Locations
The Locations module records information about physical storage locations, which can then be attached to catalogue records to track object movement. Please see Axiell’s documentation for generic information about this module. Documentation about the Location tab in the Catalogue module may also be helpful.

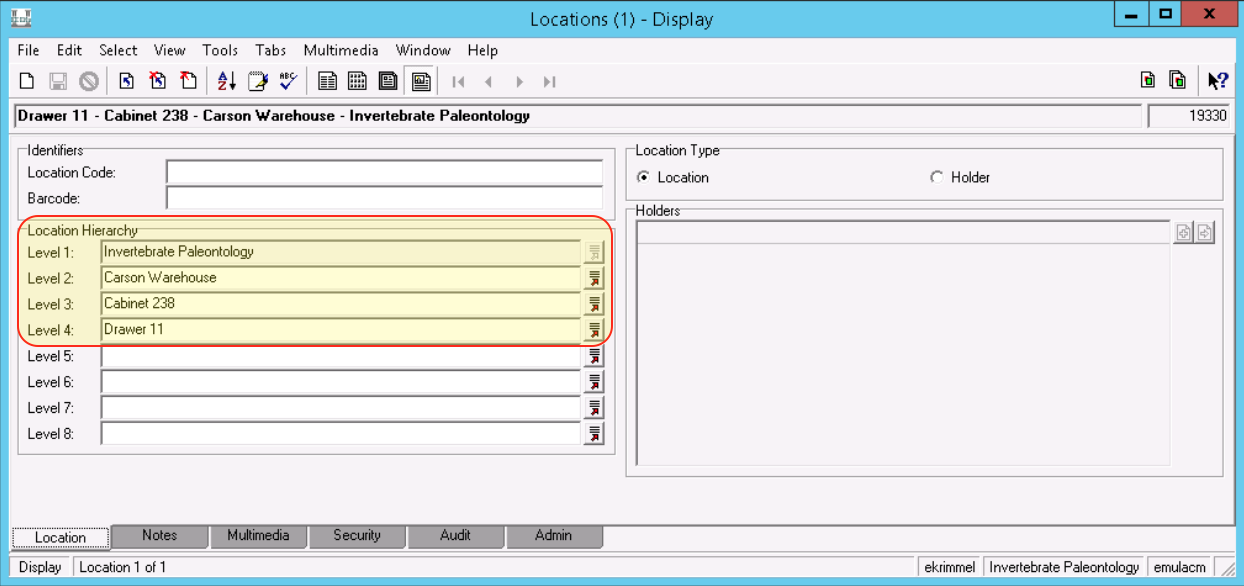
The format for the LACMIP’s storage locations is as shown in the table here:
| field | role |
|---|---|
| Level 1 | DEPARTMENT, always “Invertebrate Paleontology” |
| Level 2 | BUILDING |
| Level 3 | CABINET or physical sub-collection |
| Level 4 | DRAWER or more anything more specific |
Below are some examples of various common locations:
| field | example value |
|---|---|
| Level 1 | Invertebrate Paleontology |
| Level 2 | Carson Warehouse |
| Level 3 | Cabinet 238 |
| Level 4 | Drawer 06 |
| field | example value |
|---|---|
| Level 1 | Invertebrate Paleontology |
| Level 2 | Carson Warehouse |
| Level 3 | Education Collection |
| Level 4 |
| field | example value |
|---|---|
| Level 1 | Invertebrate Paleontology |
| Level 2 | Carson Warehouse |
| Level 3 | Taxonomic Collection |
| Level 4 |
| field | example value |
|---|---|
| Level 1 | Invertebrate Paleontology |
| Level 2 | Carson Warehouse |
| Level 3 | Special Collections |
| Level 4 | Fossil Insect Cabinet |
| field | example value |
|---|---|
| Level 1 | Invertebrate Paleontology |
| Level 2 | NHMLA Main Museum |
| Level 3 | Type Room |
| Level 4 |
Update storage locations
Ideally, the storage locations for all specimens should be tracked. This can be done one of two ways: 1) by updating the storage location directly on the Location tab within the Catalogue module or 2) by using the Relocate tool.
Option 1: Update storage locations on the Location tab
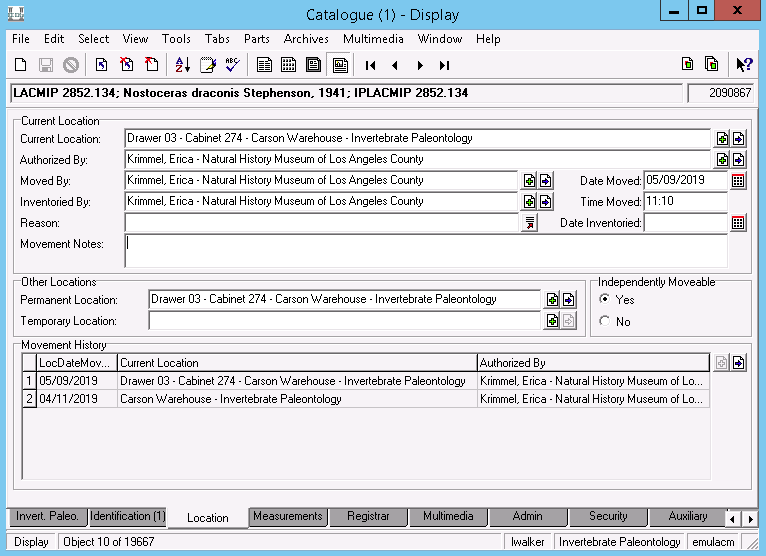
To update the location of one record, fill out the Current Location, Authorized By, Moved By, and Inventoried By fields on the Location tab. This can be somewhat tedious, especially for updating multiple records, so the Relocate tool is the recommended option.
Option 2: Update storage locations for multiple records with Relocate
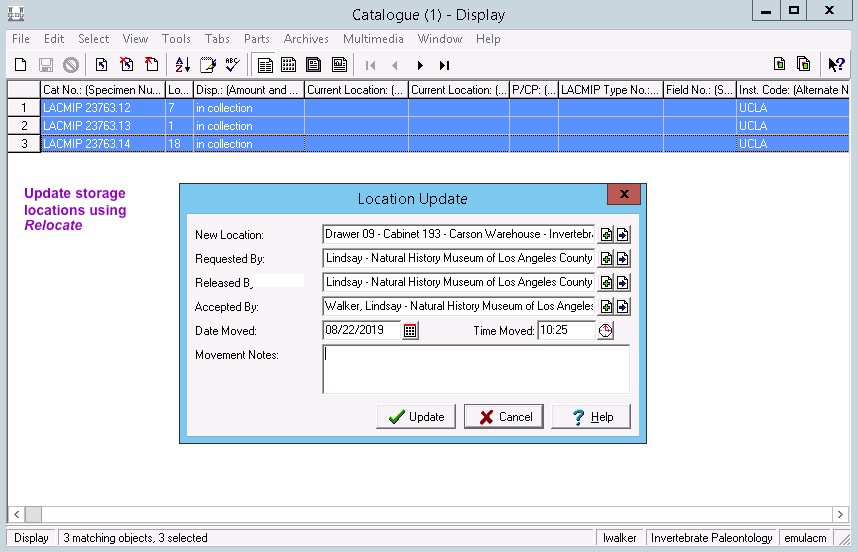
To update storage locations using the Relocate tool, search for and select all records in the Catalogue module that you would like to apply (or update) the storage locations for. Then navigate to the Relocate tool: Tools > Relocate > Selected Records. In the Location Update window, attach the appropriate values for the fields as shown below. The Date Moved and Time Moved fields will update automatically.
Storage location history is visible on the Location tab in the Movement History table. Note that only the database administrator can remove rows from this table once they have been added and saved, so please update storage locations carefully.

