Imaging
This page will help get you started with specimen photography.
Basic Photography Workflow
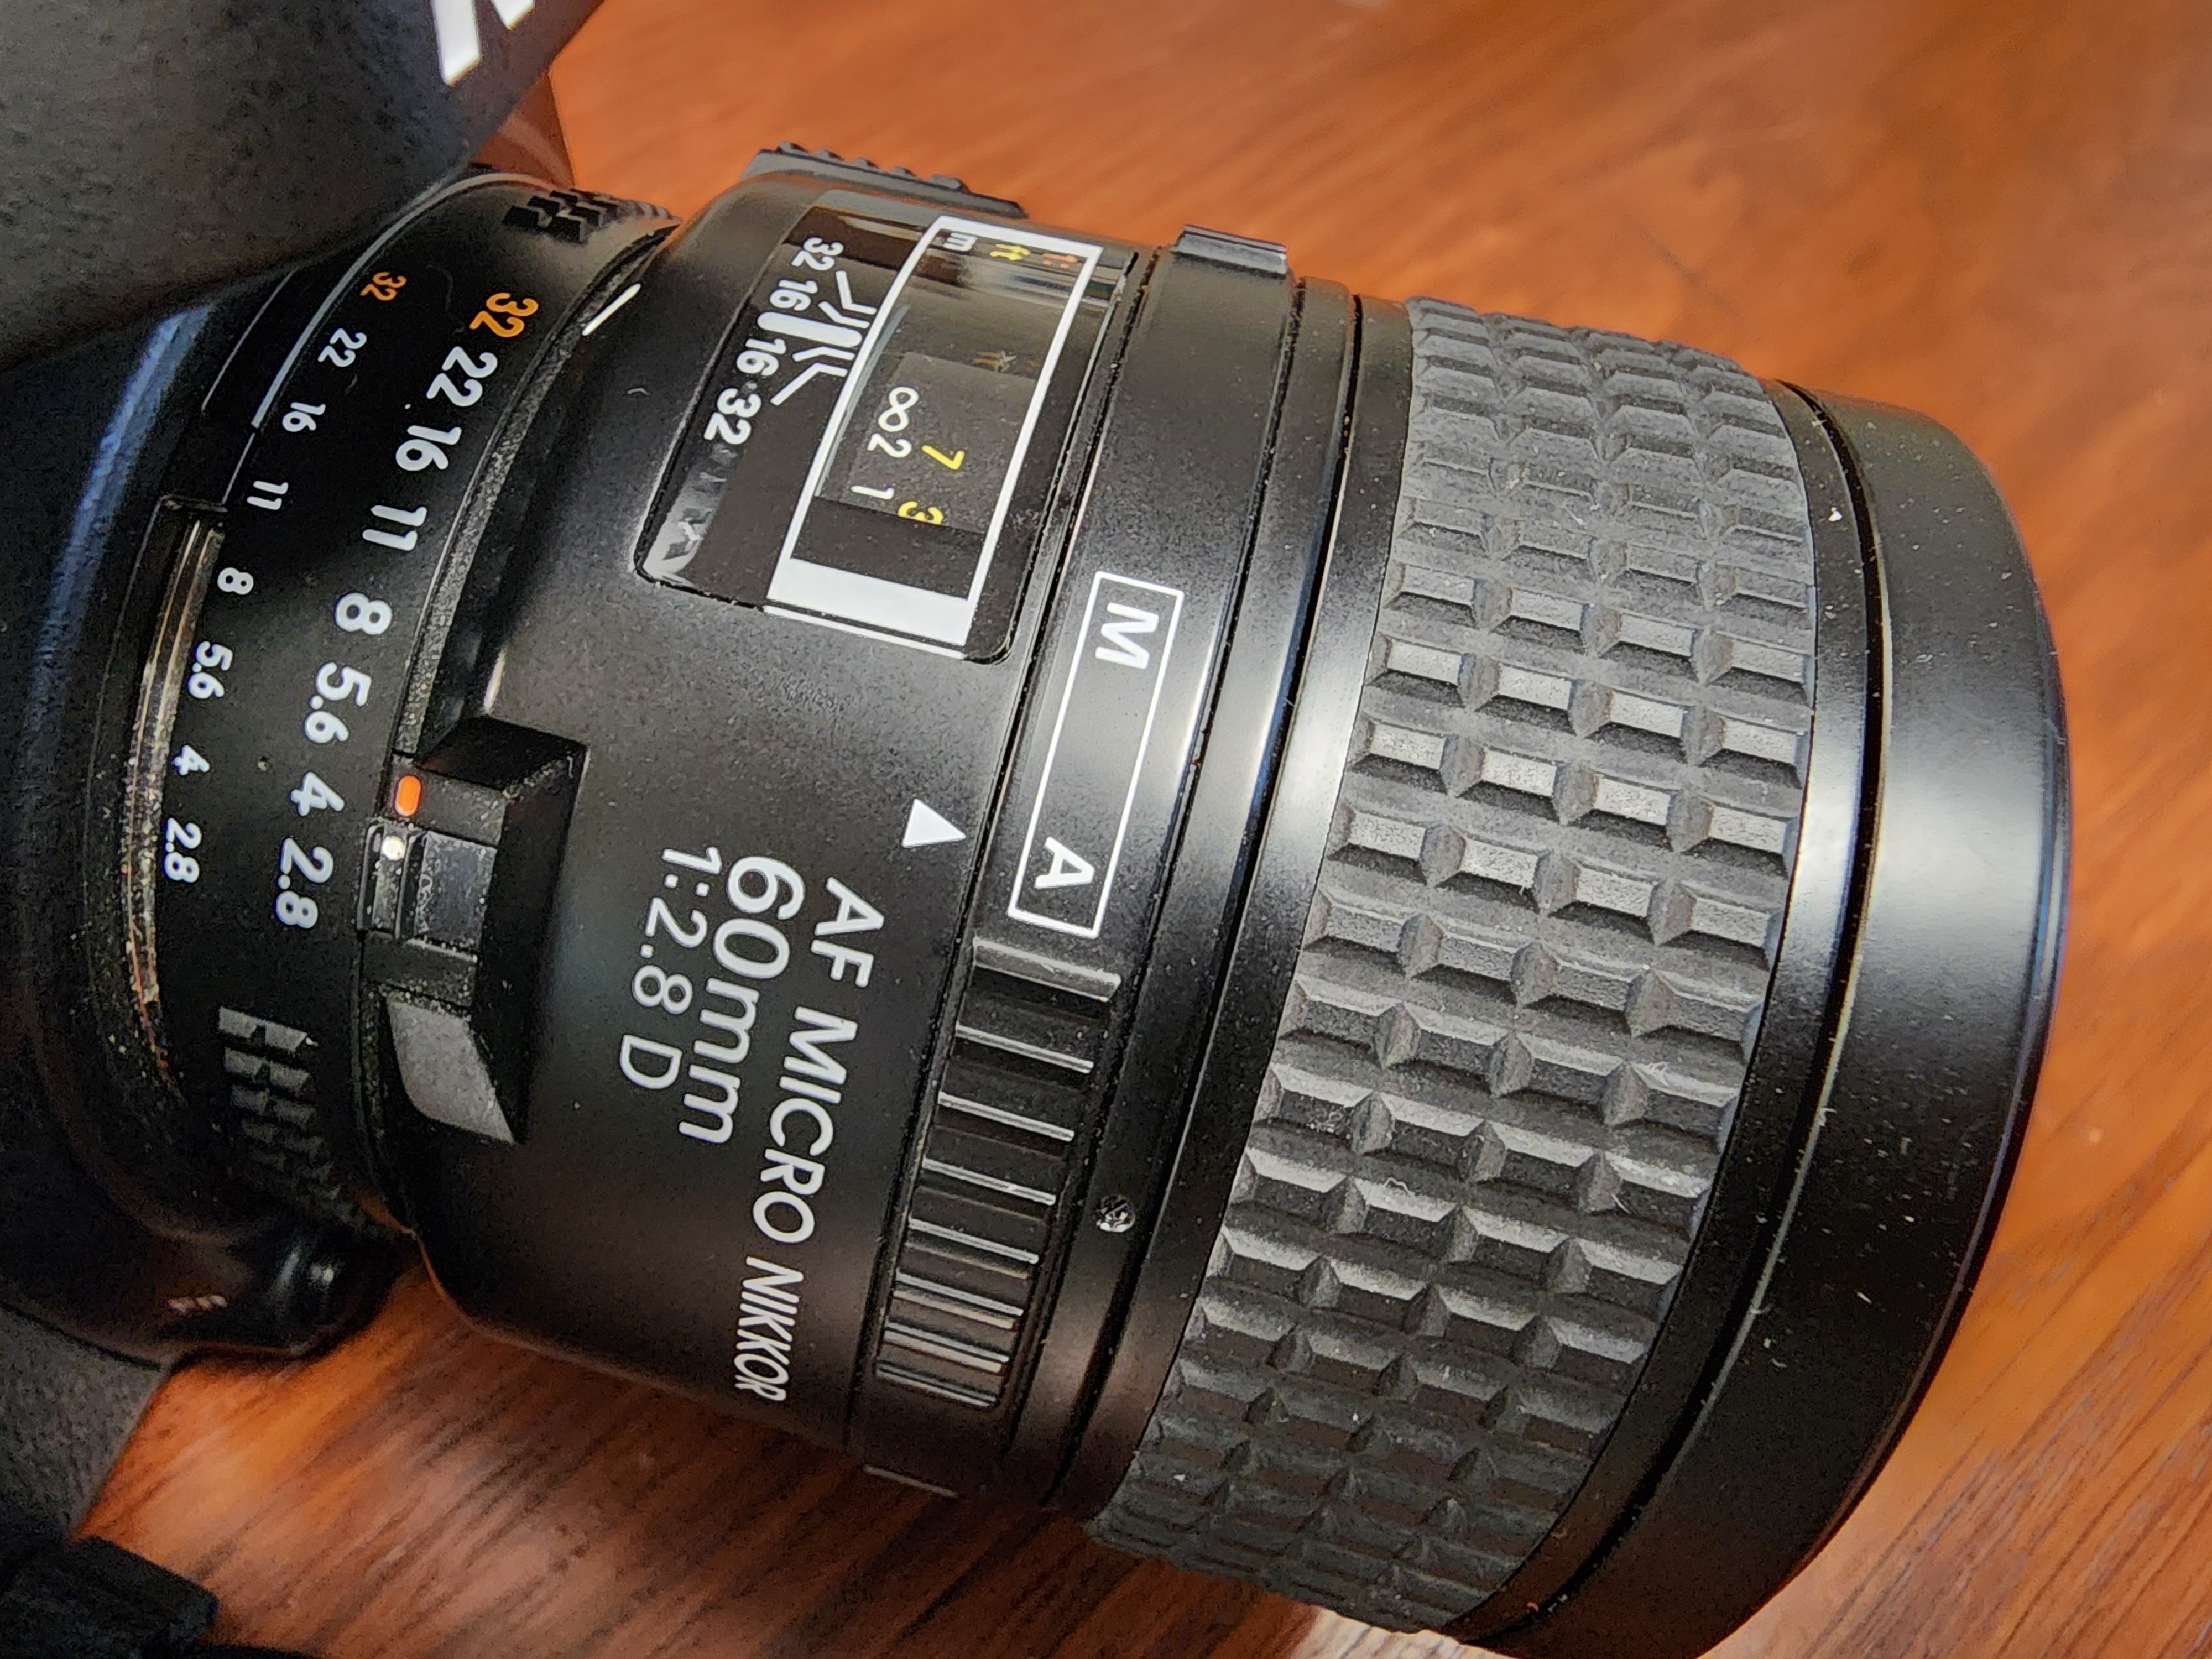
This workflow will introduce you to the basic steps required to image fossils using our Nikon D610 DSLR camera combined with the Nikkor AF Micro-Nikkor 60mm f/2.8D lens.
Hardware
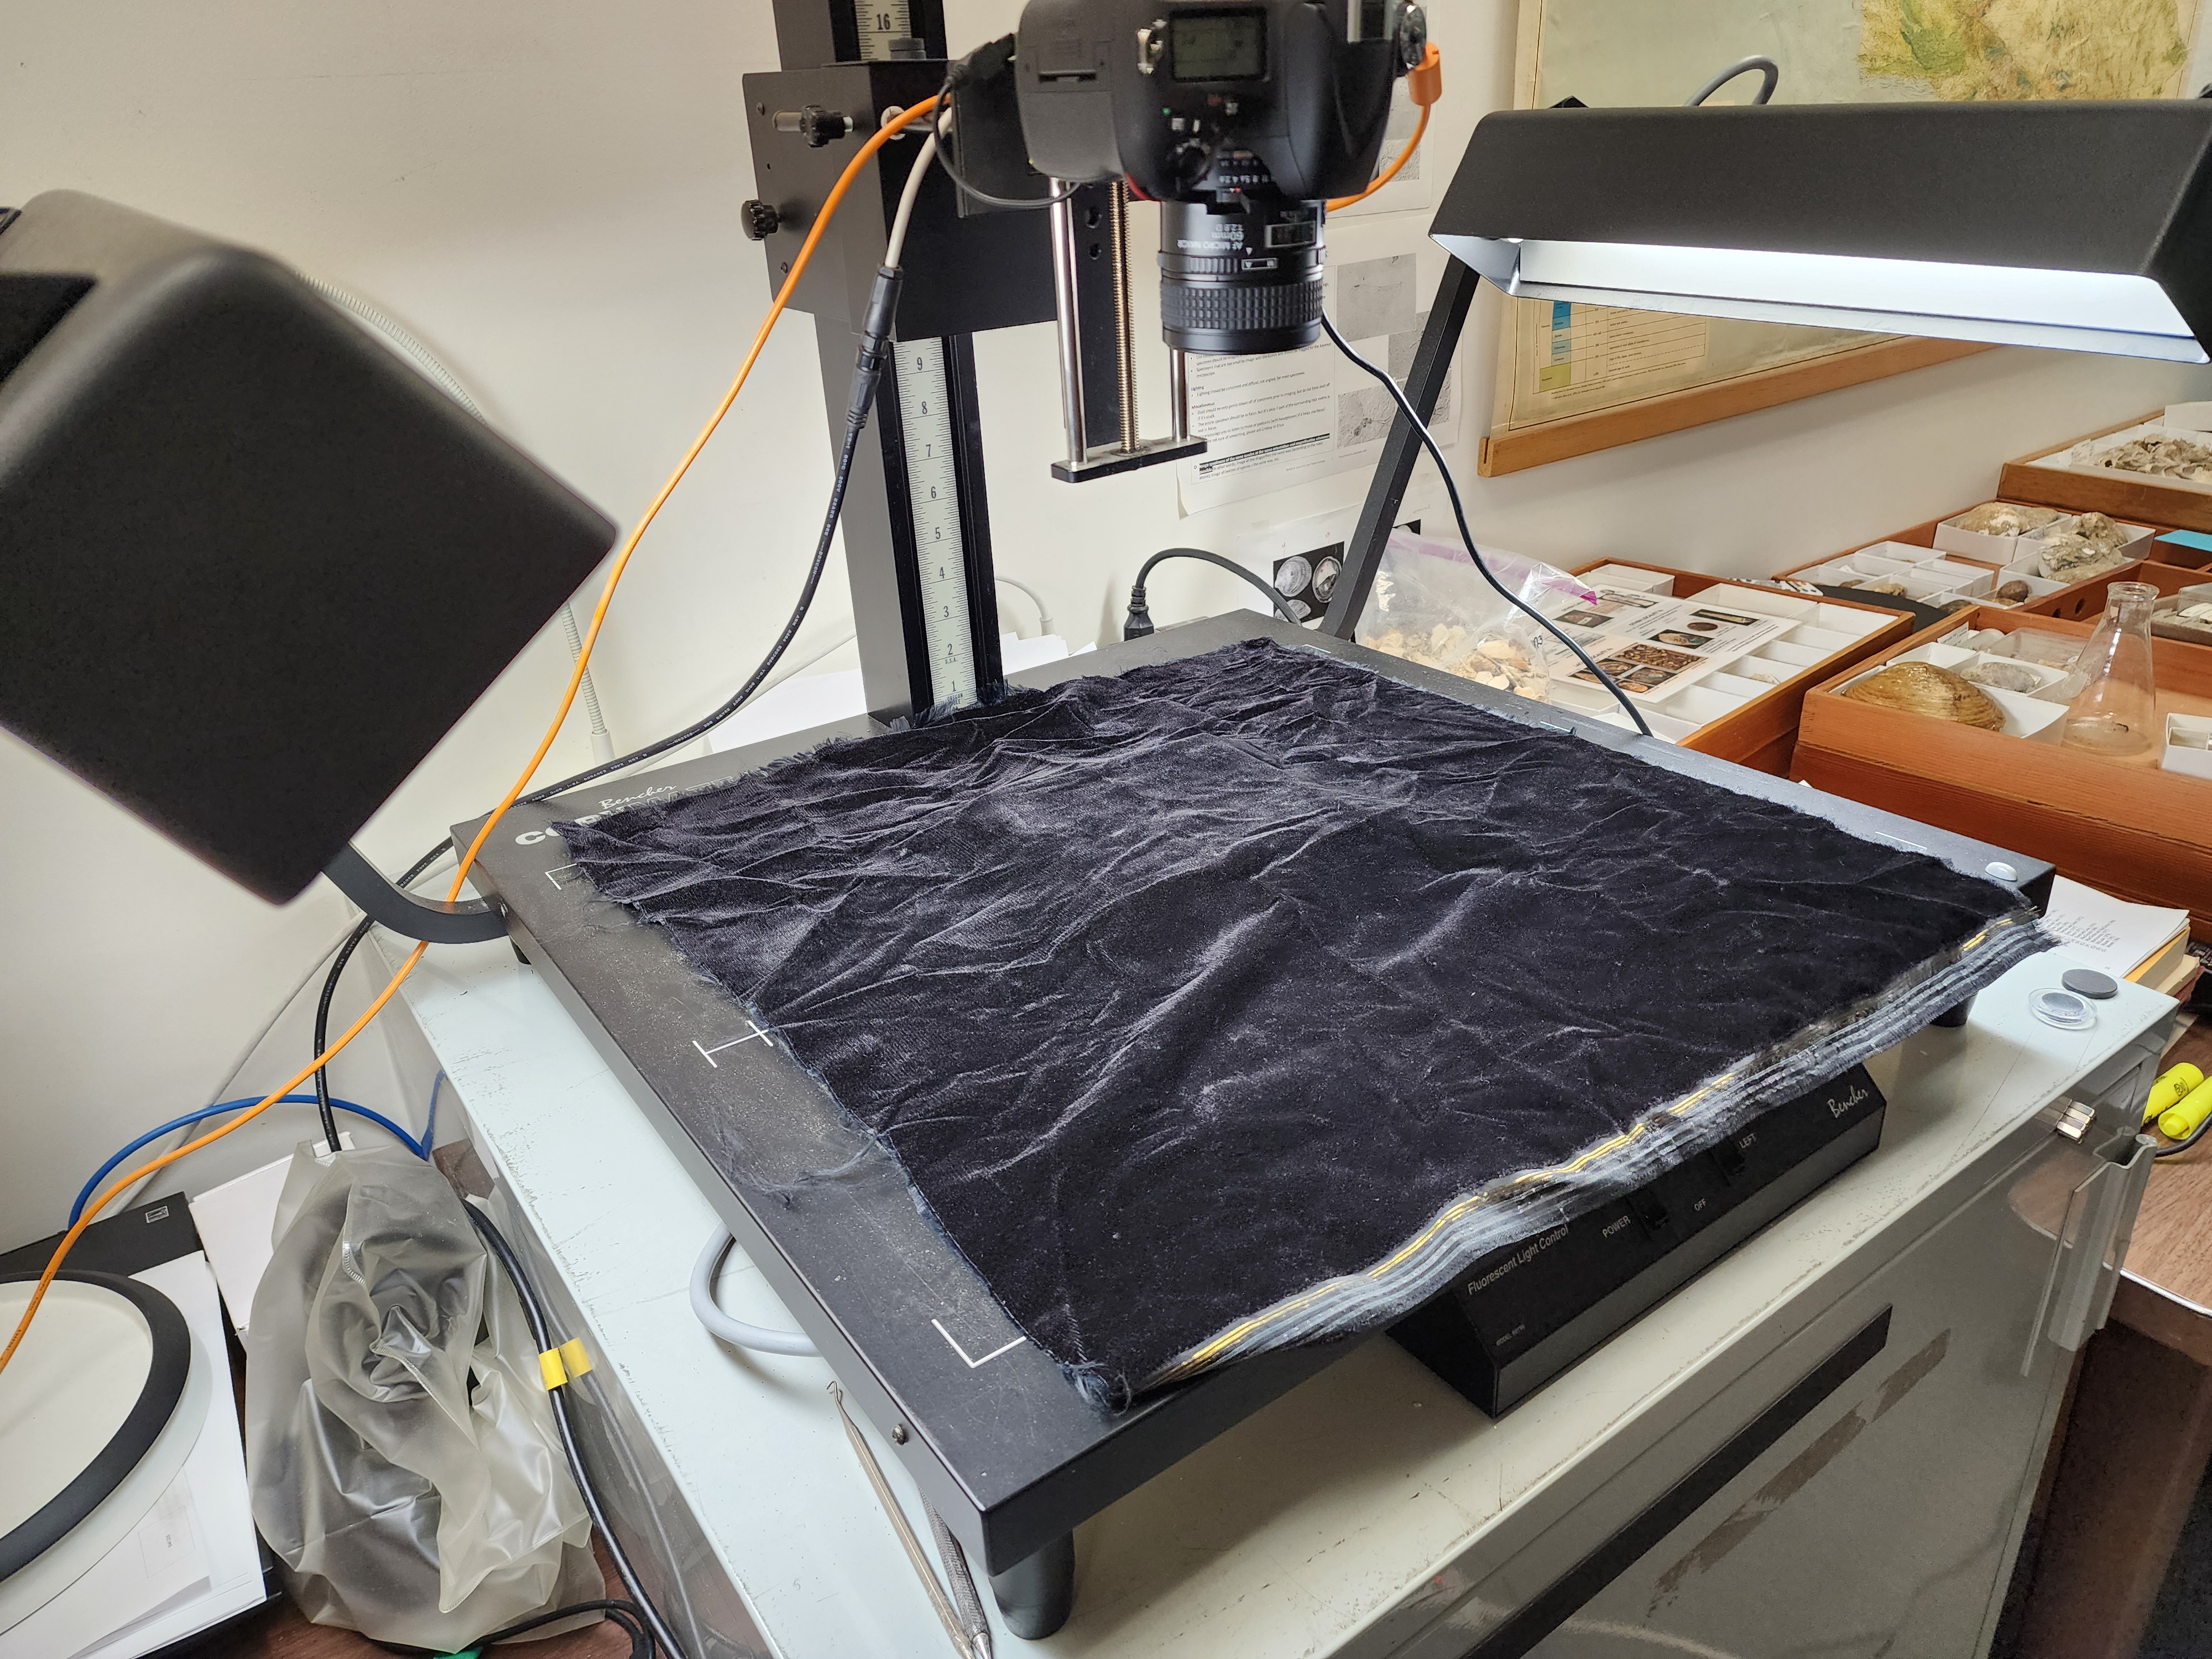
1) Uncover the camera station if needed.
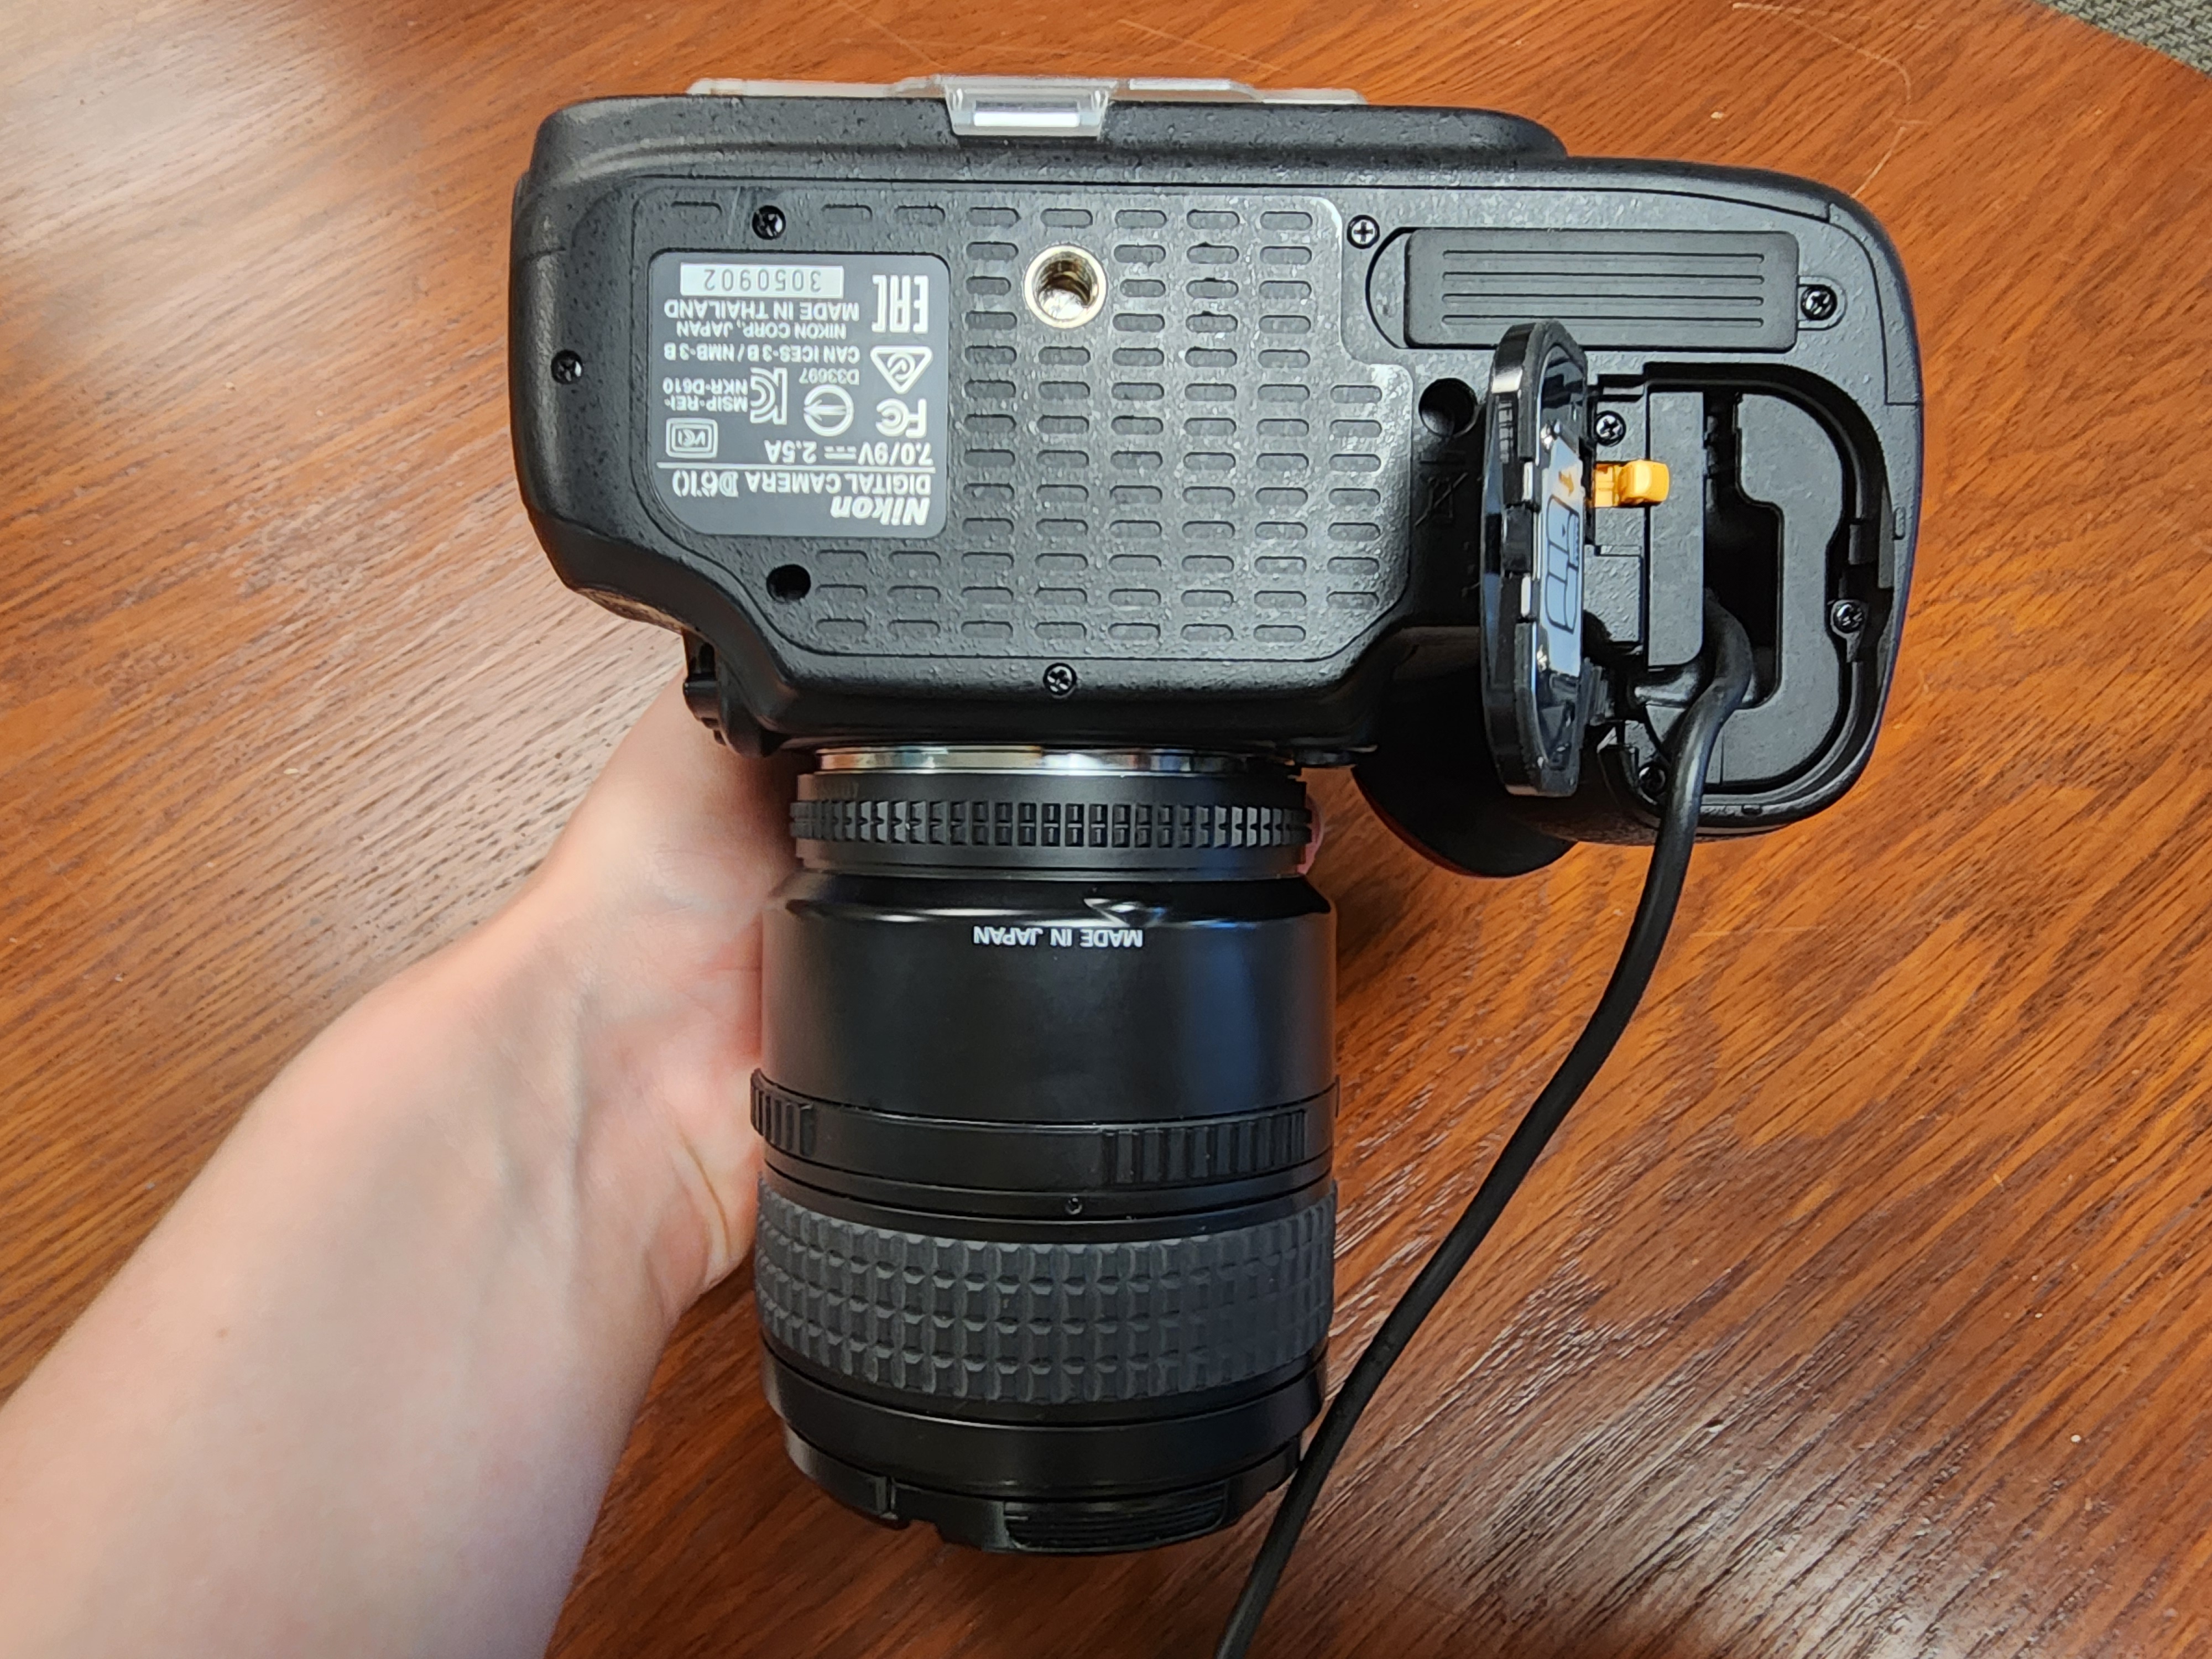
2) Insert the battery into the bottom of the camera and position the wire into the channel before closing the flap. Plug the battery pack into an outlet.
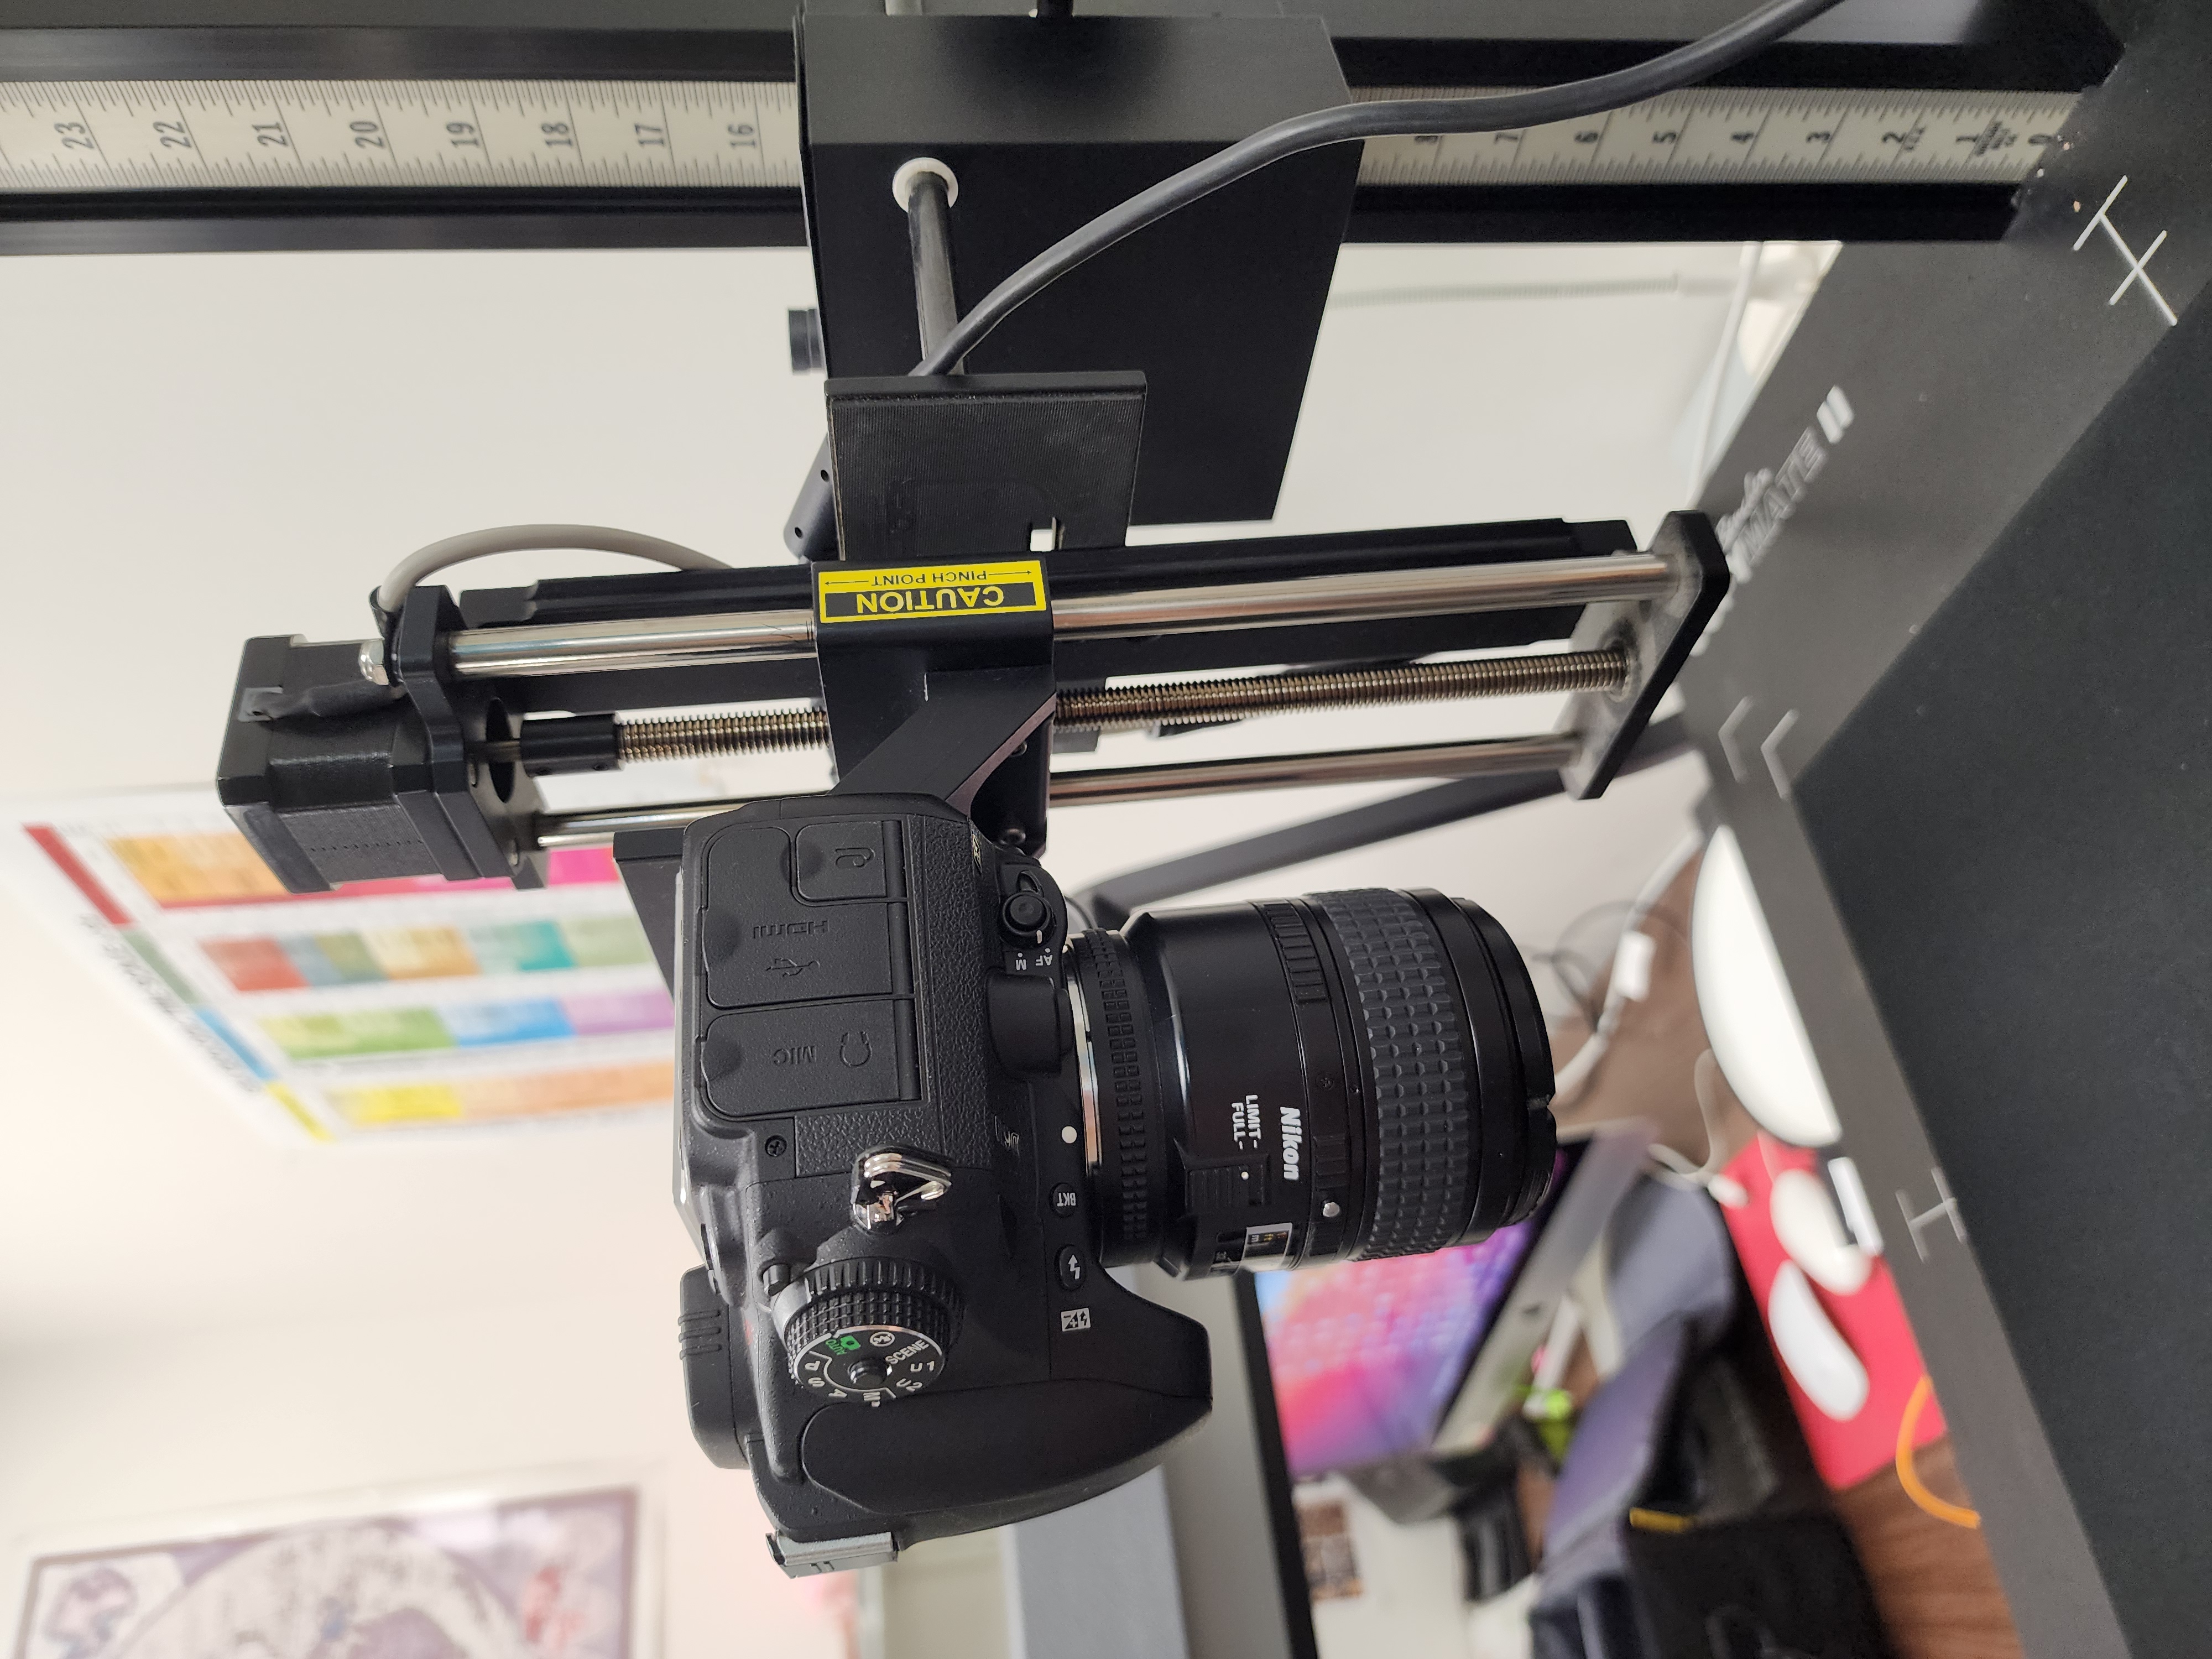
3) Mount the camera carefully to the imaging station by aligning the screw and the hole on the bottom of the camera. Hold the camera firmly by the body while attaching and when moving the arm of the imaging station up and down.
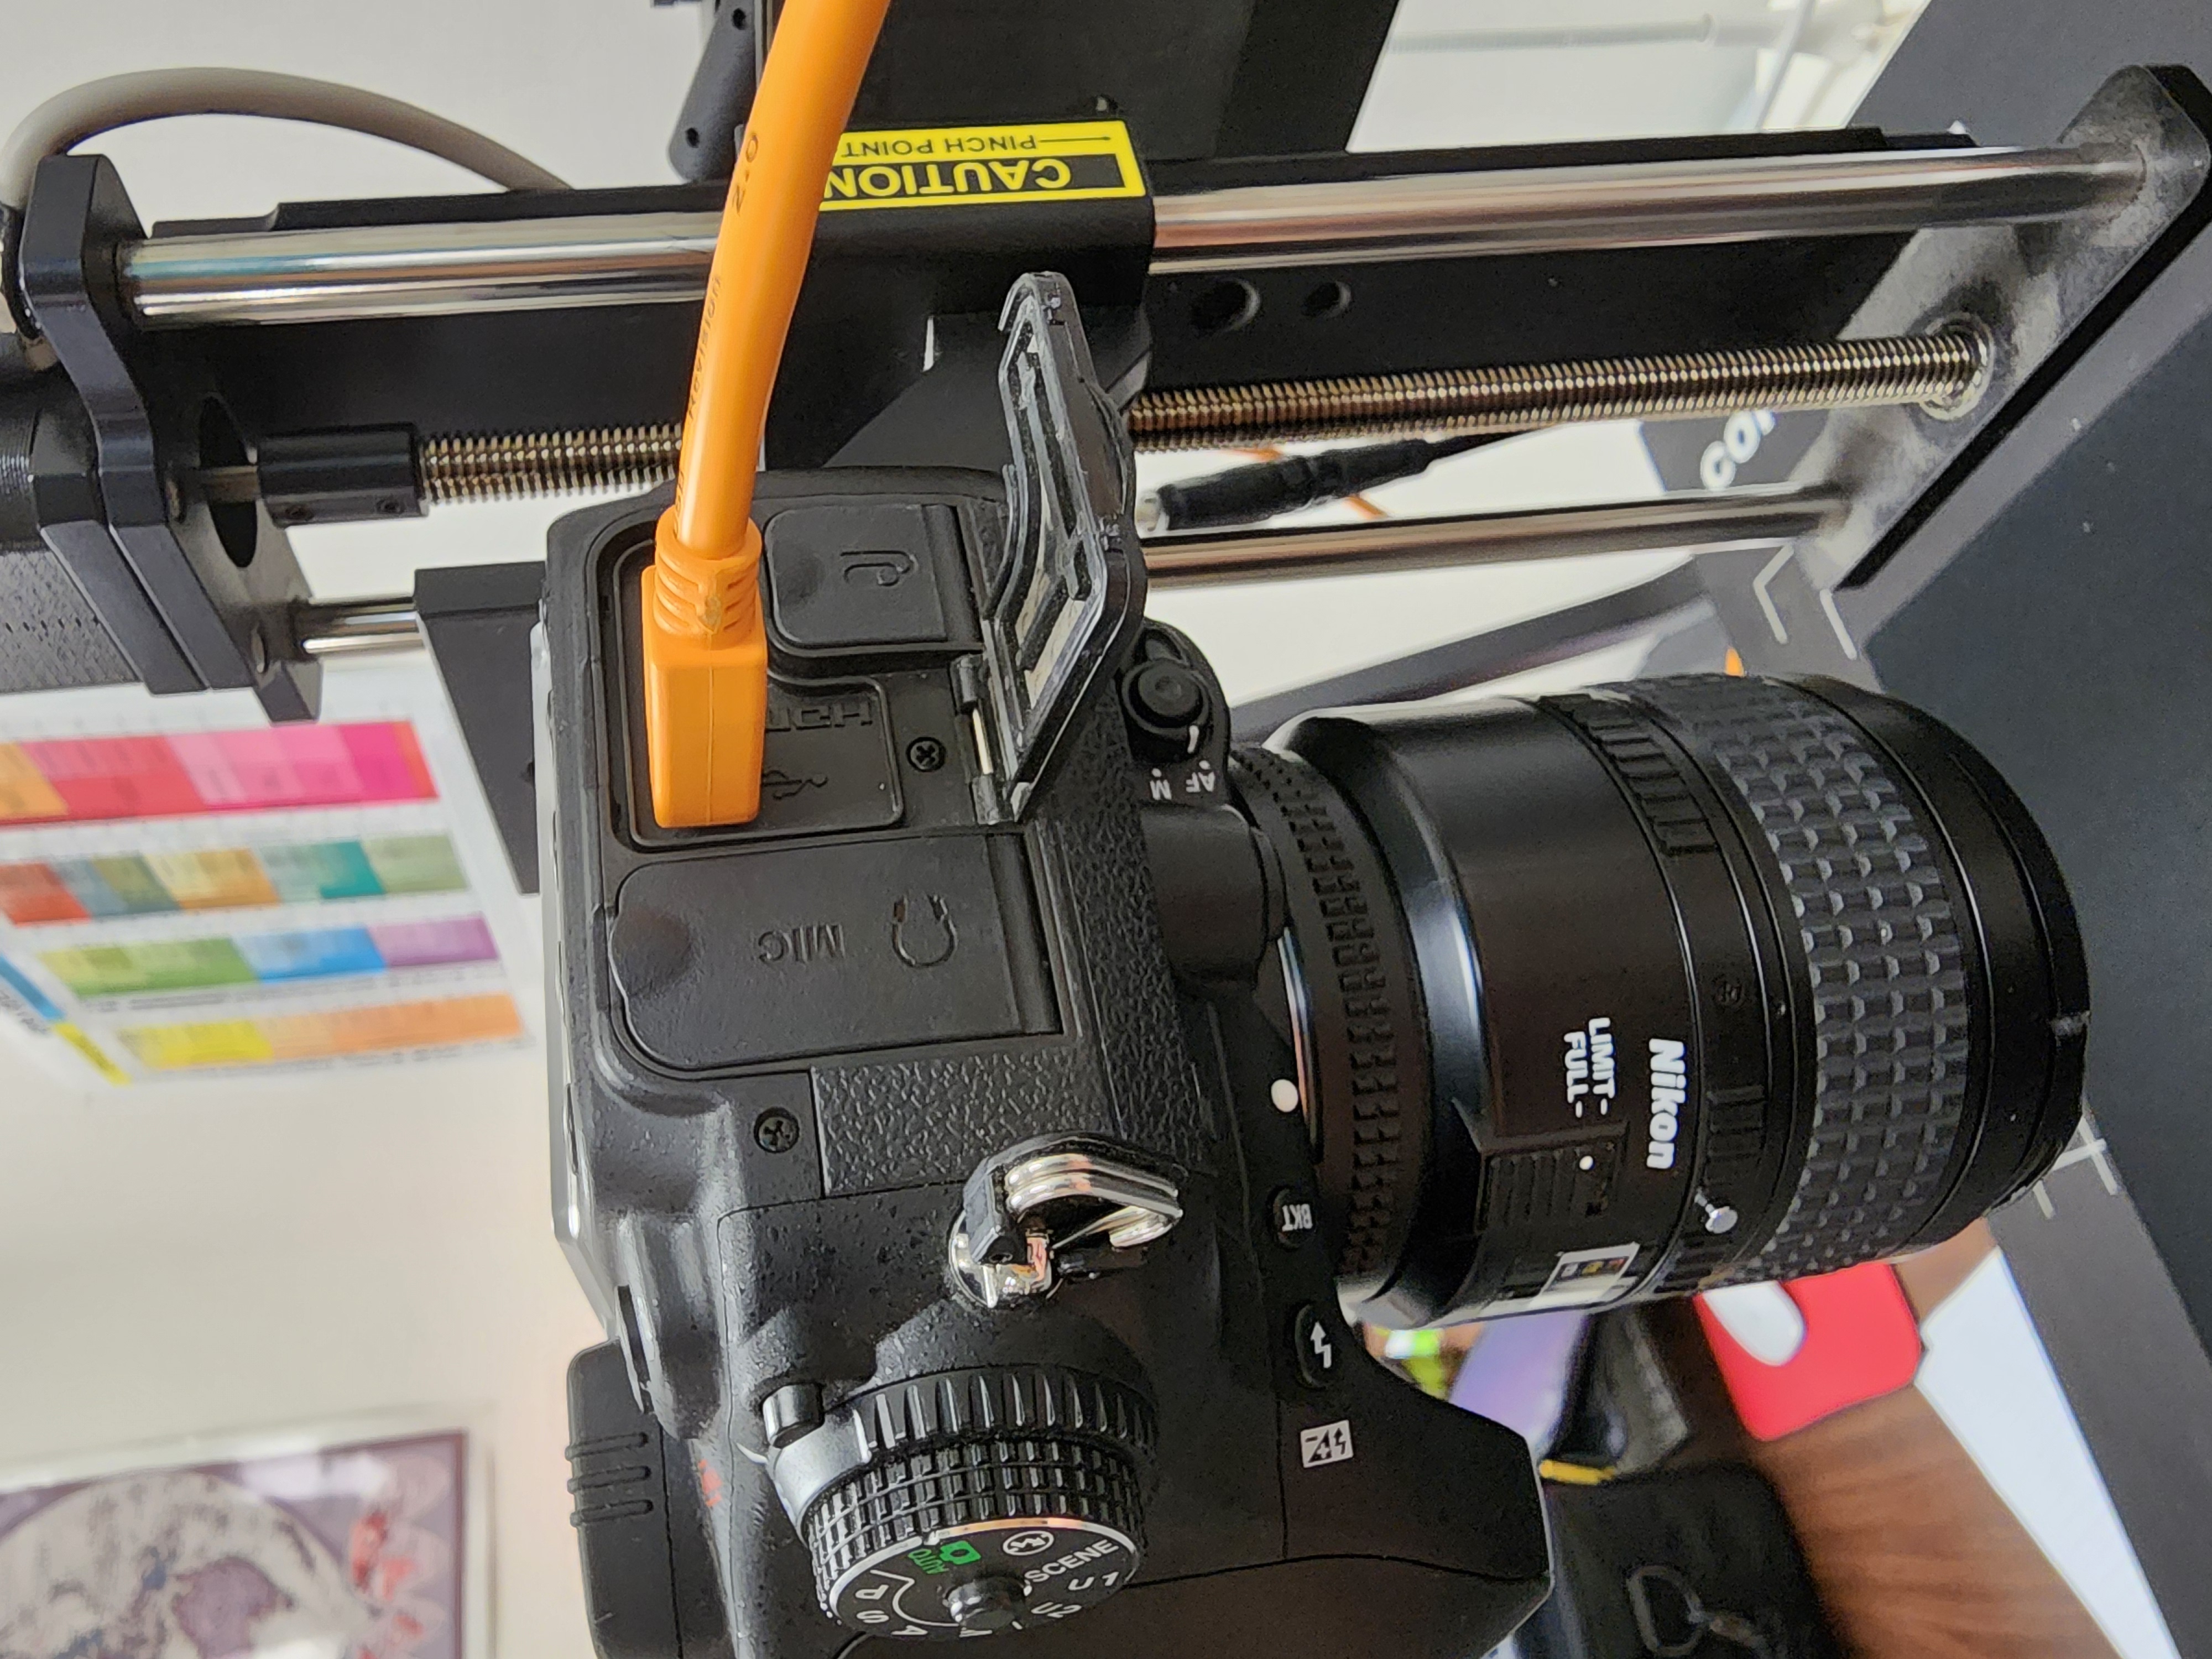
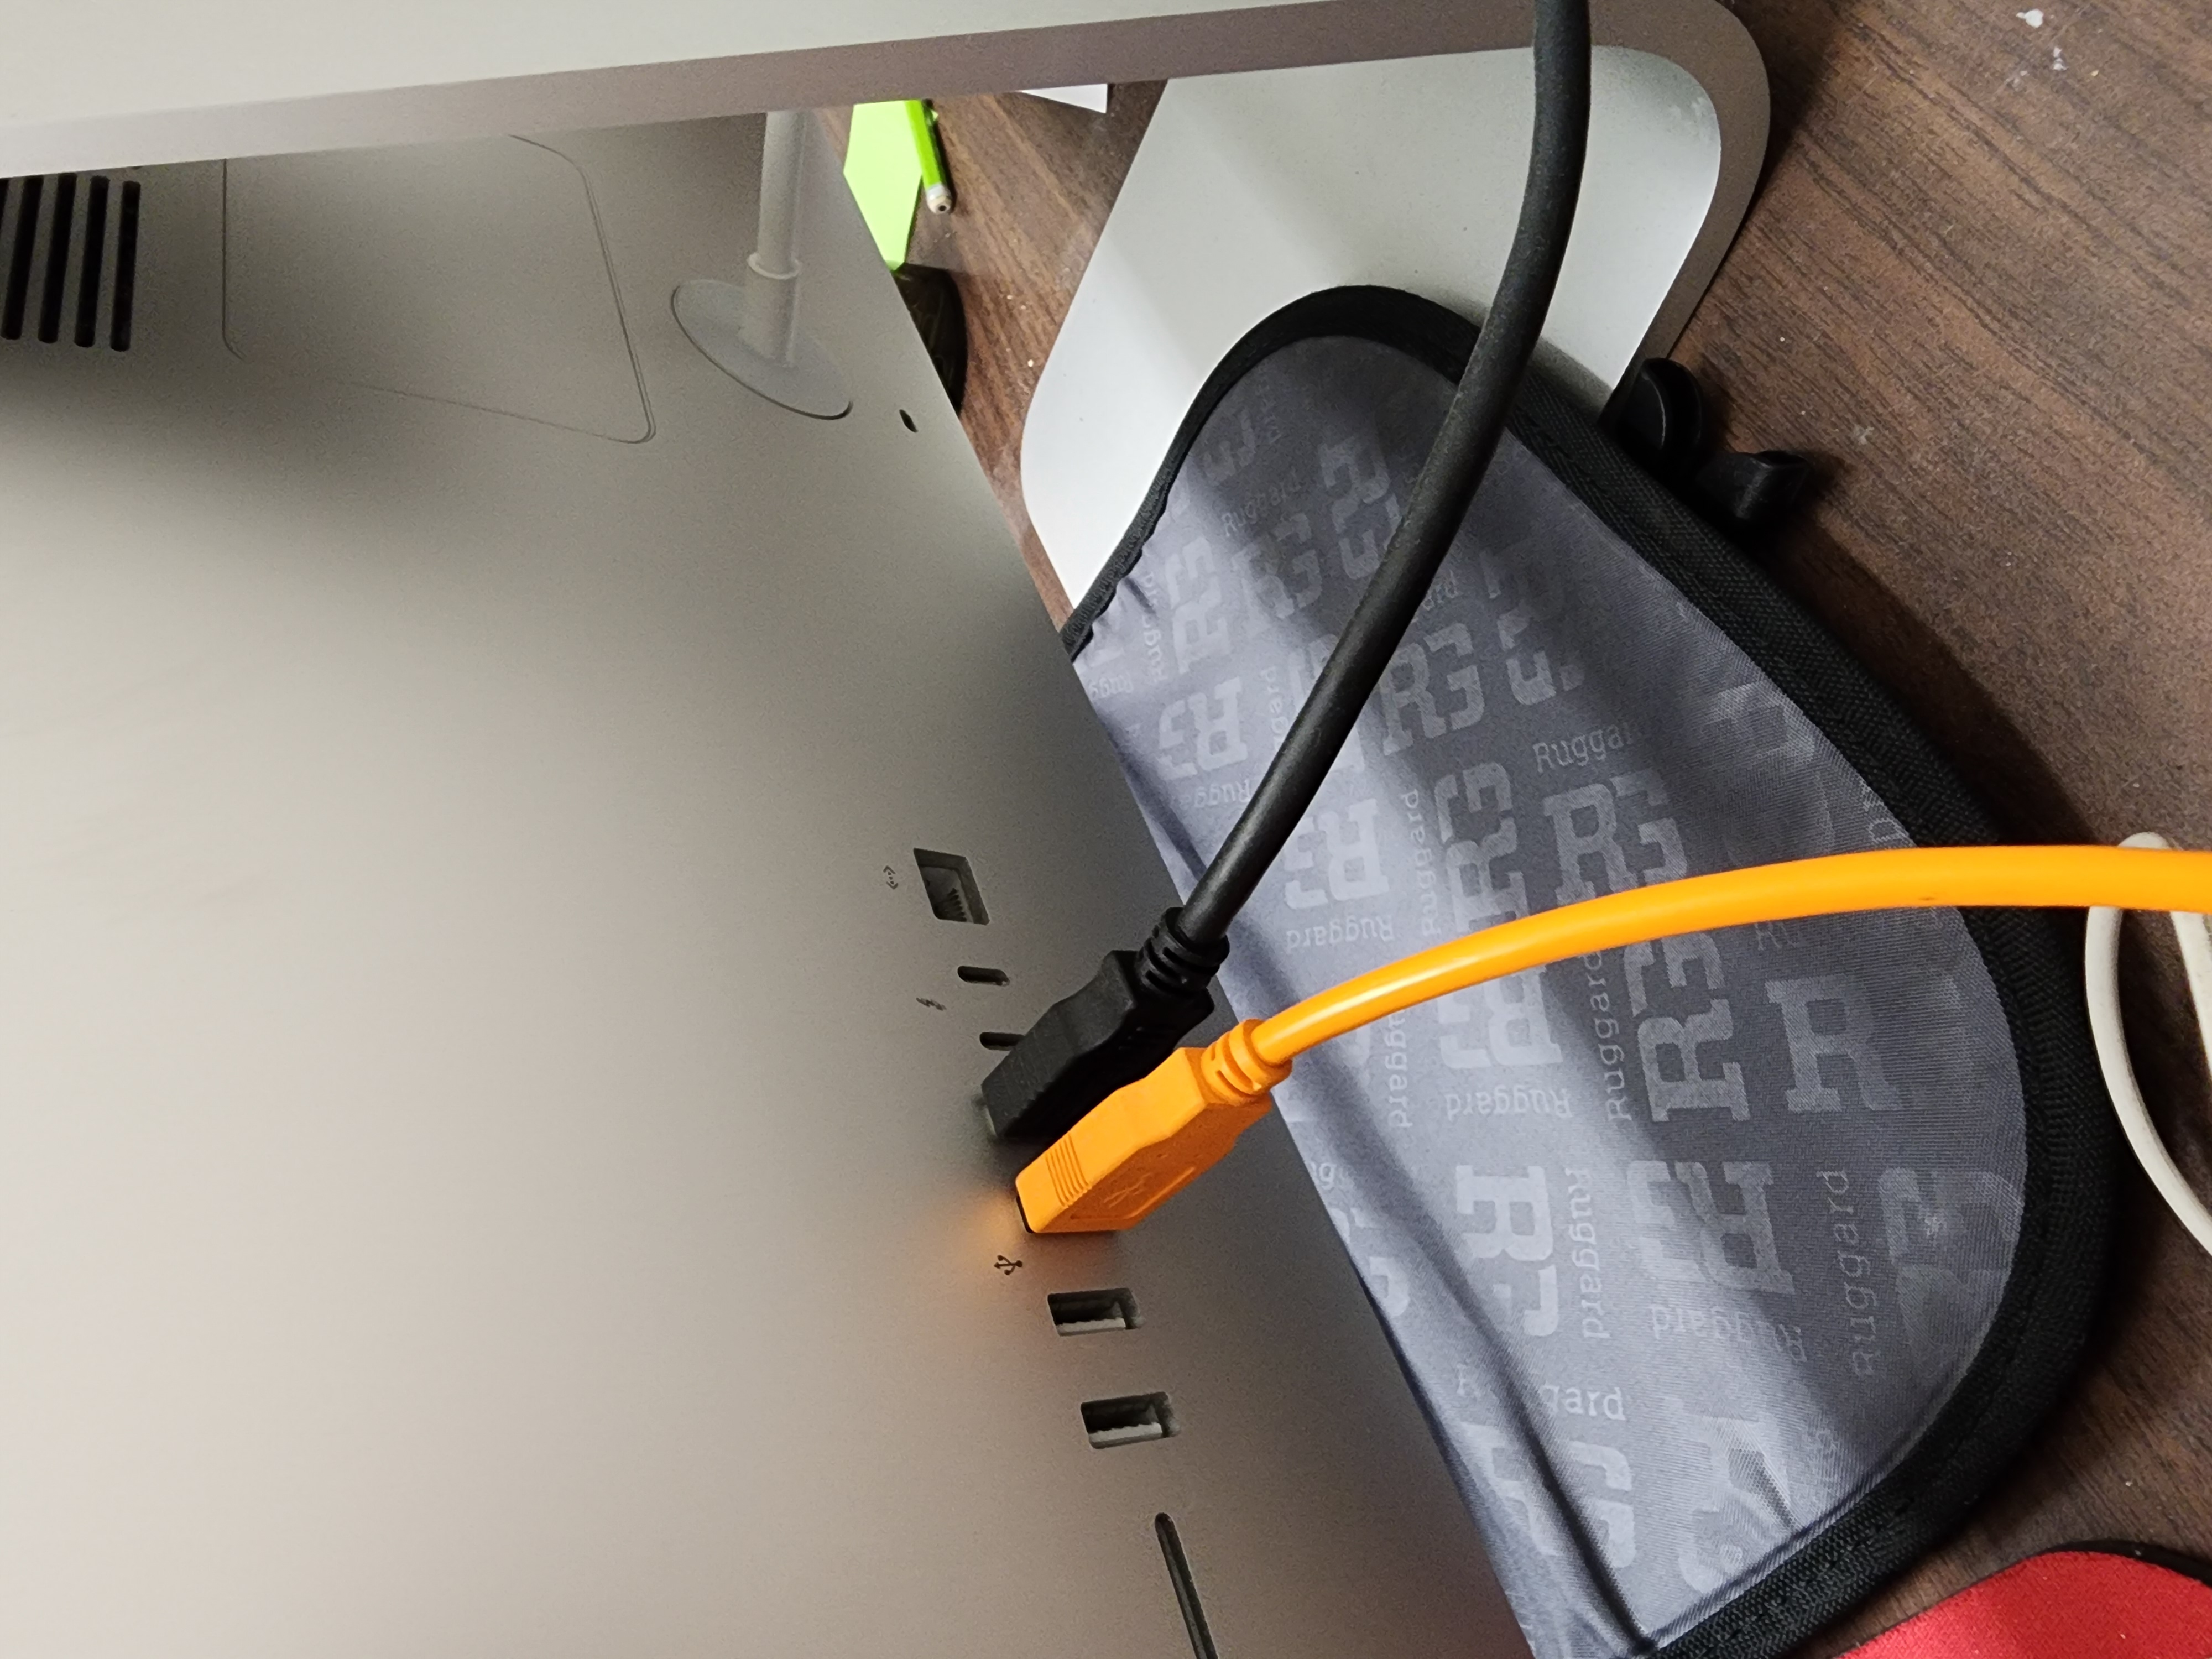
4) Attach the orange cable to the usb port on the side of the camera and to the usb port on the back of the MAC desktop (at the collections center) or on the PC tower (at the type collection)
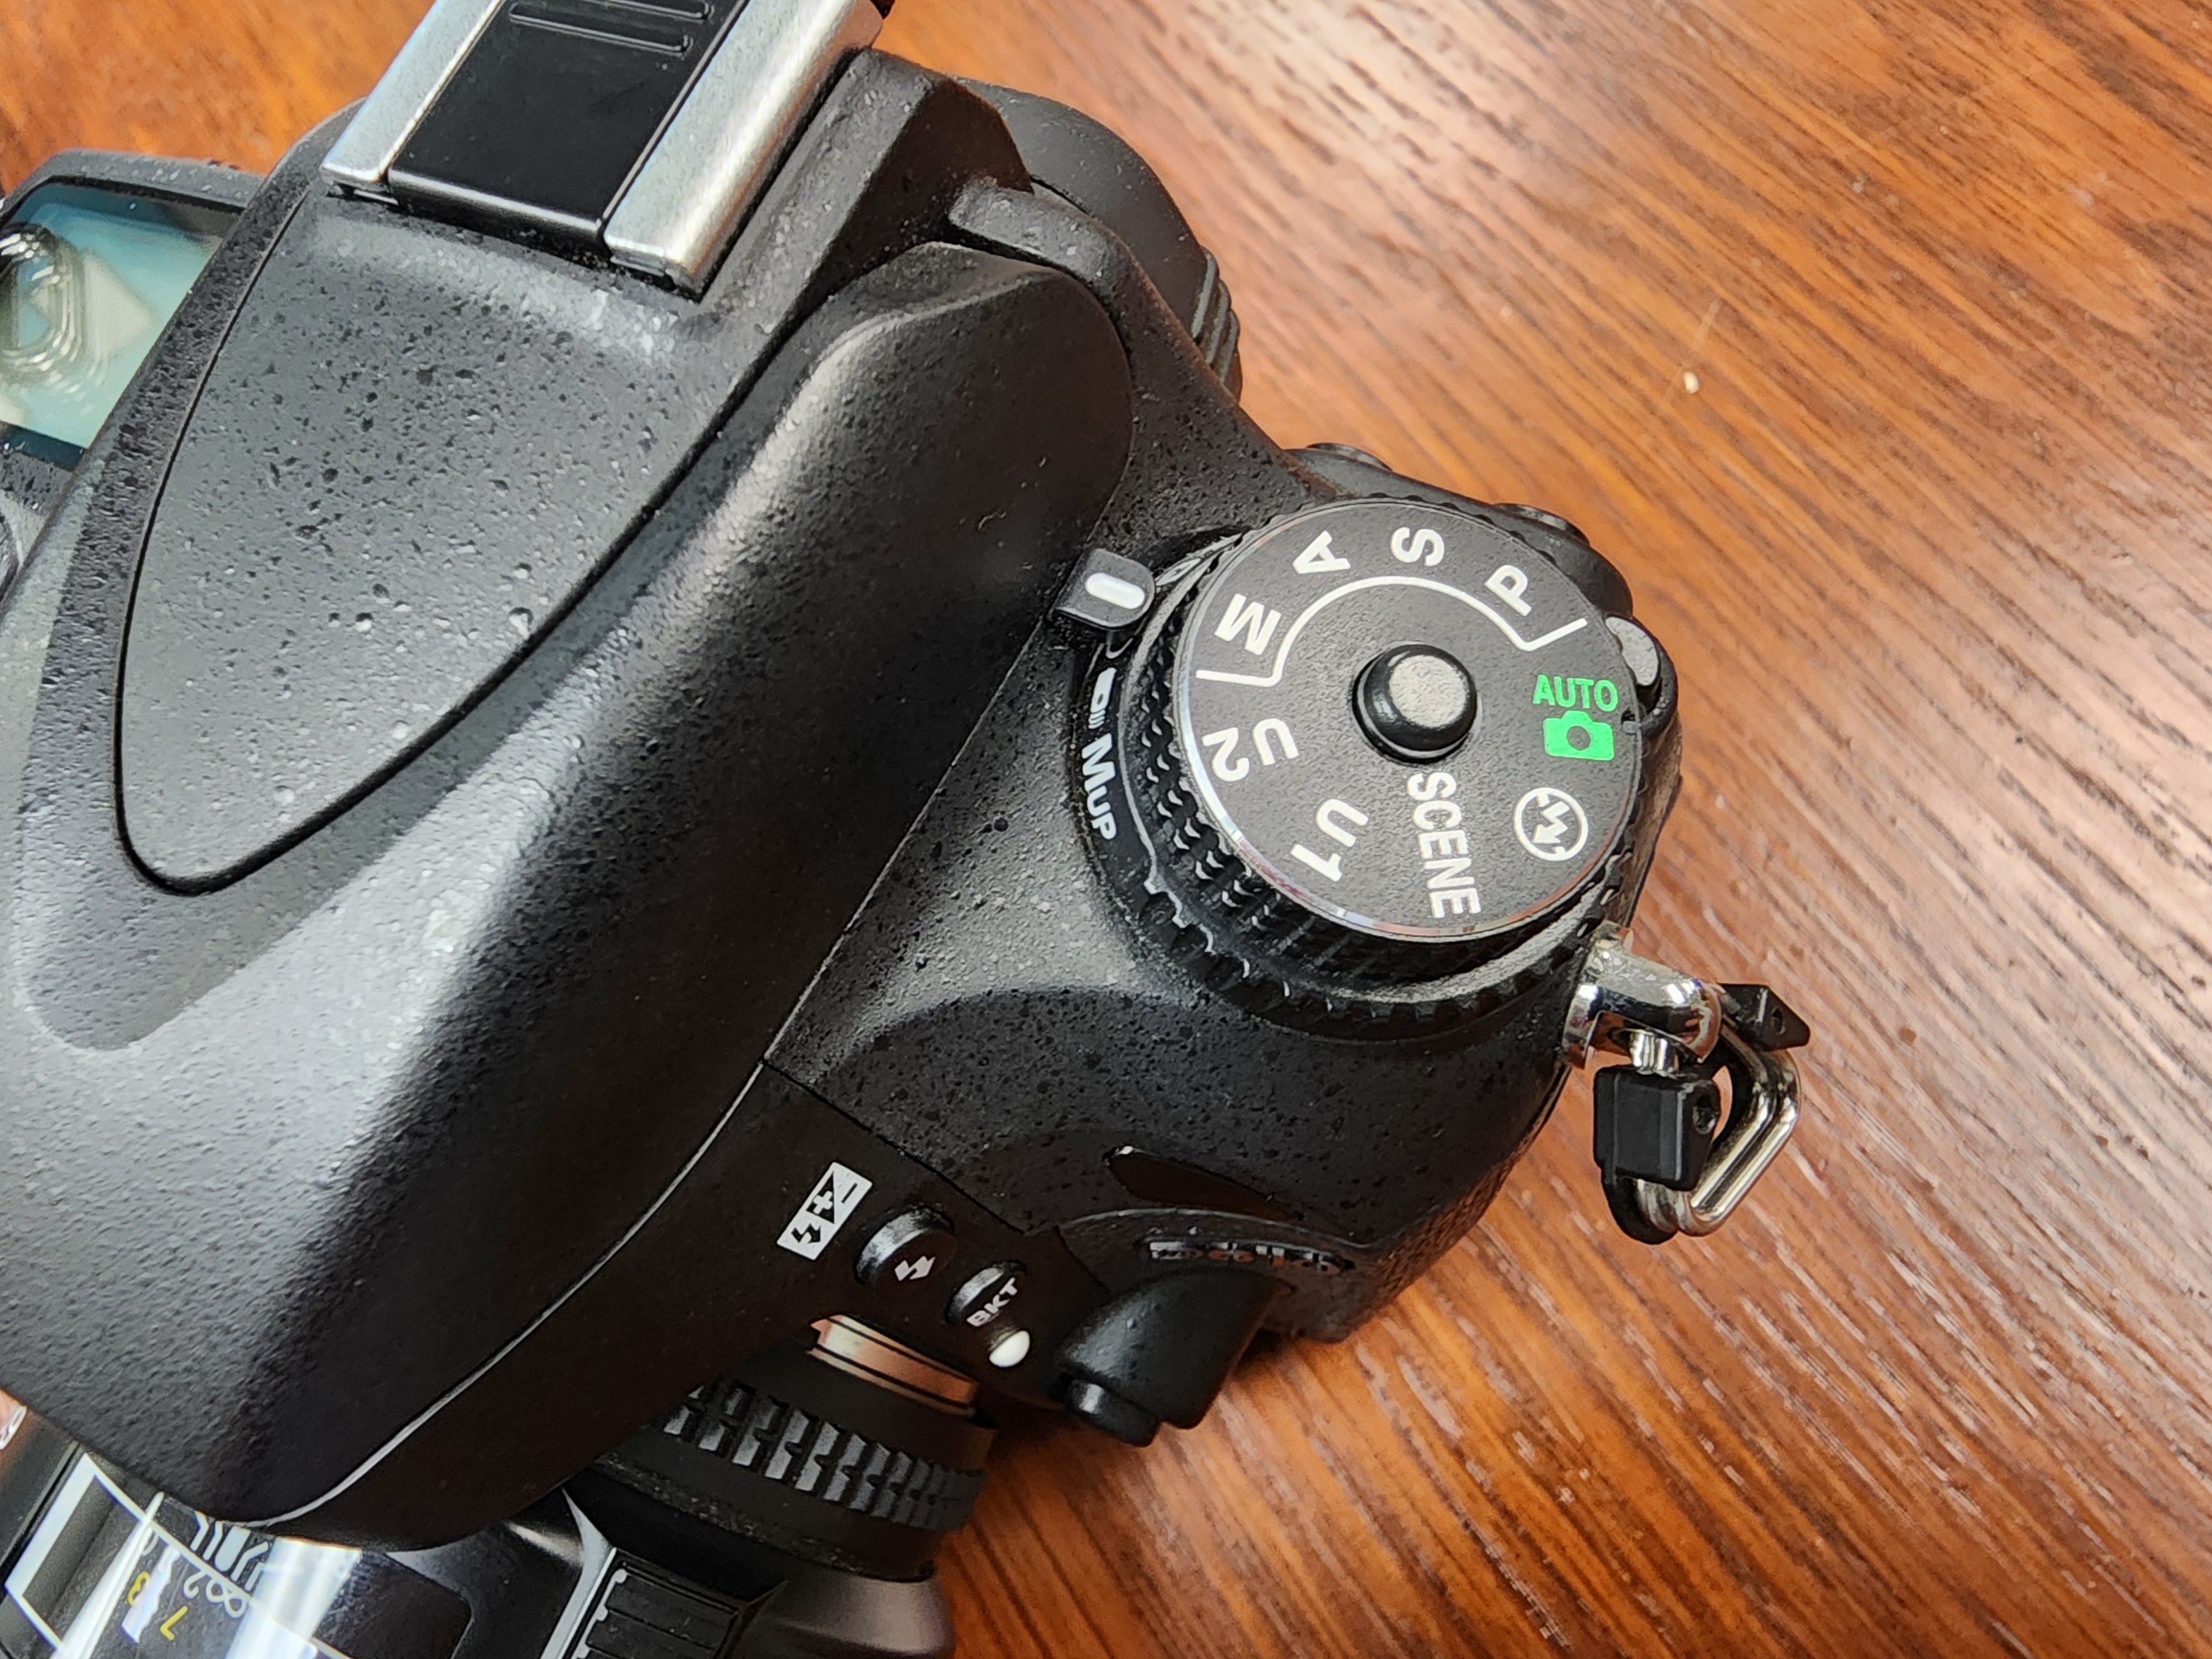
![]() If at this stage the screen on top of the camera is displaying “Err”, you will have to reset the camera. To do this, hold down the two buttons with the green dots next to them. Once the camera has reset, try taking a picture wile the camera is not connected to the computer. Then, plug the usb cable back in.
If at this stage the screen on top of the camera is displaying “Err”, you will have to reset the camera. To do this, hold down the two buttons with the green dots next to them. Once the camera has reset, try taking a picture wile the camera is not connected to the computer. Then, plug the usb cable back in.
5) Carefully remove the lens cap on the camera and make sure the lens is set to Automatic (A) while the main body is set to Manual (M). Then, turn the camera on.
6) Turn on the lights by either pressing the switch at the bottom of the imaging station (at the collections center) or by pressing each individual lamp switch for the four lights (at the type collection)
7) Place your desired substrate for imaging under the camera (sand or black beans) and position a piece of black velvet over the substrate so that no edges can be seen.
Software
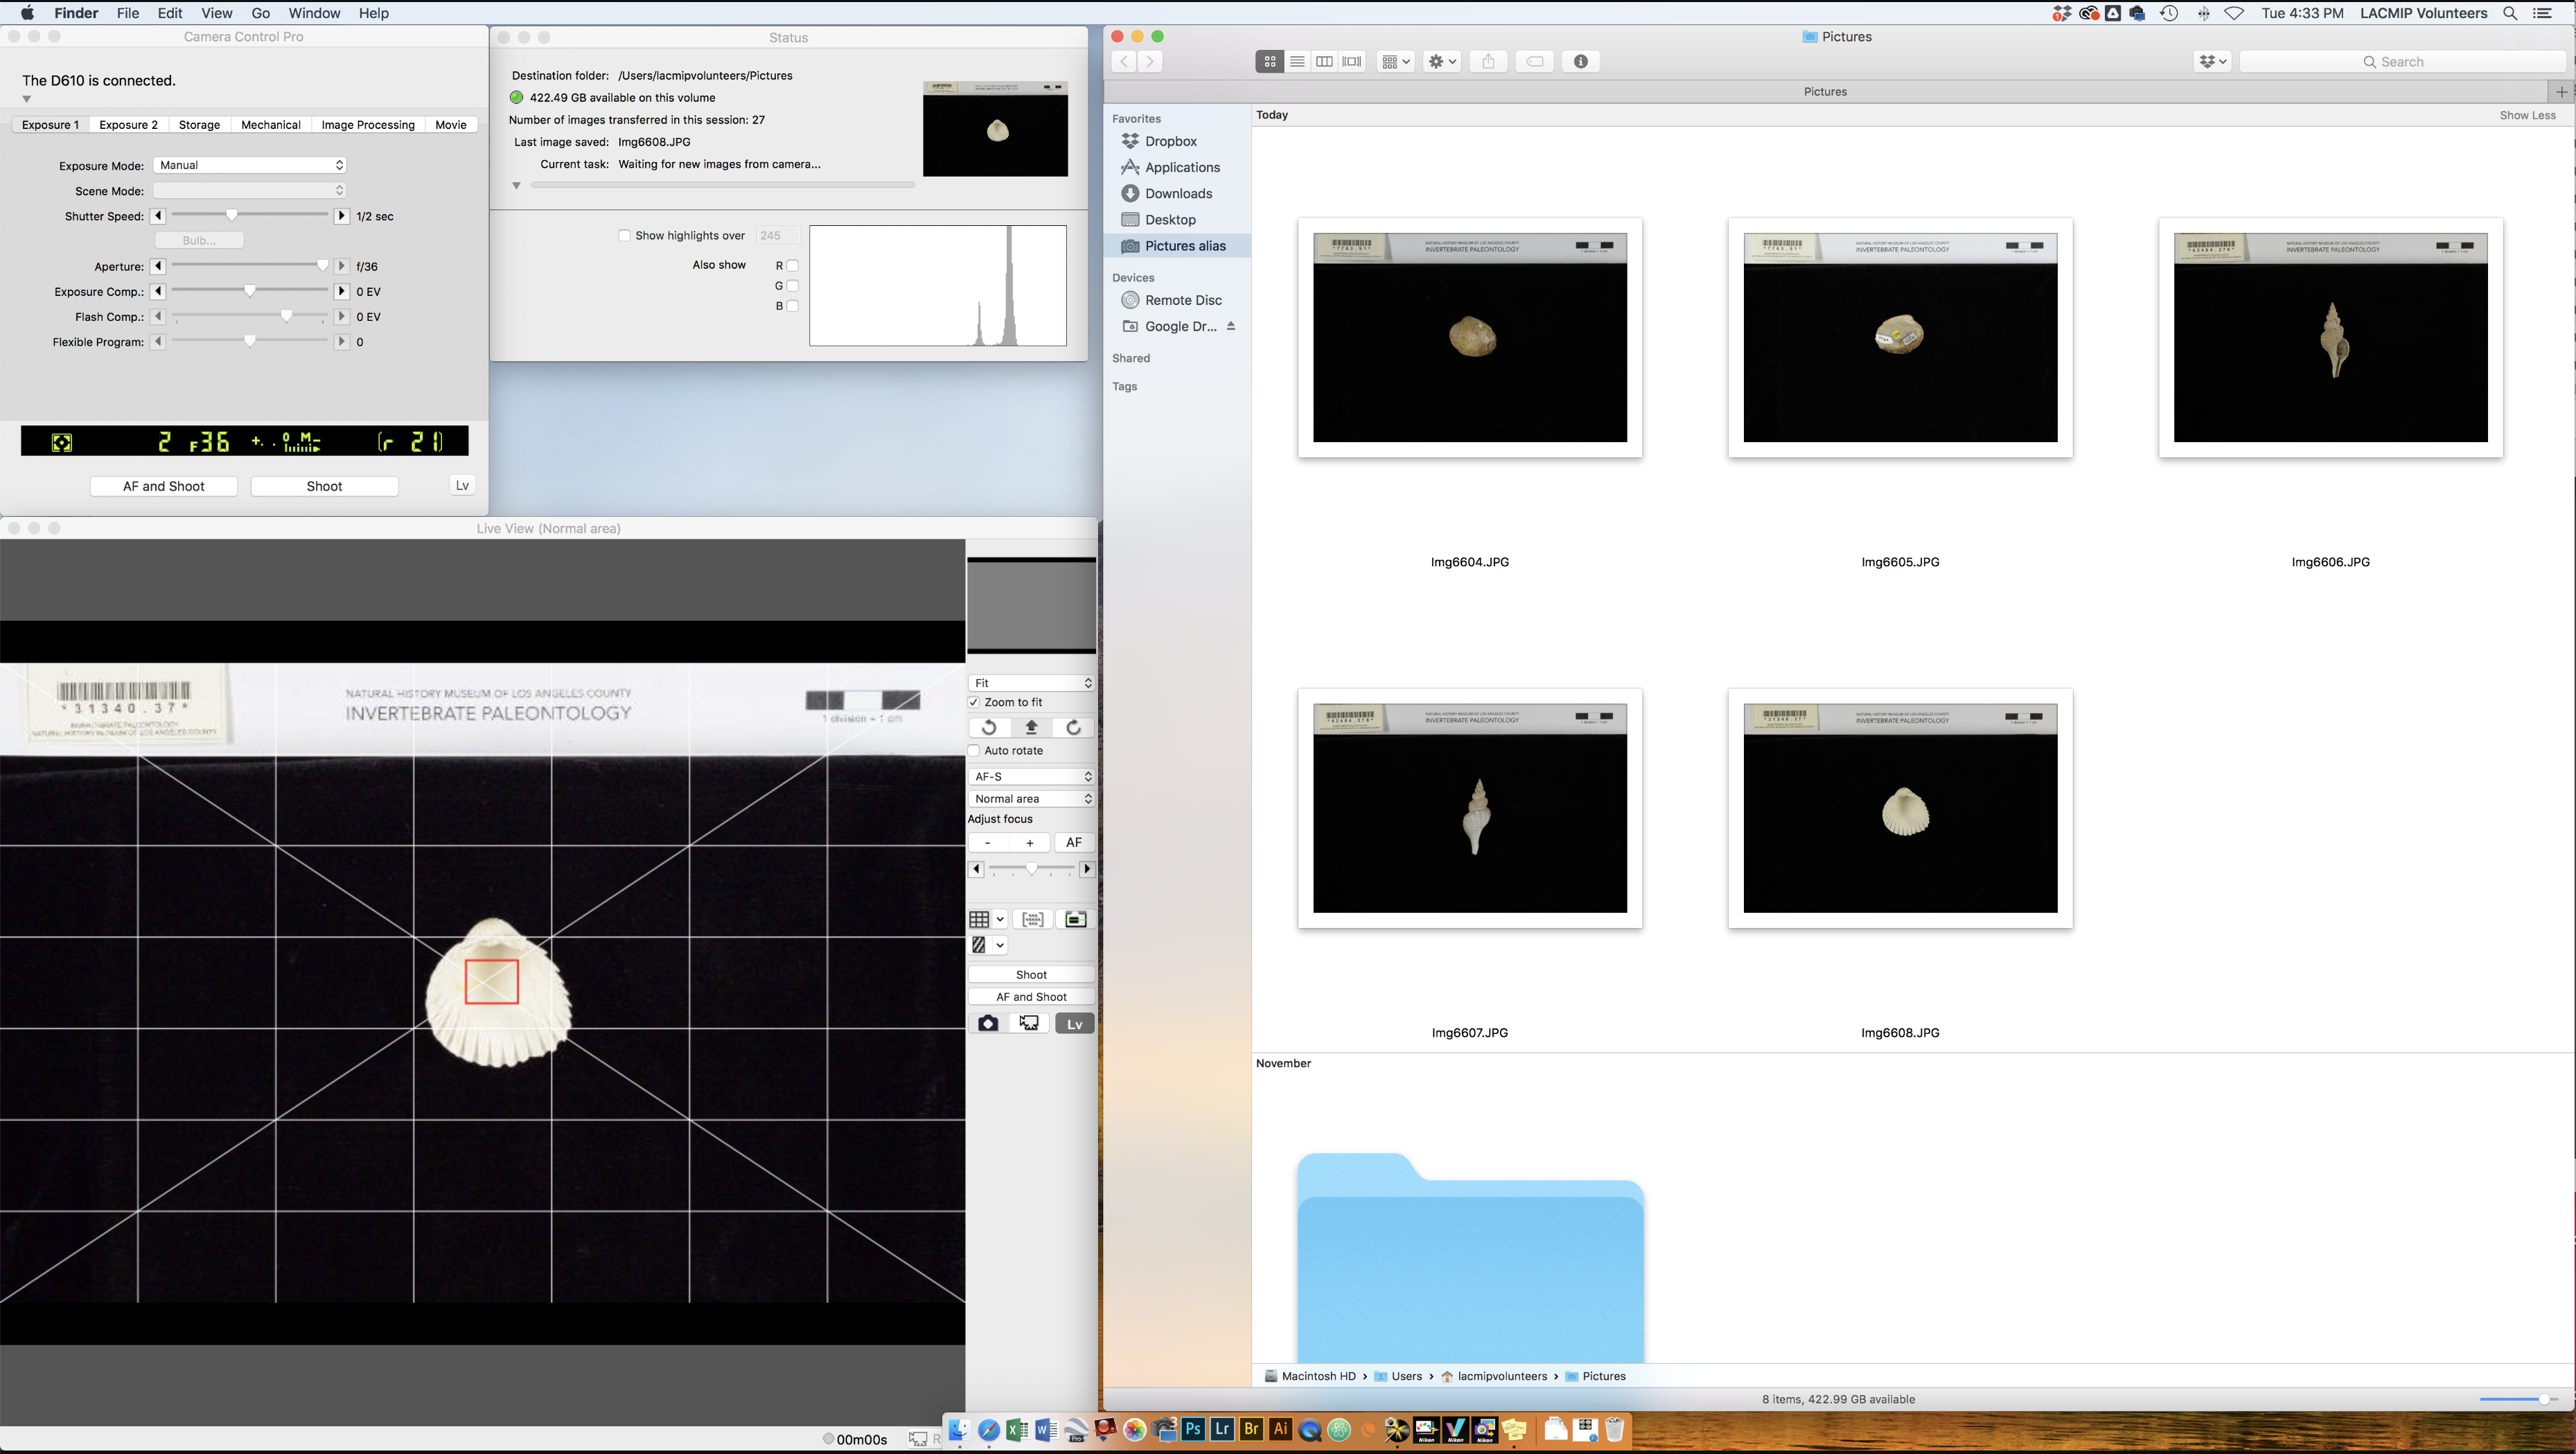
On the Mac desktop, initiate: 1) Camera Control Pro 2 with LiveView (“LV”) enabled and 2) open the Pictures folder (Macintosh HD > Users > lacmipvolunteers > Pictures). Make sure “Manual” is selected within the camera settings in LiveView. A high f stop is preferable and shutter speed varies depending on the desired light level. Moving the slider to the left will make your picture darker and to the right will make it lighter.

Select
LACMIP staff will assign you a set of specimens to image. If the specimens are presented to you in a tray or drawer, please do not rearrange the boxes as you work through them, only work with one specimen lot at a time, and never disassociate specimens from their labels. Immediately alert the Collections Manager if you think a specimen and its labels have become mismatched.
Position
 Orient the specimen in the frame of the image using LiveView. If you are unfamiliar with imaging fossil invertebrates, refer to the LACMIP image gallery on GBIF for examples. The Digital Atlas of Ancient Life also has good examples and introductory anatomical explanations.
Place the correct size of the imaging template at the top of the image with the barcode of the specimen’s label in the “barcode” box. If the label is bending too much, putty can be used to briefly attach the label to the template. Be aware that the putty will leave stains on the template over time and may require the template to be reprinted after a few uses.
When imaging bivalves, align the hinge at the top of the image to be in a straight, horizontal line. When taking a picture of the underside, make sure the specimen is as flat as possible, you will probably have to dig a crater to achieve this. Try to imagine that if you were to place a paper on top of it, the paper would be completely flat.
When imaging gastropods, take one picture with the aperture aligned with the camera and one where the aperture is flat on the surface of the substrate.
When imaging specimens at the collections center, you usually will only need to take two images per specimen: the view from the top and the view from the bottom.
If you are imaging specimens in the type collection, you may have to take more pictures than you would at the collections center. In addition, you will have to take pictures of the historic labels placed inside of the specimen’s container. Talk to the Collections Manager about the specifics of the organism you are imaging.
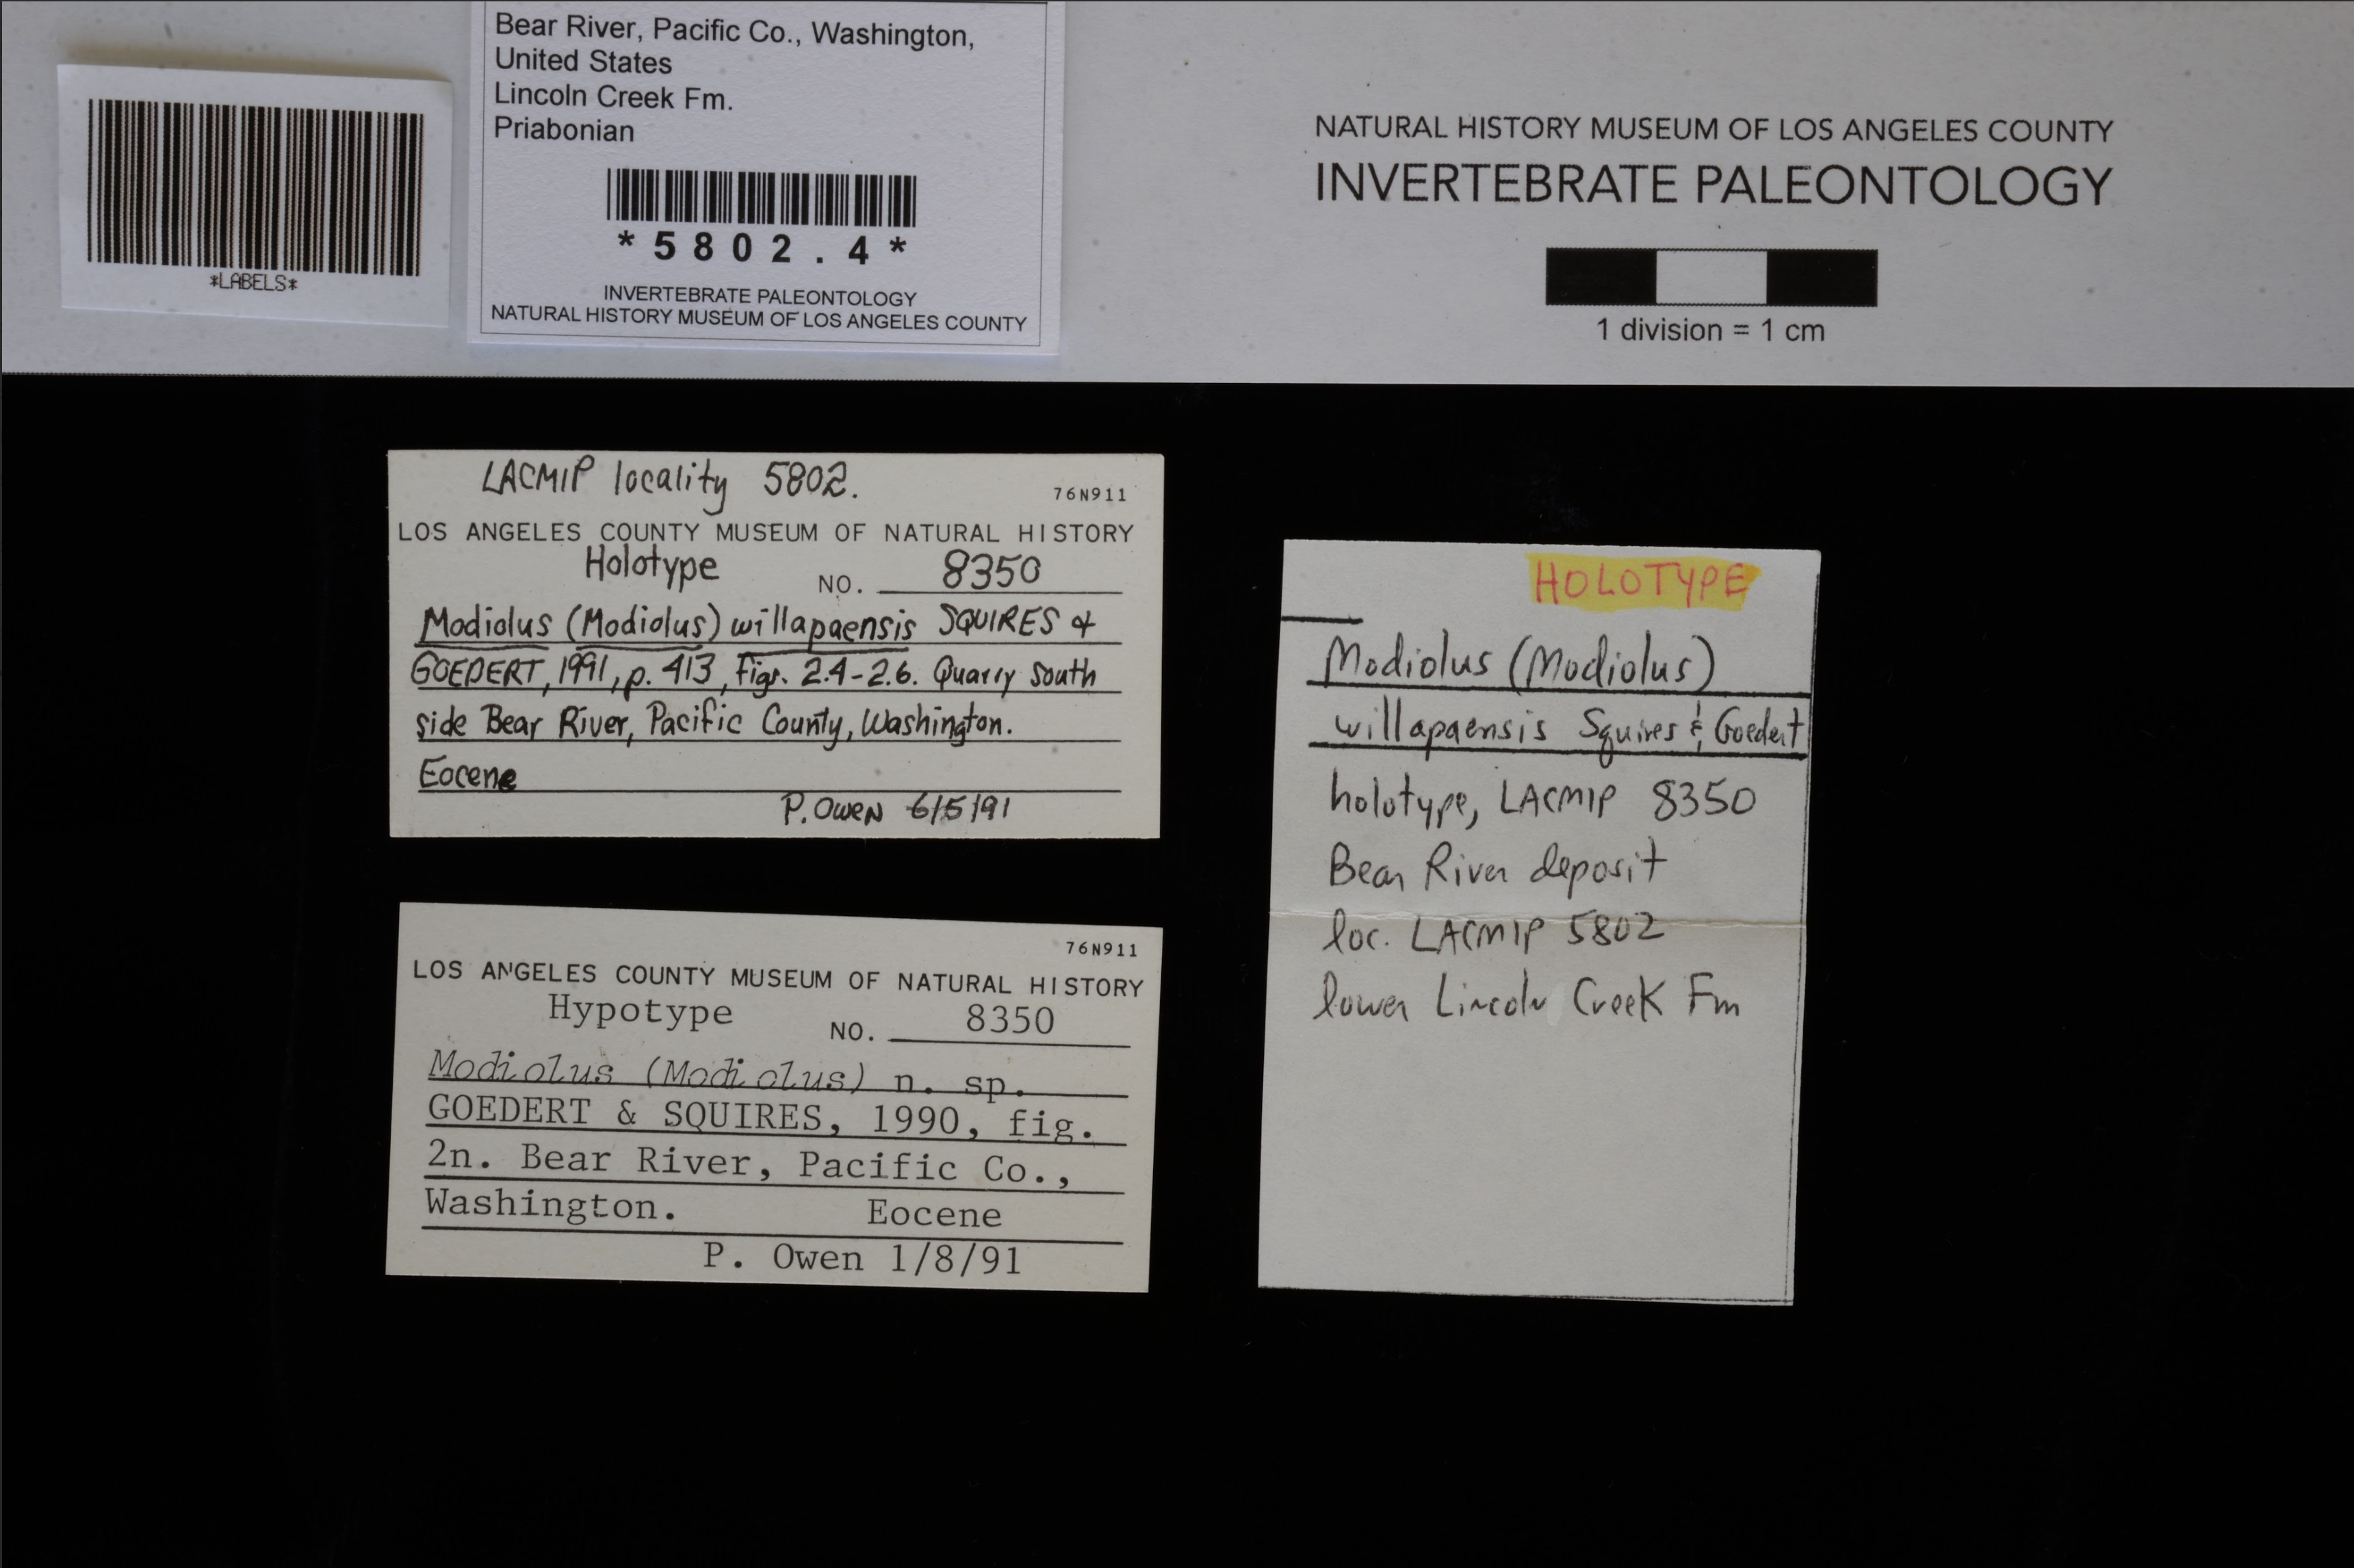
ℹ️ If you are unsure of how to image a particular type specimen, you may be able to locate where it was originally photographed for a publication and use that image as a reference.
Barcode
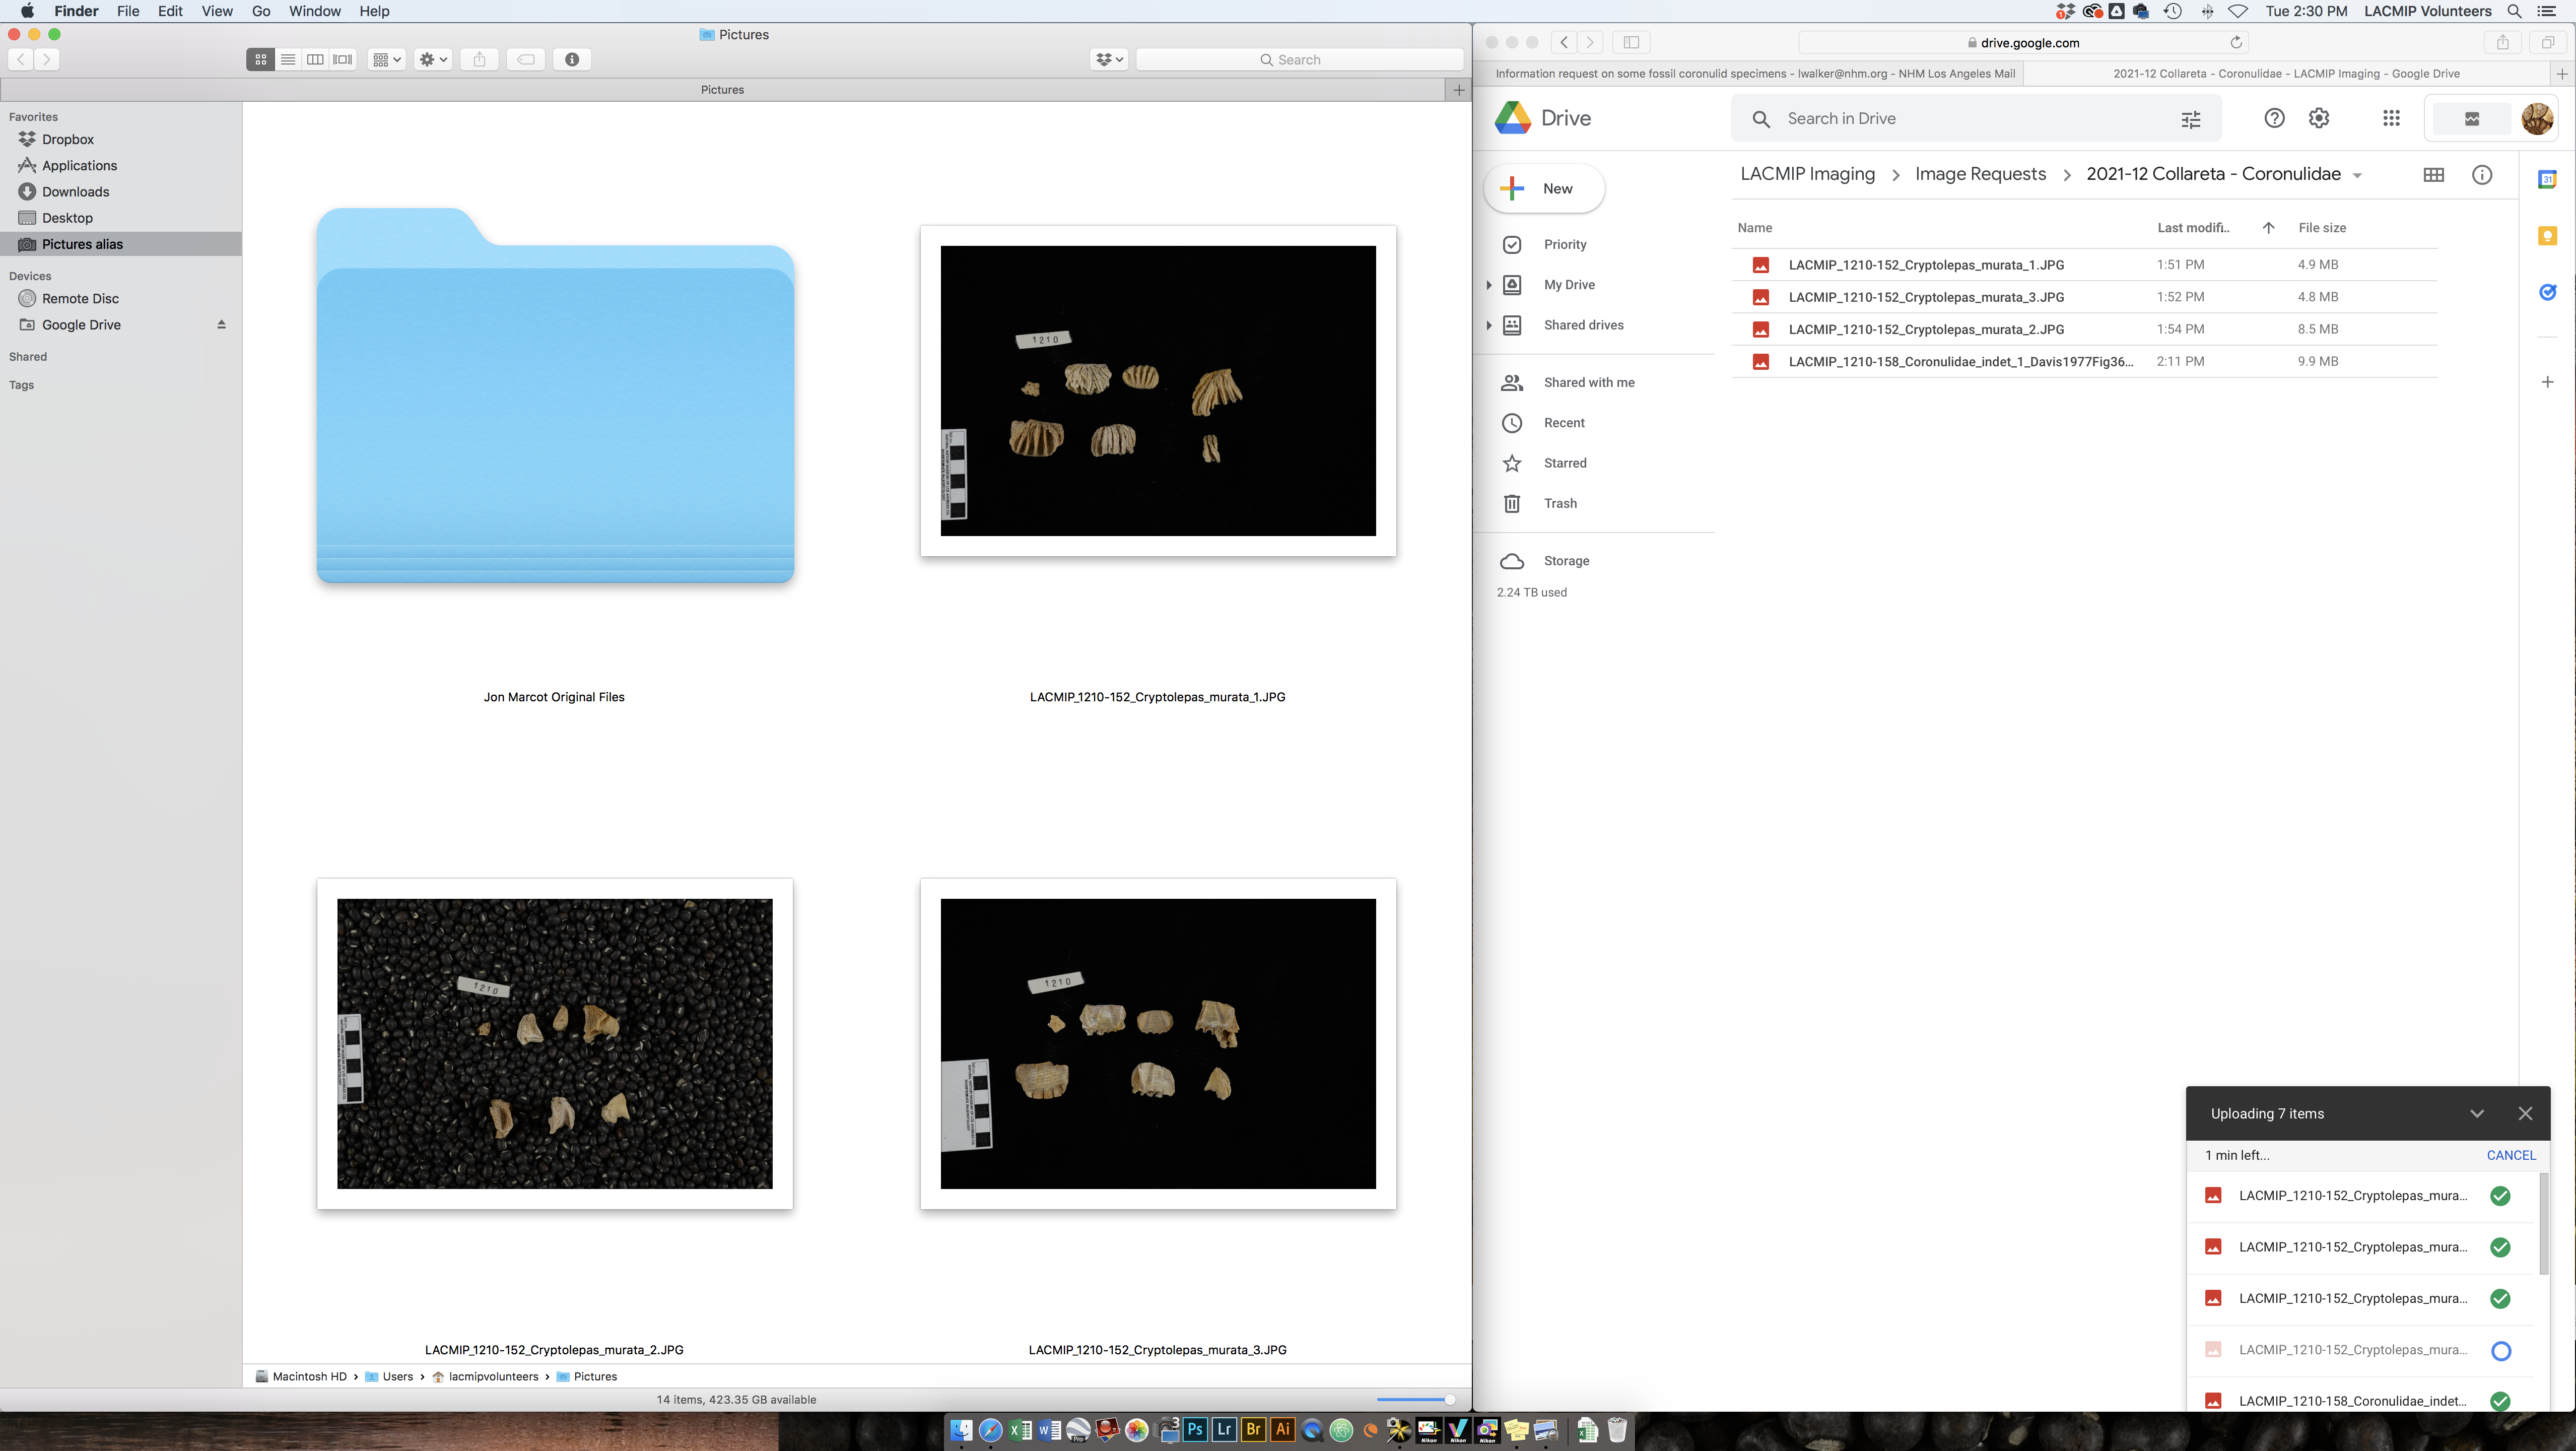
Place the specimen label in the field of view such that the barcode is completely visible in the corner of the image. The barcode must not be visually obscured in any way. At this point, your desktop should look something like this:
Capture
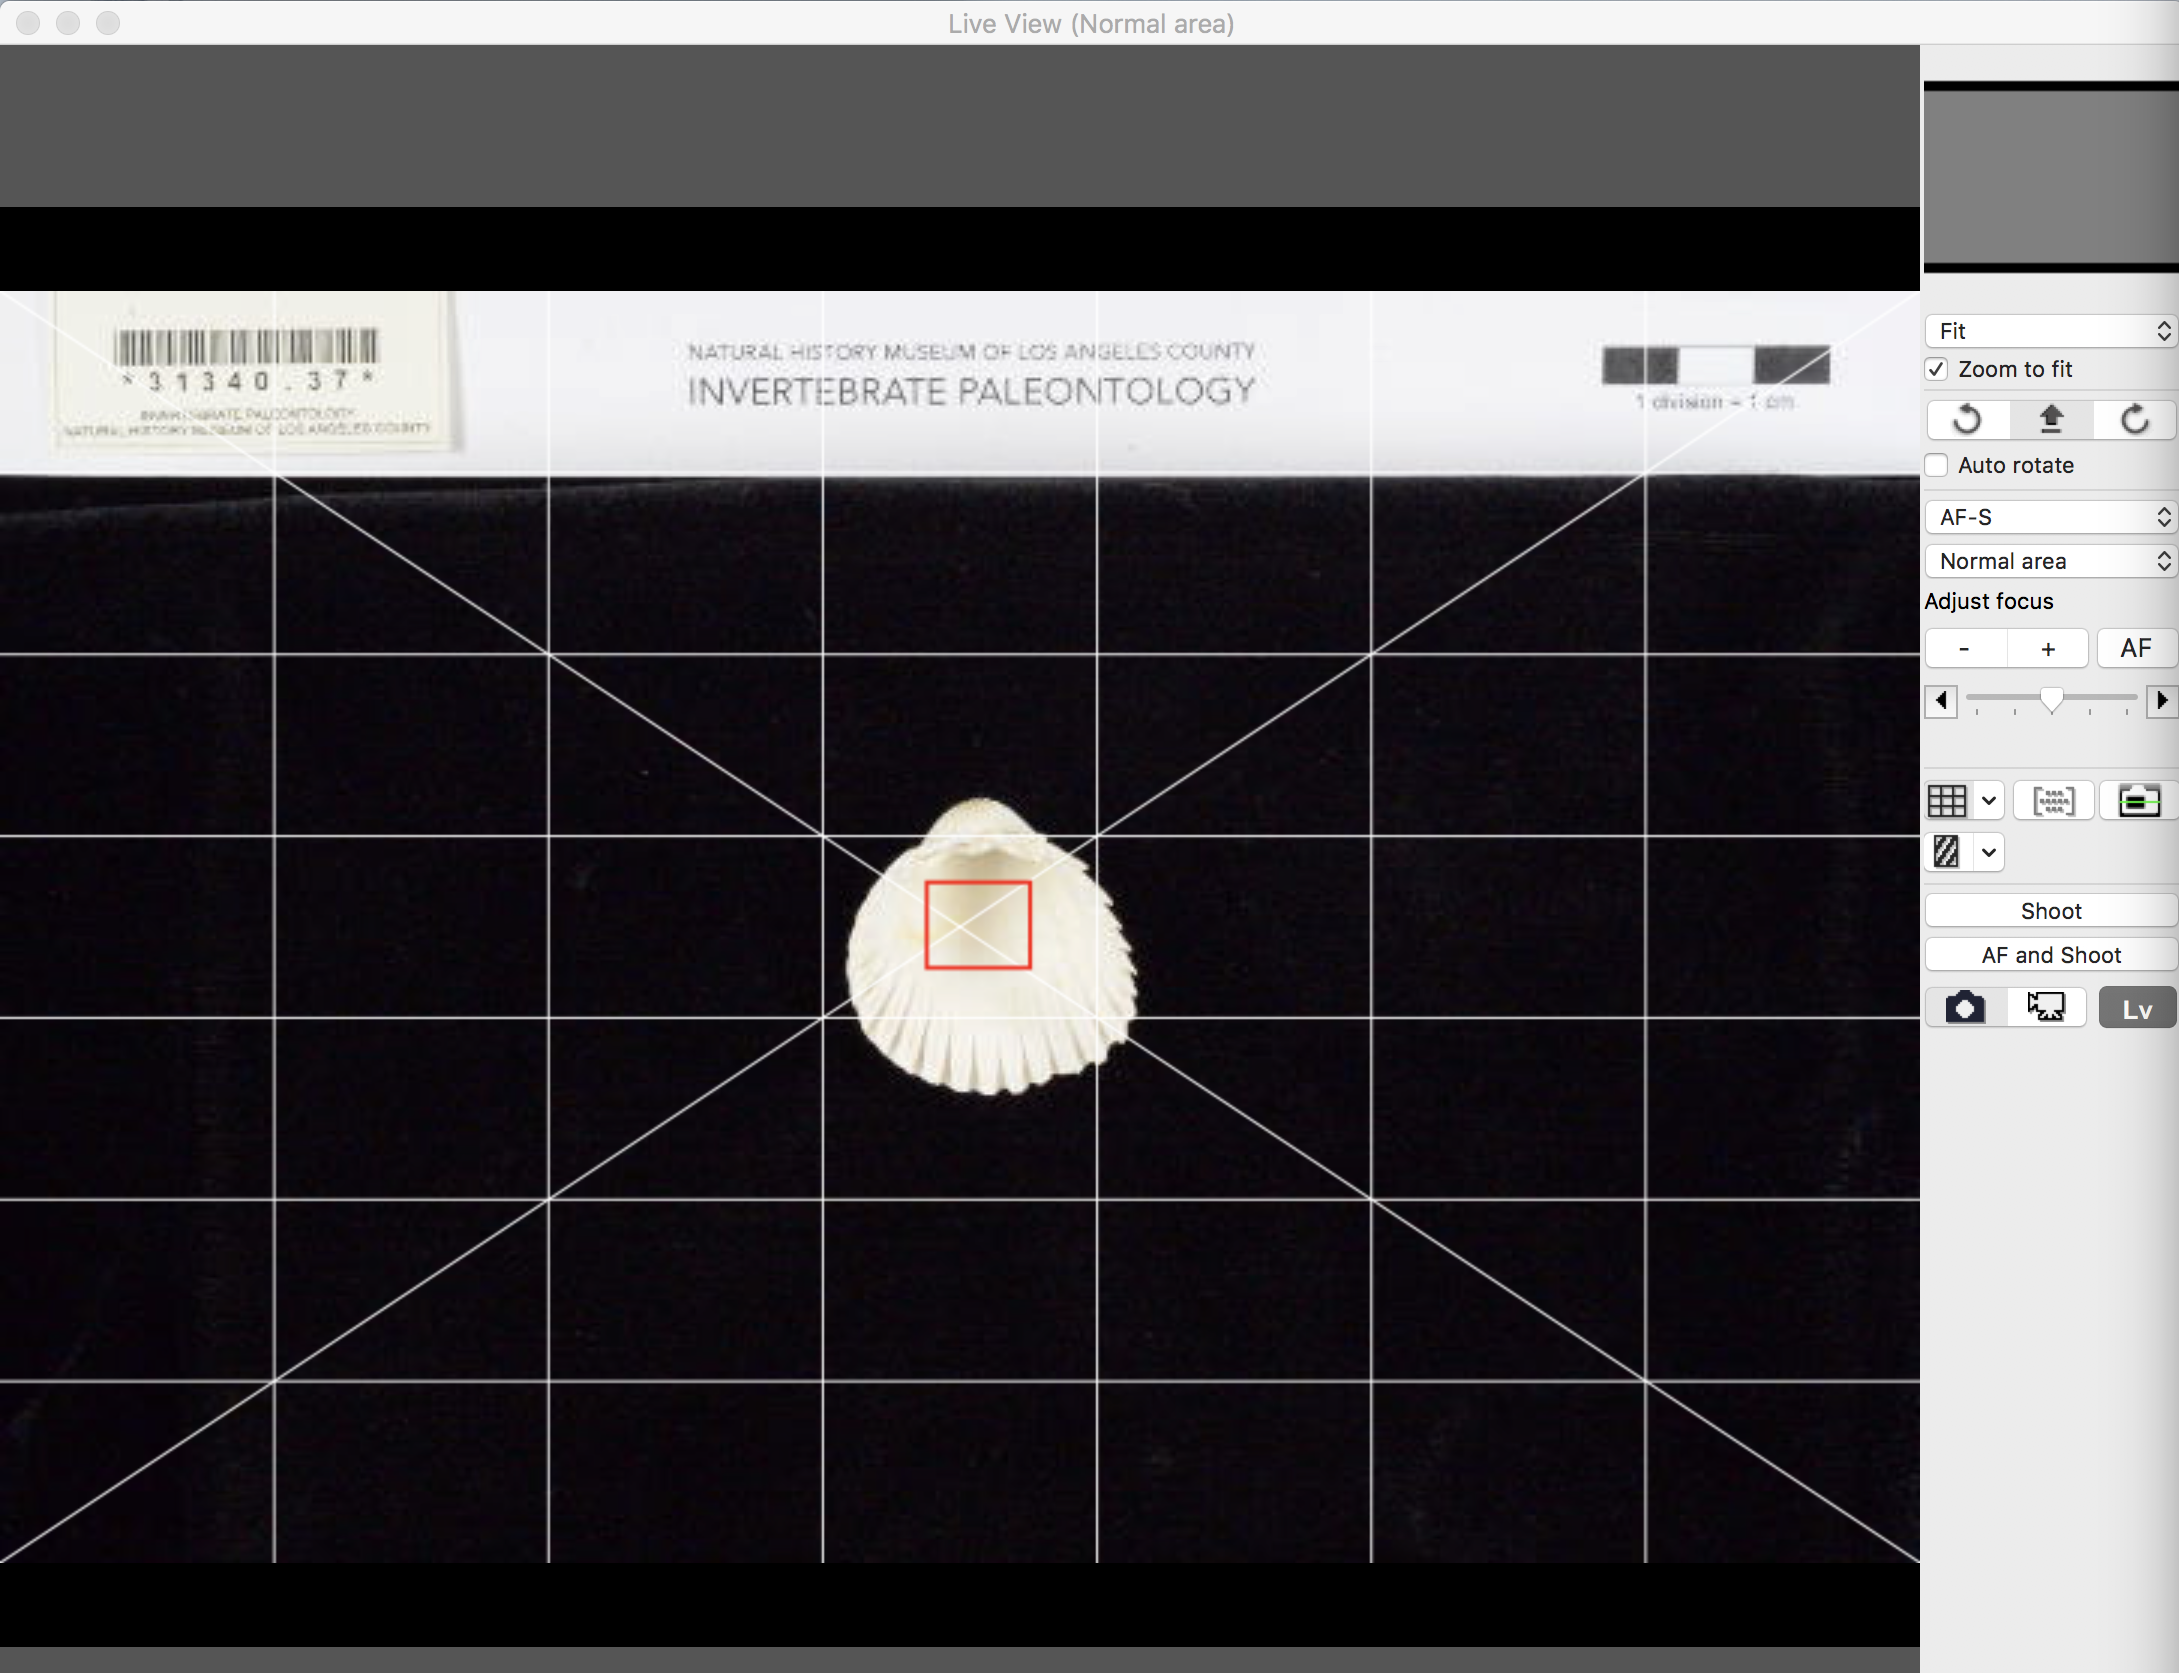
In the LiveView window, click on the barcode. A box will appear over it. Select “AF and Shoot”. If the image is not captured, you may need to select a different focal point with the mouse.
QC
The new image will appear in the Pictures folder. Quickly quality control (QC) the image to ensure both the barcode and specimen are in focus. (If they are not, click on another focal point in the Camera Control Pro window and capture another photo until everything is in focus.) If you are still having trouble, just know that it is much more important that the specimen is in focus than the barcode but try your best to have both in focus. Please immediately delete images that are not in focus. If the barcode is not in focus, the image will not be renamed properly.
Repeat
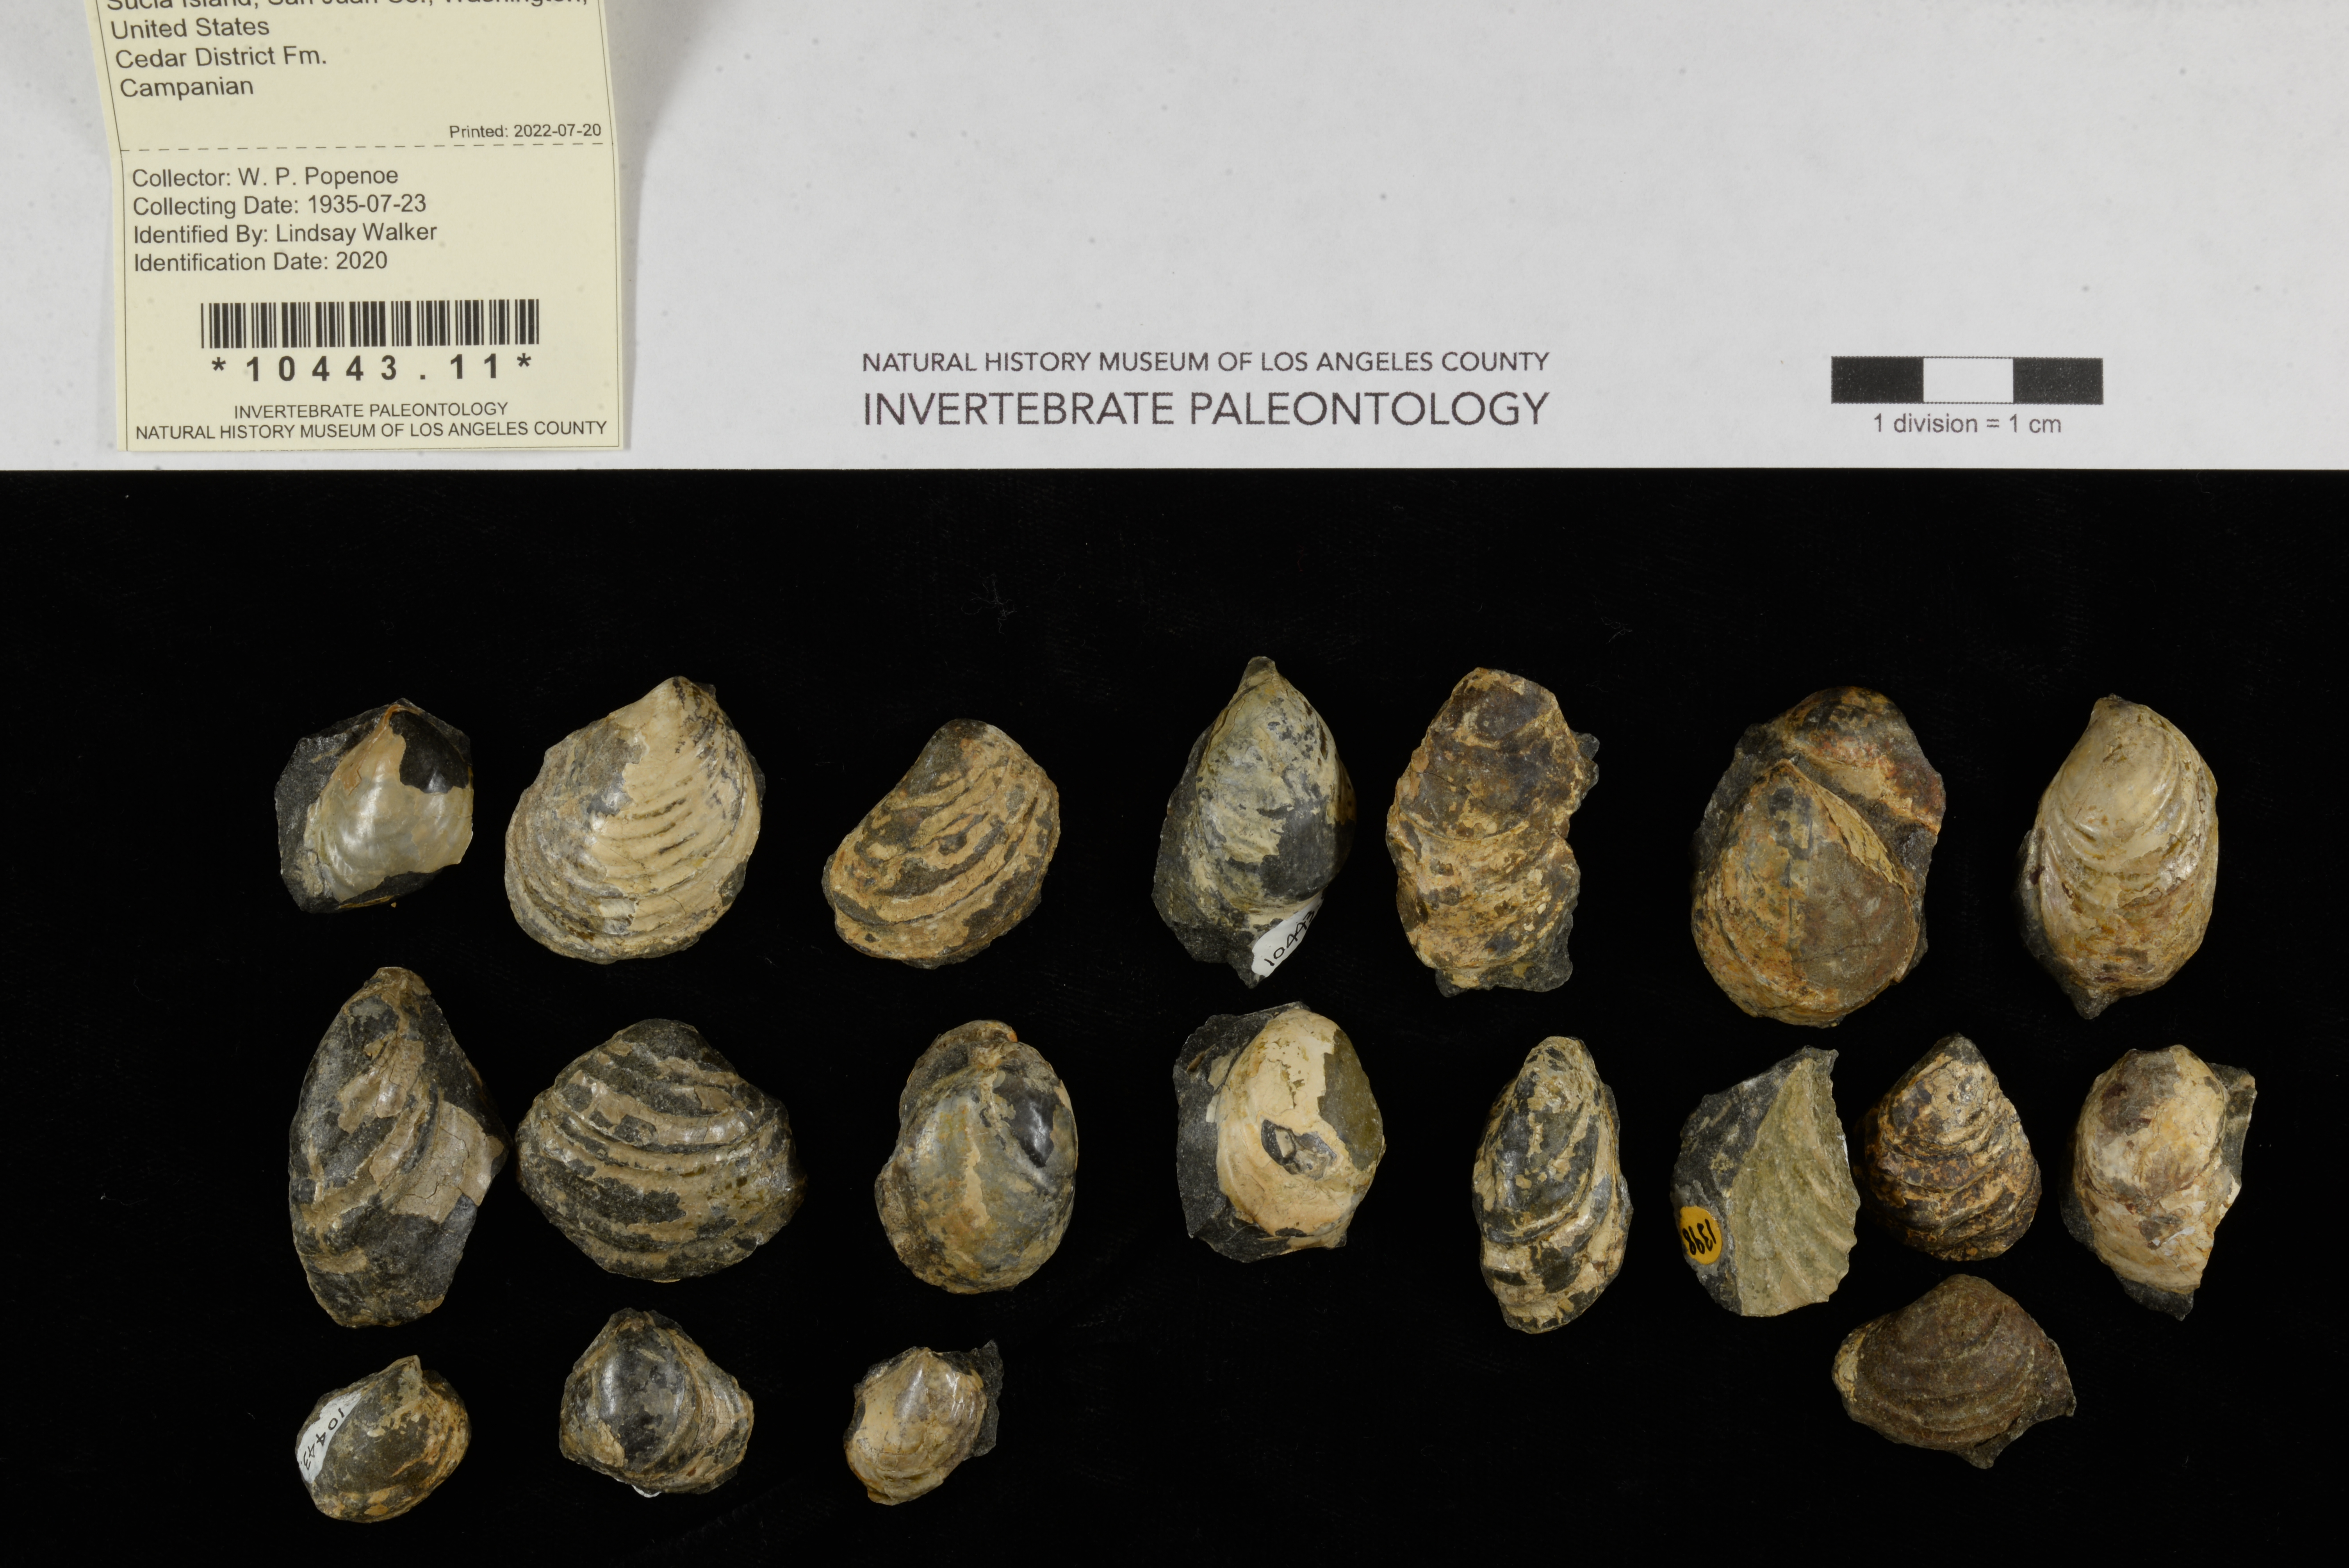
Repeat the steps above until all necessary views are captured for the specimen. Typically 1-2 views are captured for bivalves (interior & exterior) & 2-3 views for gastropods (apertural & abapterural, plus an umbilical view for Trochoidea & Patellogastropoda). If a lot contains multiple specimens, an overall (“habitus”) image showing all specimens may be required, example shown below. If there is a pink tag in the box, remove it before moving onto the next specimen lot.
Labels
If you have been instructed to image the accompanying labels, include the “labels” barcode on the image template. If labels have text on two sides, photograph both sides. If there are too many labels to fit into the field of view, please take multiple images until all labels are captures.
Save
At the end of your imaging session in the type collection, all files need to be saved to Google Drive > LACMIP Imaging in the appropriate folder directory. If you are imaging specimens with barcoded labels for a specific project, select all new images in Pictures and drag them into the appropriate “To Process” folder in LACMIP Imaging. Please reference the will be automatically renamed and moved overnight.
Delete
Once your files have successfully copied to Google Drive (save the last 10 mins of your shift for this task), delete your originals from the Pictures folder before leaving. Do not delete them until every file has been uploaded.
Shut Down
When your imaging shift is complete, 1) replace the lens cap and dust cover on the camera and turn off the lights. You may have to change the “automatic” setting on the camera lens to “manual” to put the lens cap back on safely.
2) Remove the orange cord from the camera and remove the camera from the imaging station.
3) Unplug the battery pack and remove it from the base of the camera before packing up everything in the camera bag once more.
4) If any sand or black beans have spilled onto the workspace, please collect as much as you can and return it to its proper container. Because this is a shared workstation, please keep it tidy!
![]() Handle all imaging equipment with care. The cameras and lenses are difficult to clean and costly to replace. Never remove the lenses from the cameras or touch the glass on either lens.
Handle all imaging equipment with care. The cameras and lenses are difficult to clean and costly to replace. Never remove the lenses from the cameras or touch the glass on either lens.
![]() If you need to print new scale bars, label barcodes, etc., or refresh the background template because it’s worn, these items are saved in Google Drive > LACMIP Imaging.
If you need to print new scale bars, label barcodes, etc., or refresh the background template because it’s worn, these items are saved in Google Drive > LACMIP Imaging.
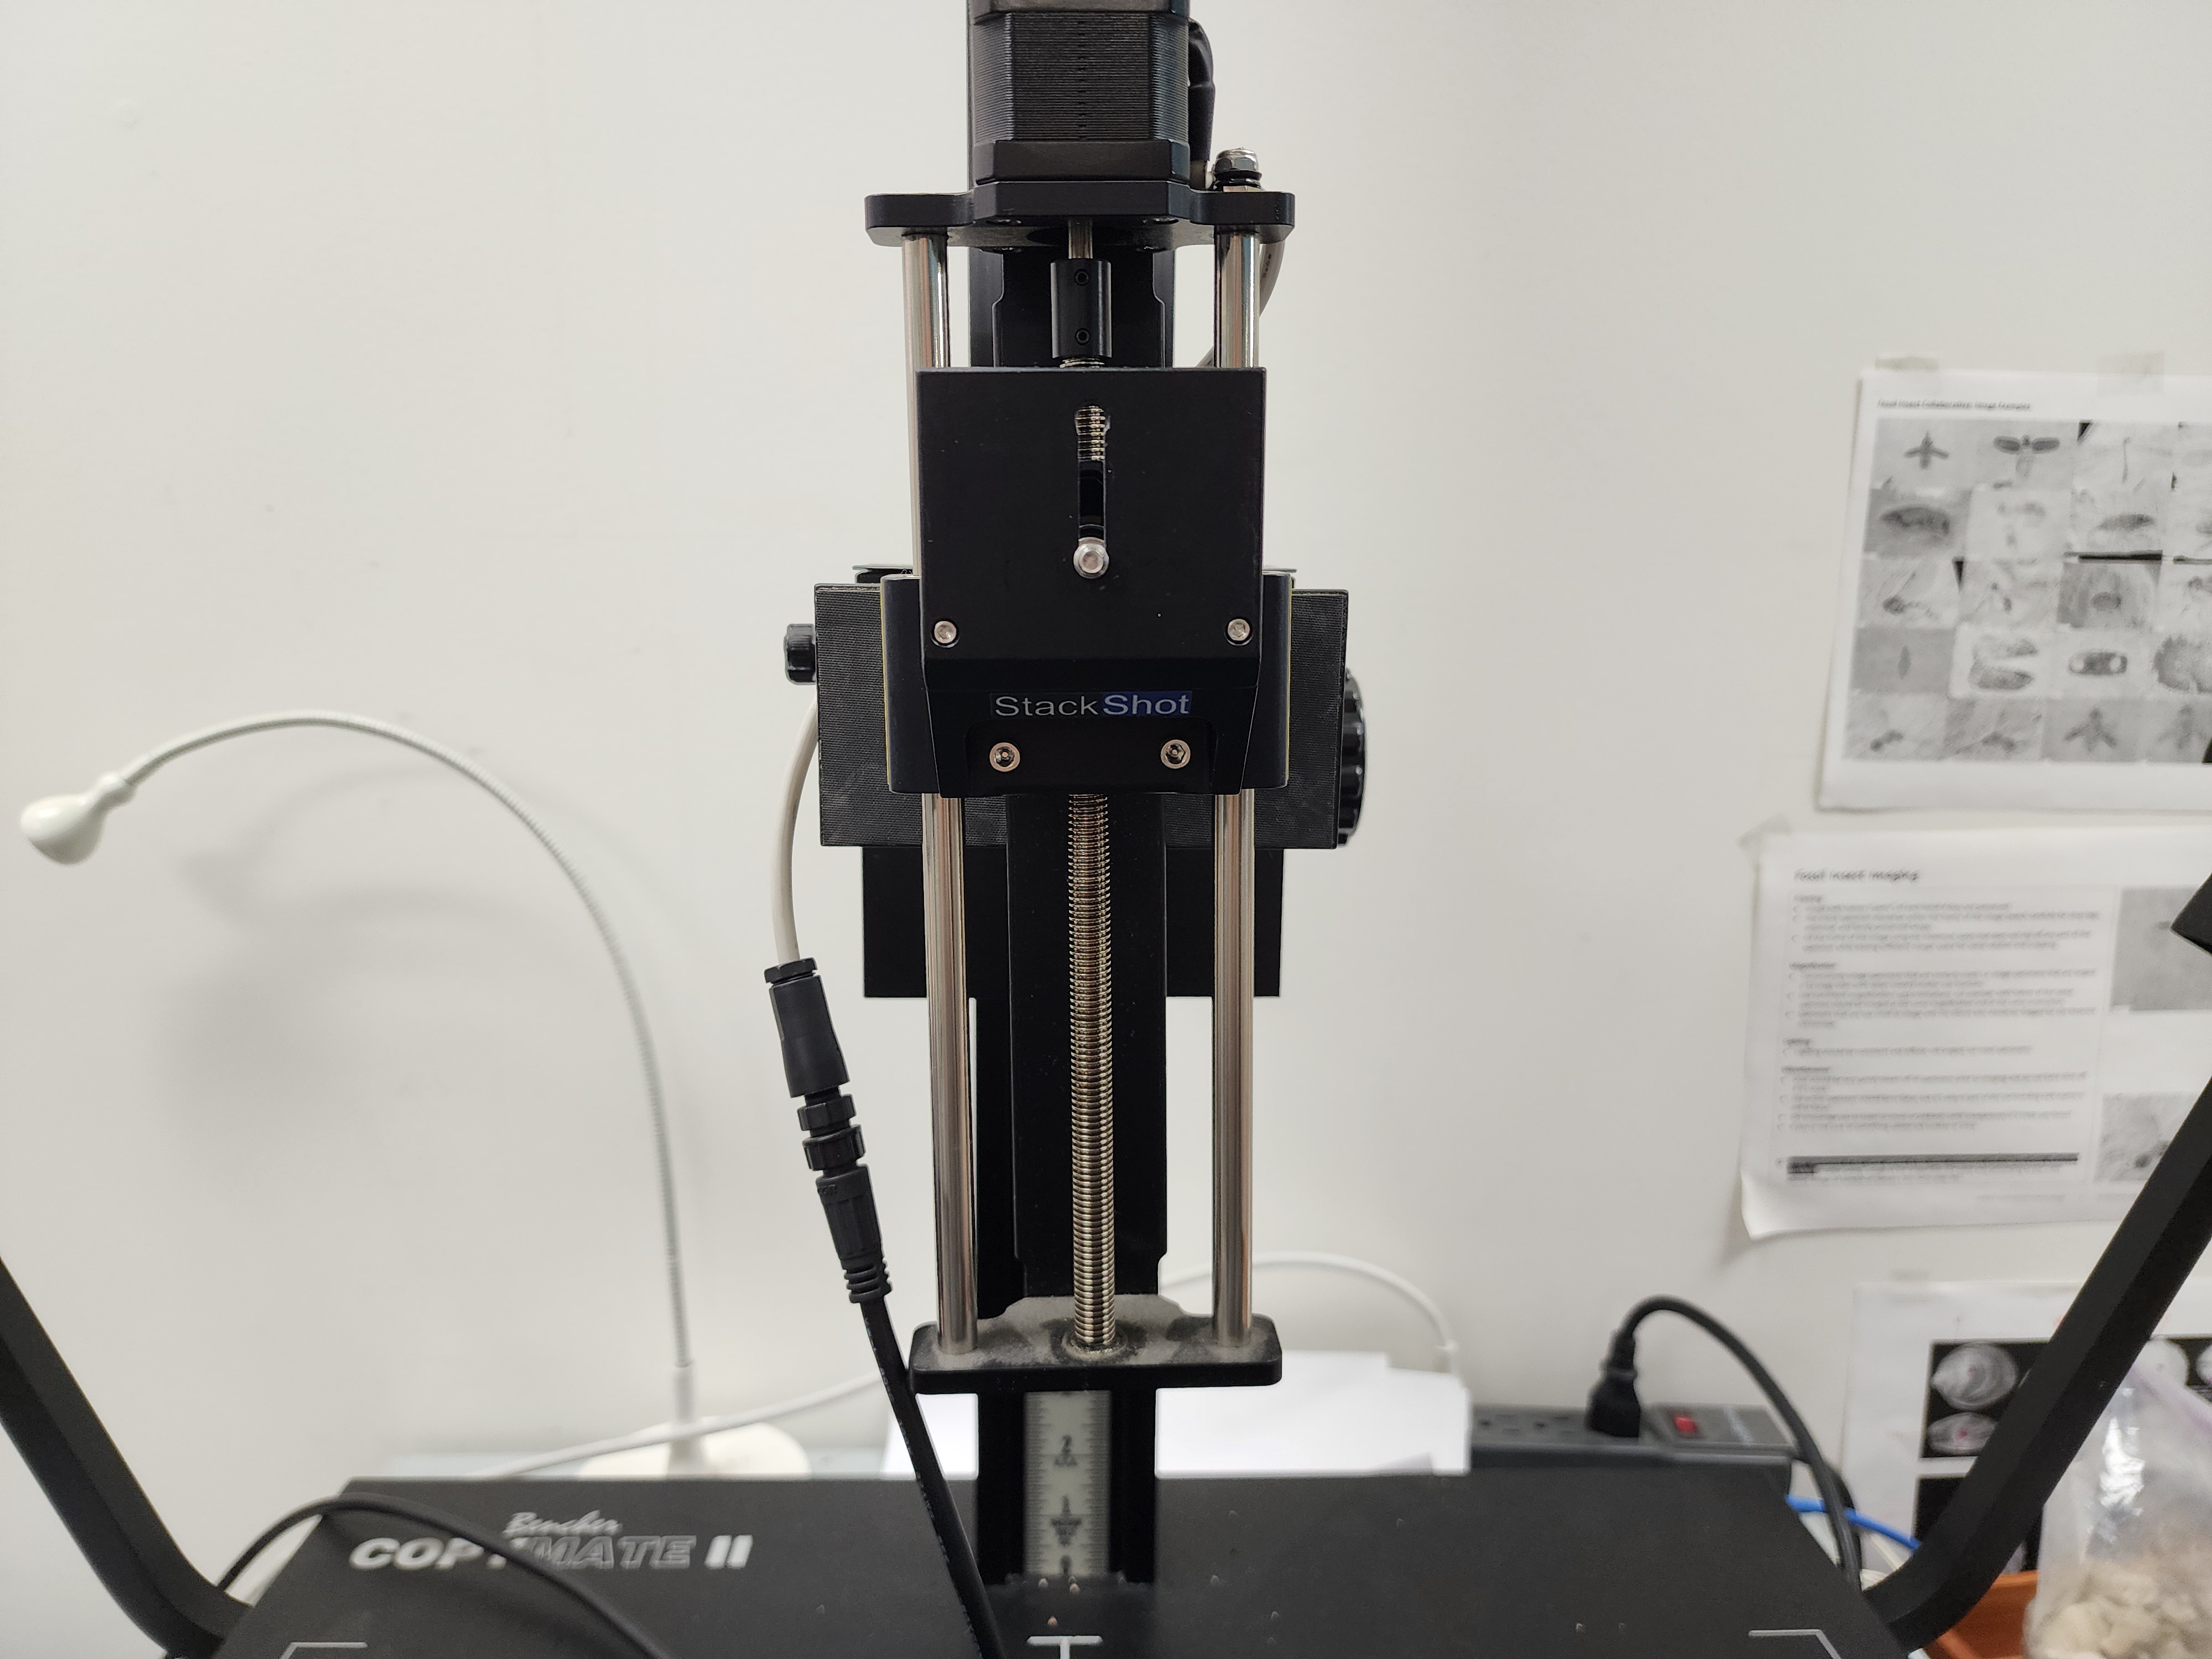
Macrophotography
Photographing small specimens and taking detailed images of larger specimens requires a more involved and time-consuming workflow. These images are acquired using a Canon EOS 5D Mark III DSLR camera paired with a Canon MP-E 65mm f/2.8 1-5x macro lens and a Cognysis StackShot macro rail. A guide to macrophotography was developed for LACMIP’s Fossil Insect PEN (2017-2020).
Additionally, the museum’s Keyence microscope can be accessed by appointment when very high quality imagery is needed to fulfill research requests. Access to this equipment is controlled by the Entomology division.
Storage
Google Drive
All specimen images should be saved to an appropriate subfolder in Google Drive > Shared Drives > LACMIP Imaging. The purpose of this shared drive is to store original, unaltered specimen images. These files should be periodically shared with the Database Manager for ingestion into EMu’s Multimedia module. Images that are intended for the web will also need to be uploaded to Extensis Portfolio.
Extensis Portfolio
Extensis Portfolio is the NHMLA’s institutional DAMS. All images to be shared with online aggregators must have metadata applied before ingestion into Extensis.
You can acccess Extensis using your NHMLA login and password. Not all images in Extensis are publicly visible; only files save to the catalog “Invertpaleo published assets” will become available online, whereas files saved to “Invertpaleo archived assets” will remain private. Files added to the former catalog can be viewed and downloaded from here, and can be pushed to aggregators.
The first time you access Extensis, ask IT (itsupport@nhm.org) for the best contact for direct assistance. This individual can provide advice on the latest recommendations for ingesting large batches of images into the DAMS, and should be able to adjust any account permissions you need enabled. Likewise, the Database Manager can facilitate ingestion of images into EMu and their online publication to data aggregators. Importantly, files intended for online publication must be saved in Extensis Portfolio > Invertpaleo published assets and attached to their respective records EMu and their file names must match in both storage locations (however, their file extensions may differ).
Other copies
Prior to the NHMLA’s adoption of Google Drive in 2019, images for the EPICC (2015-2020), CSC (2017-2019), and FIC (2017-2020) projects were saved to two external hard drives. These files have since been backed up on the DAMS and in Google Drive. LACMIP will not be using external hard drives for long-term image storage moving forward.
File names
Script
When images containing images of barcoded specimen labels are saved to one of the “TO_PROCESS” folders in Google Drive, they will be renamed and reorganized overnight. Please thoroughly review the documentation on the barcode reading script for more information on how to implement this step of the imaging workflow.
![]() The file
The file Imaging-FileName-Taxonomy.csv should be periodically refreshed by re-running the “IP Basic Taxonomy Output for Imaging” report on all existing Catalogue records and overwriting the older CSV file in LACMIP Imaging > Imaging Templates. This CSV couples with the python script to insert currently accepted taxonomy into image file names.
Keystroking
Avoid manually renaming files whenever possible. However, sometimes file names must be hand keystroked. File names should conform to this format:
LACMIP_cat#_Genus_species_etc
Images containing barcodes can be renamed using the barcode scanner, which acts like a keyboard. Scan the barcode in the image to insert the catalog number into the file name. However, the file name should still be manually altered to conform to the preferred format.
Take care when naming images. If a catalog number is mistyped into a file name, the image will become disassociated from the correct specimen record. Once the image is ingested into EMu, the DAMS, and picked up by aggregators, such errors can become very time-consuming to correct.
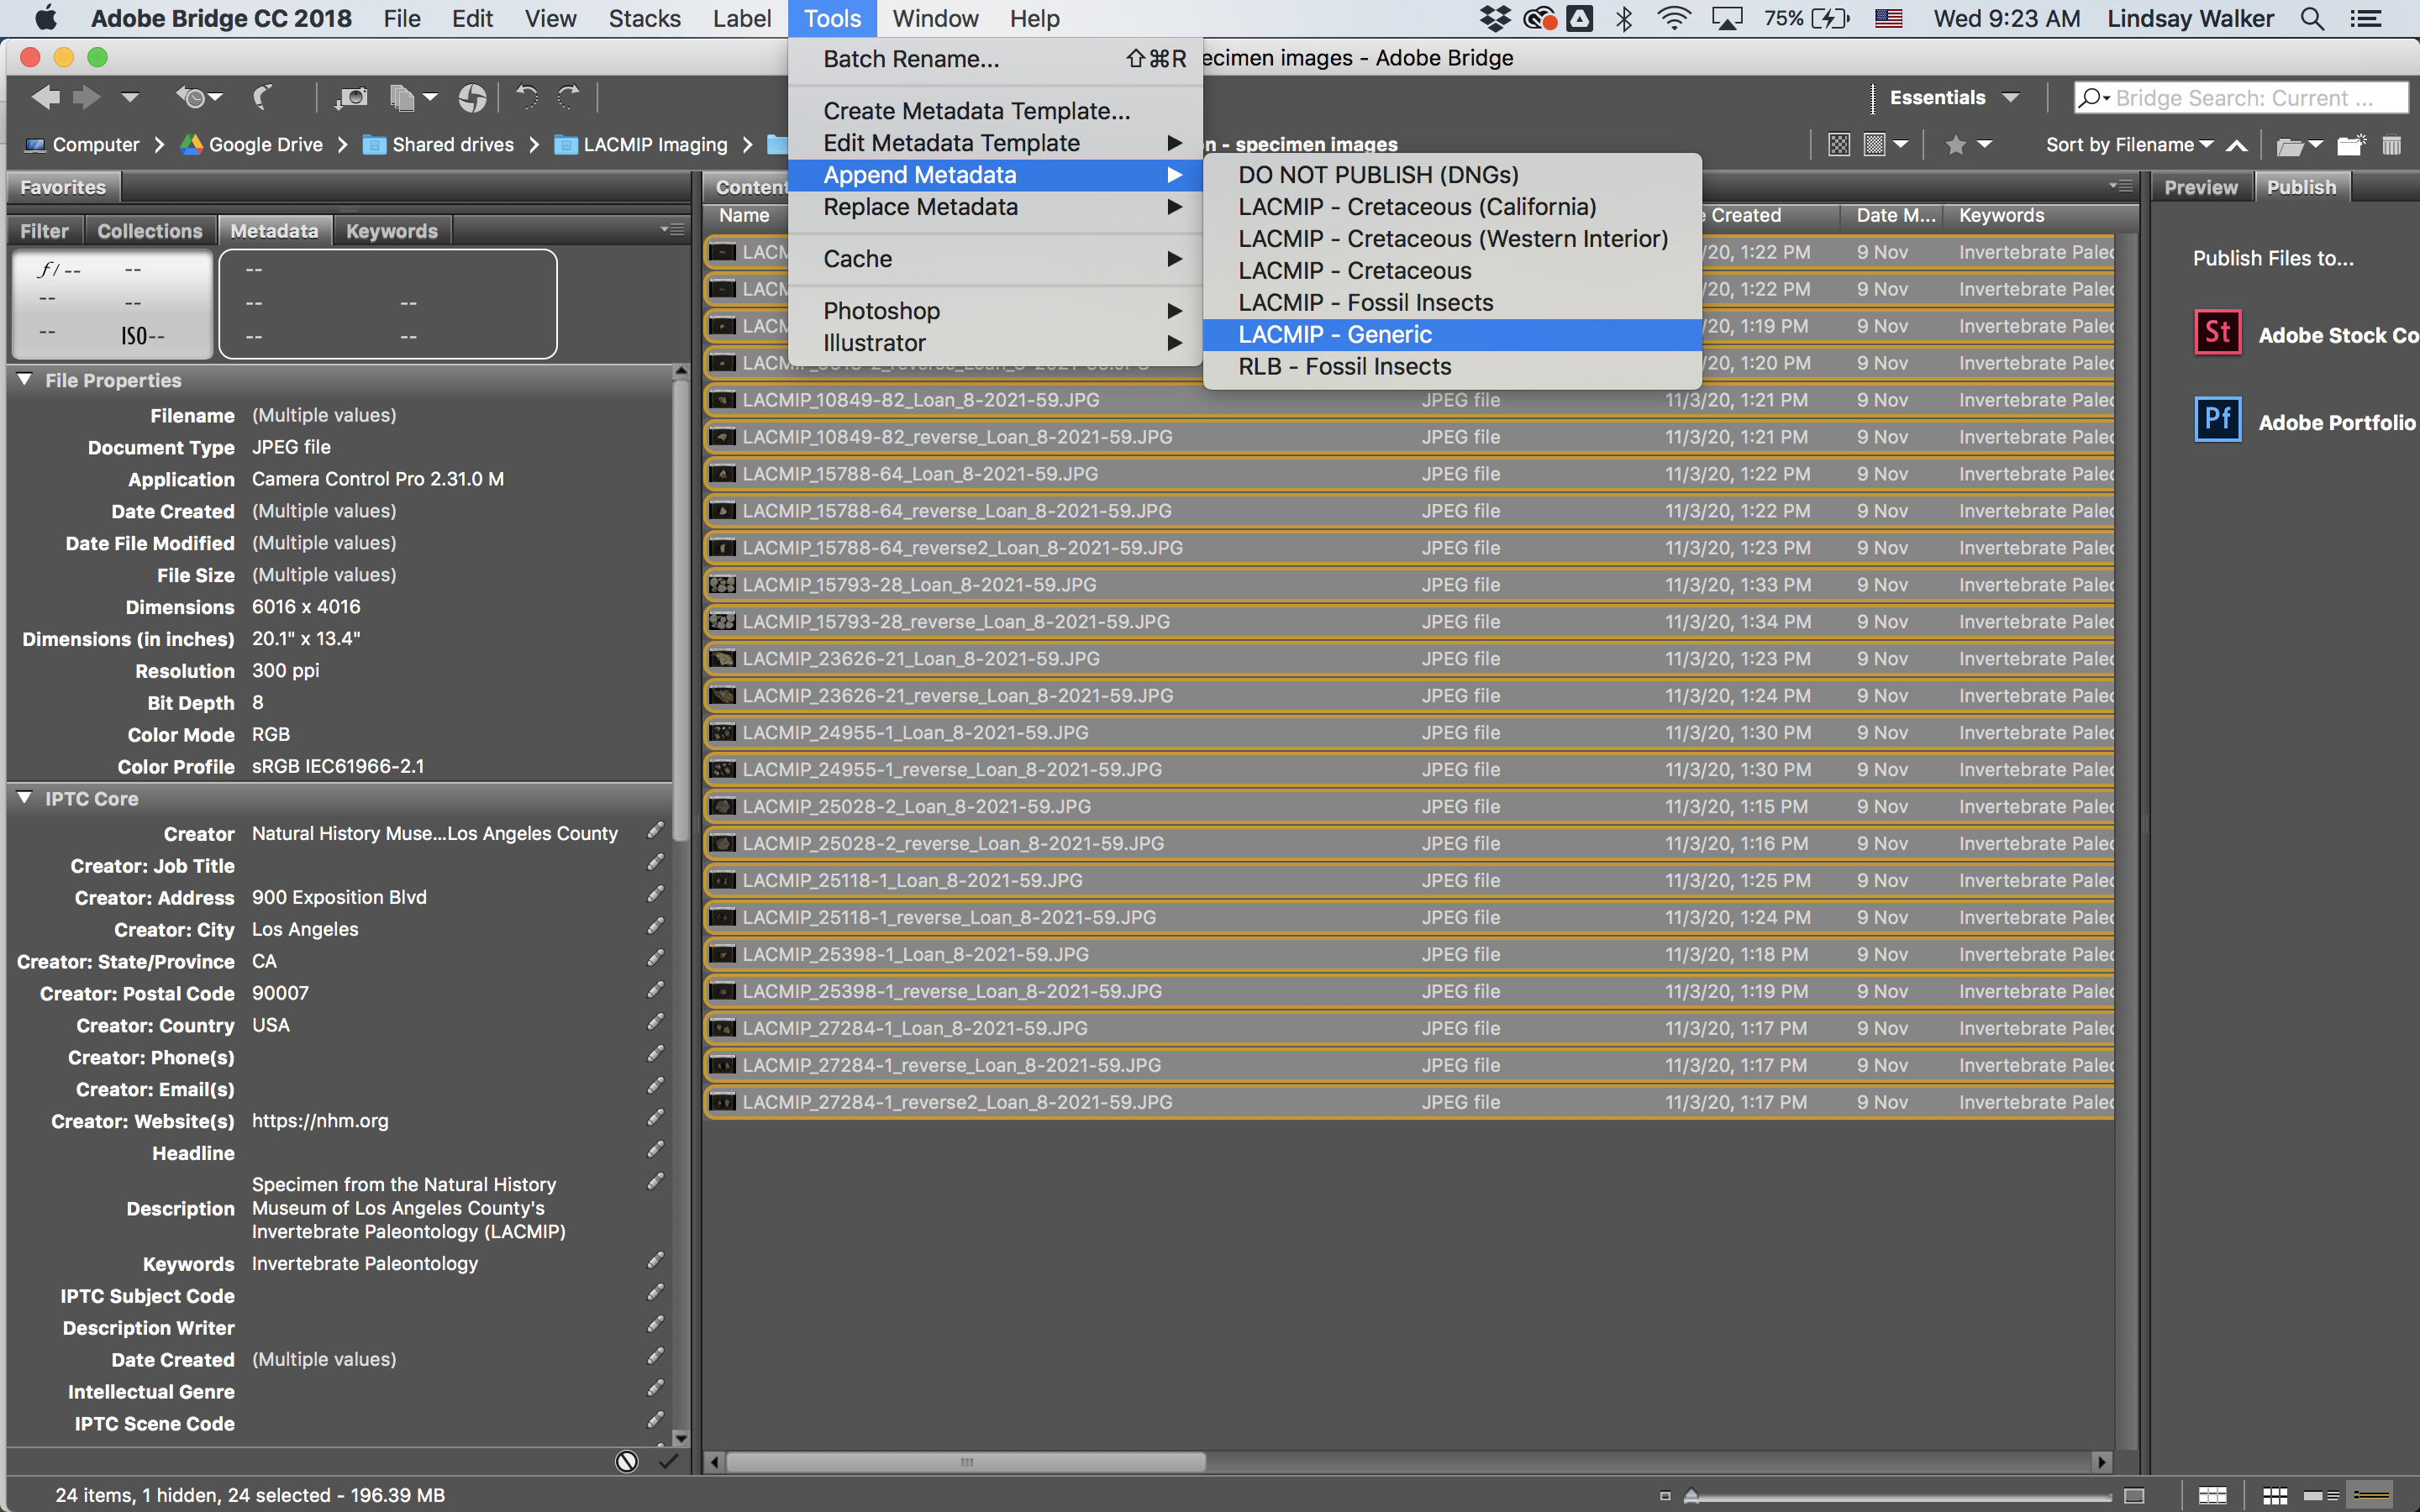
Metadata
Images destined for EMu and the web should have metadata applied to them in Adobe Bridge. To do so, open Adobe Bridge and navigate to the folder containing the images you’d like to append metadata to. Select all images in the folder, then choose Tools > Append Metadata, and select the desired template. (Do not choose Replace Metadata.) The first time you do this, you may need to load your desired metadata template into Bridge: LACMIP Imaging > Imaging Templates.
If you are applying metadata to images after they have been uploaded to Google Drive, this step will be most easily accomplished using Finder and the desktop version of Google Drive for Mac.