Printing Labels
To print labels from EMu you will first need to do a search or retrieve a group to bring up the catalogue records that you want to print labels for.
To managing label printing for general cataloging purposes you may want to set up print groups for each cataloger in advance. Doing so will give you more control over clearing records out of the group after you’ve printed labels for them. To learn more about how to set up a group for this purpose, see the documentation for “Adjusting group security” on the groups page.
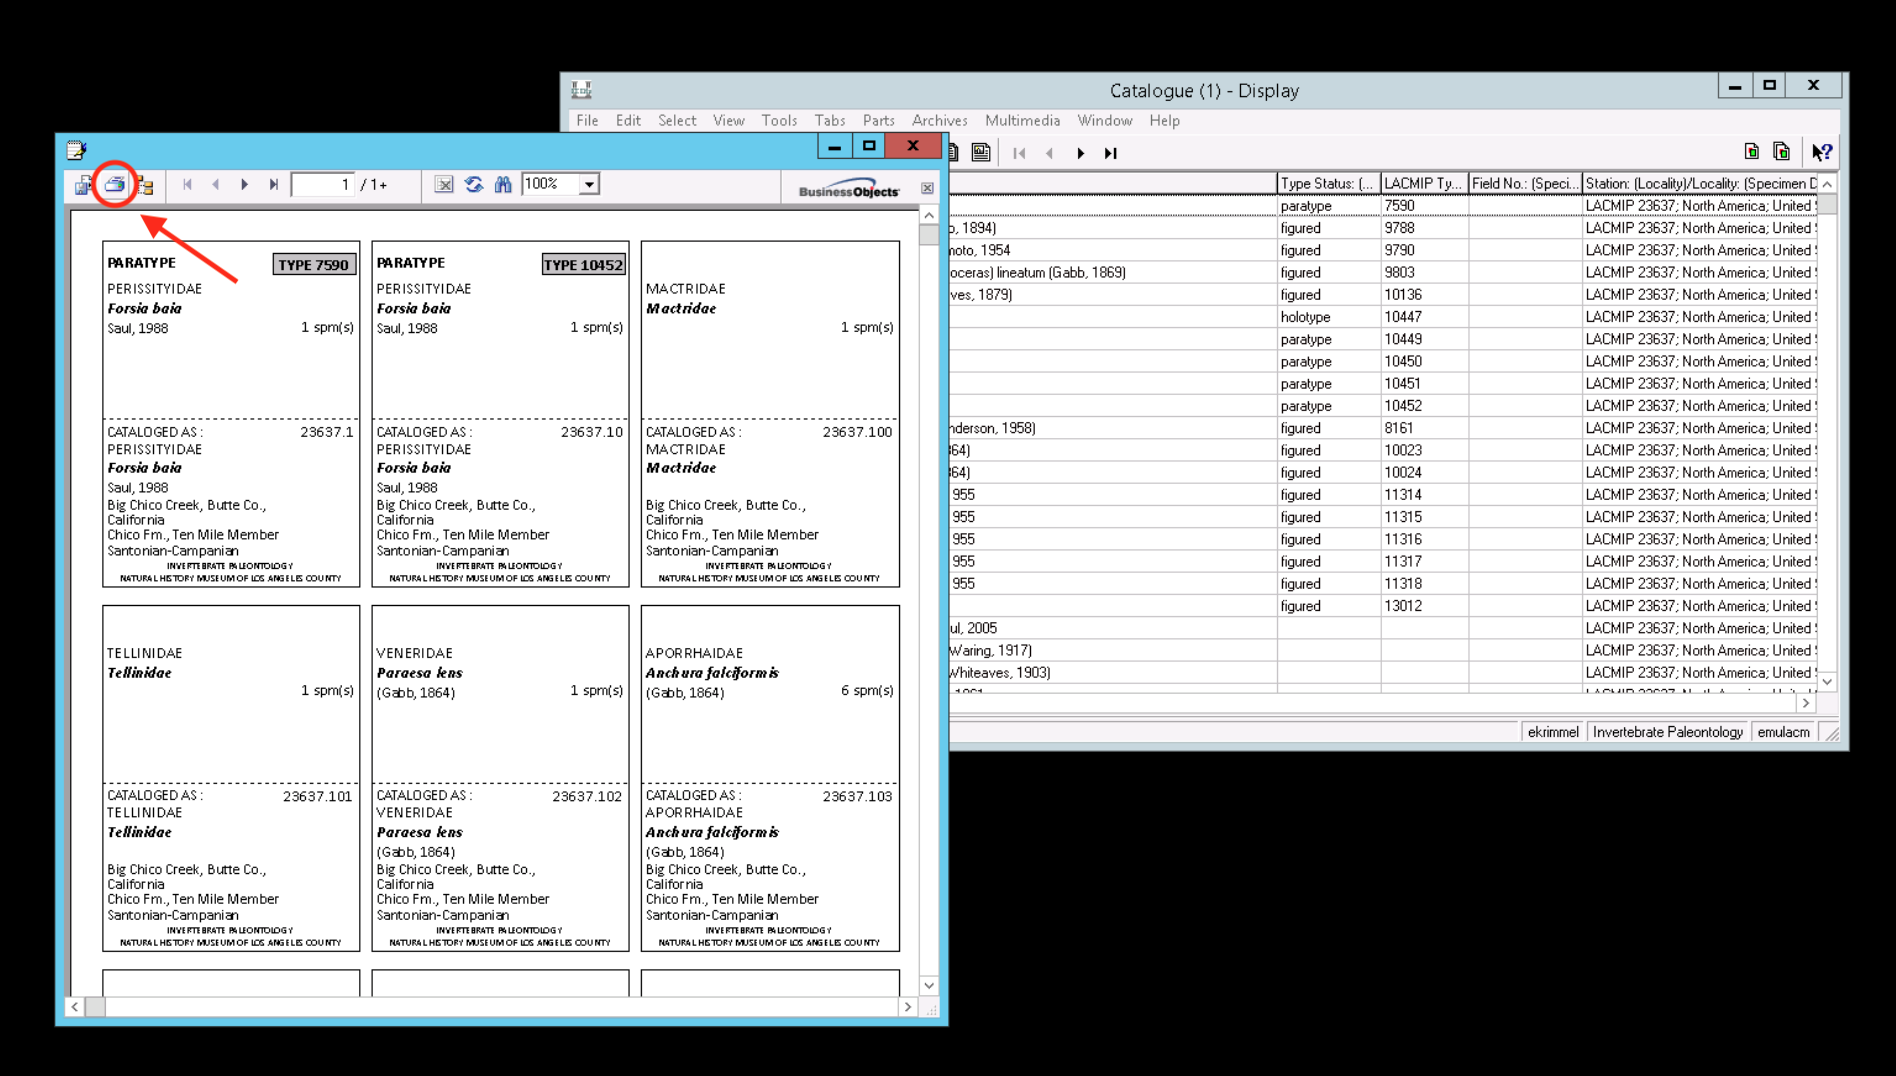
Once you have the search results, select Tools > Reports from the top menu. EMu will bring up a dialog box for you to select what kind of report you’d like to generate. Highlight the label report that you want (see below for options) and click either Report all to include all records in the search results, or Report to include only the records you have selected within the search results. You should now see a new window that looks like the screenshot below.

The Crystal report window that EMu has opened only gives you a preview of the first page of labels. To print or save your labels, click on the Print icon at the top left corner (circled in red in the image above). Leave the settings on the first dialog box (Page Setup) as they are and click OK. In the second dialog box (Print), select Microsoft XSP Document Writer and then click Print. This will allow you to save the label report as an XPS file, which can then be printed. The file needs to be saved as an .xps file and not an .oxps file in order for the file to print properly. If you are working via the VPN, you will need to download the XPS file onto your local machine and print from there.
| Step | Printing Labels via the VPN… |
|---|---|
| 1 | To print from your local machine, save the XPS file to your VPN desktop. Note: The VPN desktop is not meant for long term storage of files. IT will routinely delete extra material off the VPN. Delete your file from the Desktop after printing has been completed. |
| 2 | Next, drag and drop the file into the Downloads folder which is nested under G on Guacamole RDP under This PC. |
| 3 | A pop-up on the bottom right hand corner of the VPN titled File Transfers will display a clickable link of your downloaded XPS file. Open the downloaded file. Note: The formatting in this download becomes visually distorted and will not represent the true formatting of the XPS file. |
| 4 | Right-click the opened document, click Print, choose the “Brother HL-L8260CDW series” printer, click Preferences: Under 2 sided/Booklet choose “None” from the dropdown menu and under Media Type choose “Thick paper” from the dropdown menu. Click OK then Print. |
Please note that you cannot print this type of file from a Mac computer. LACMIP labels are set up to use the XPS format versus something more portable, e.g. PDF, because of restrictions with the remote desktop version of Adobe Acrobat.
Label report templates
Catalogue module
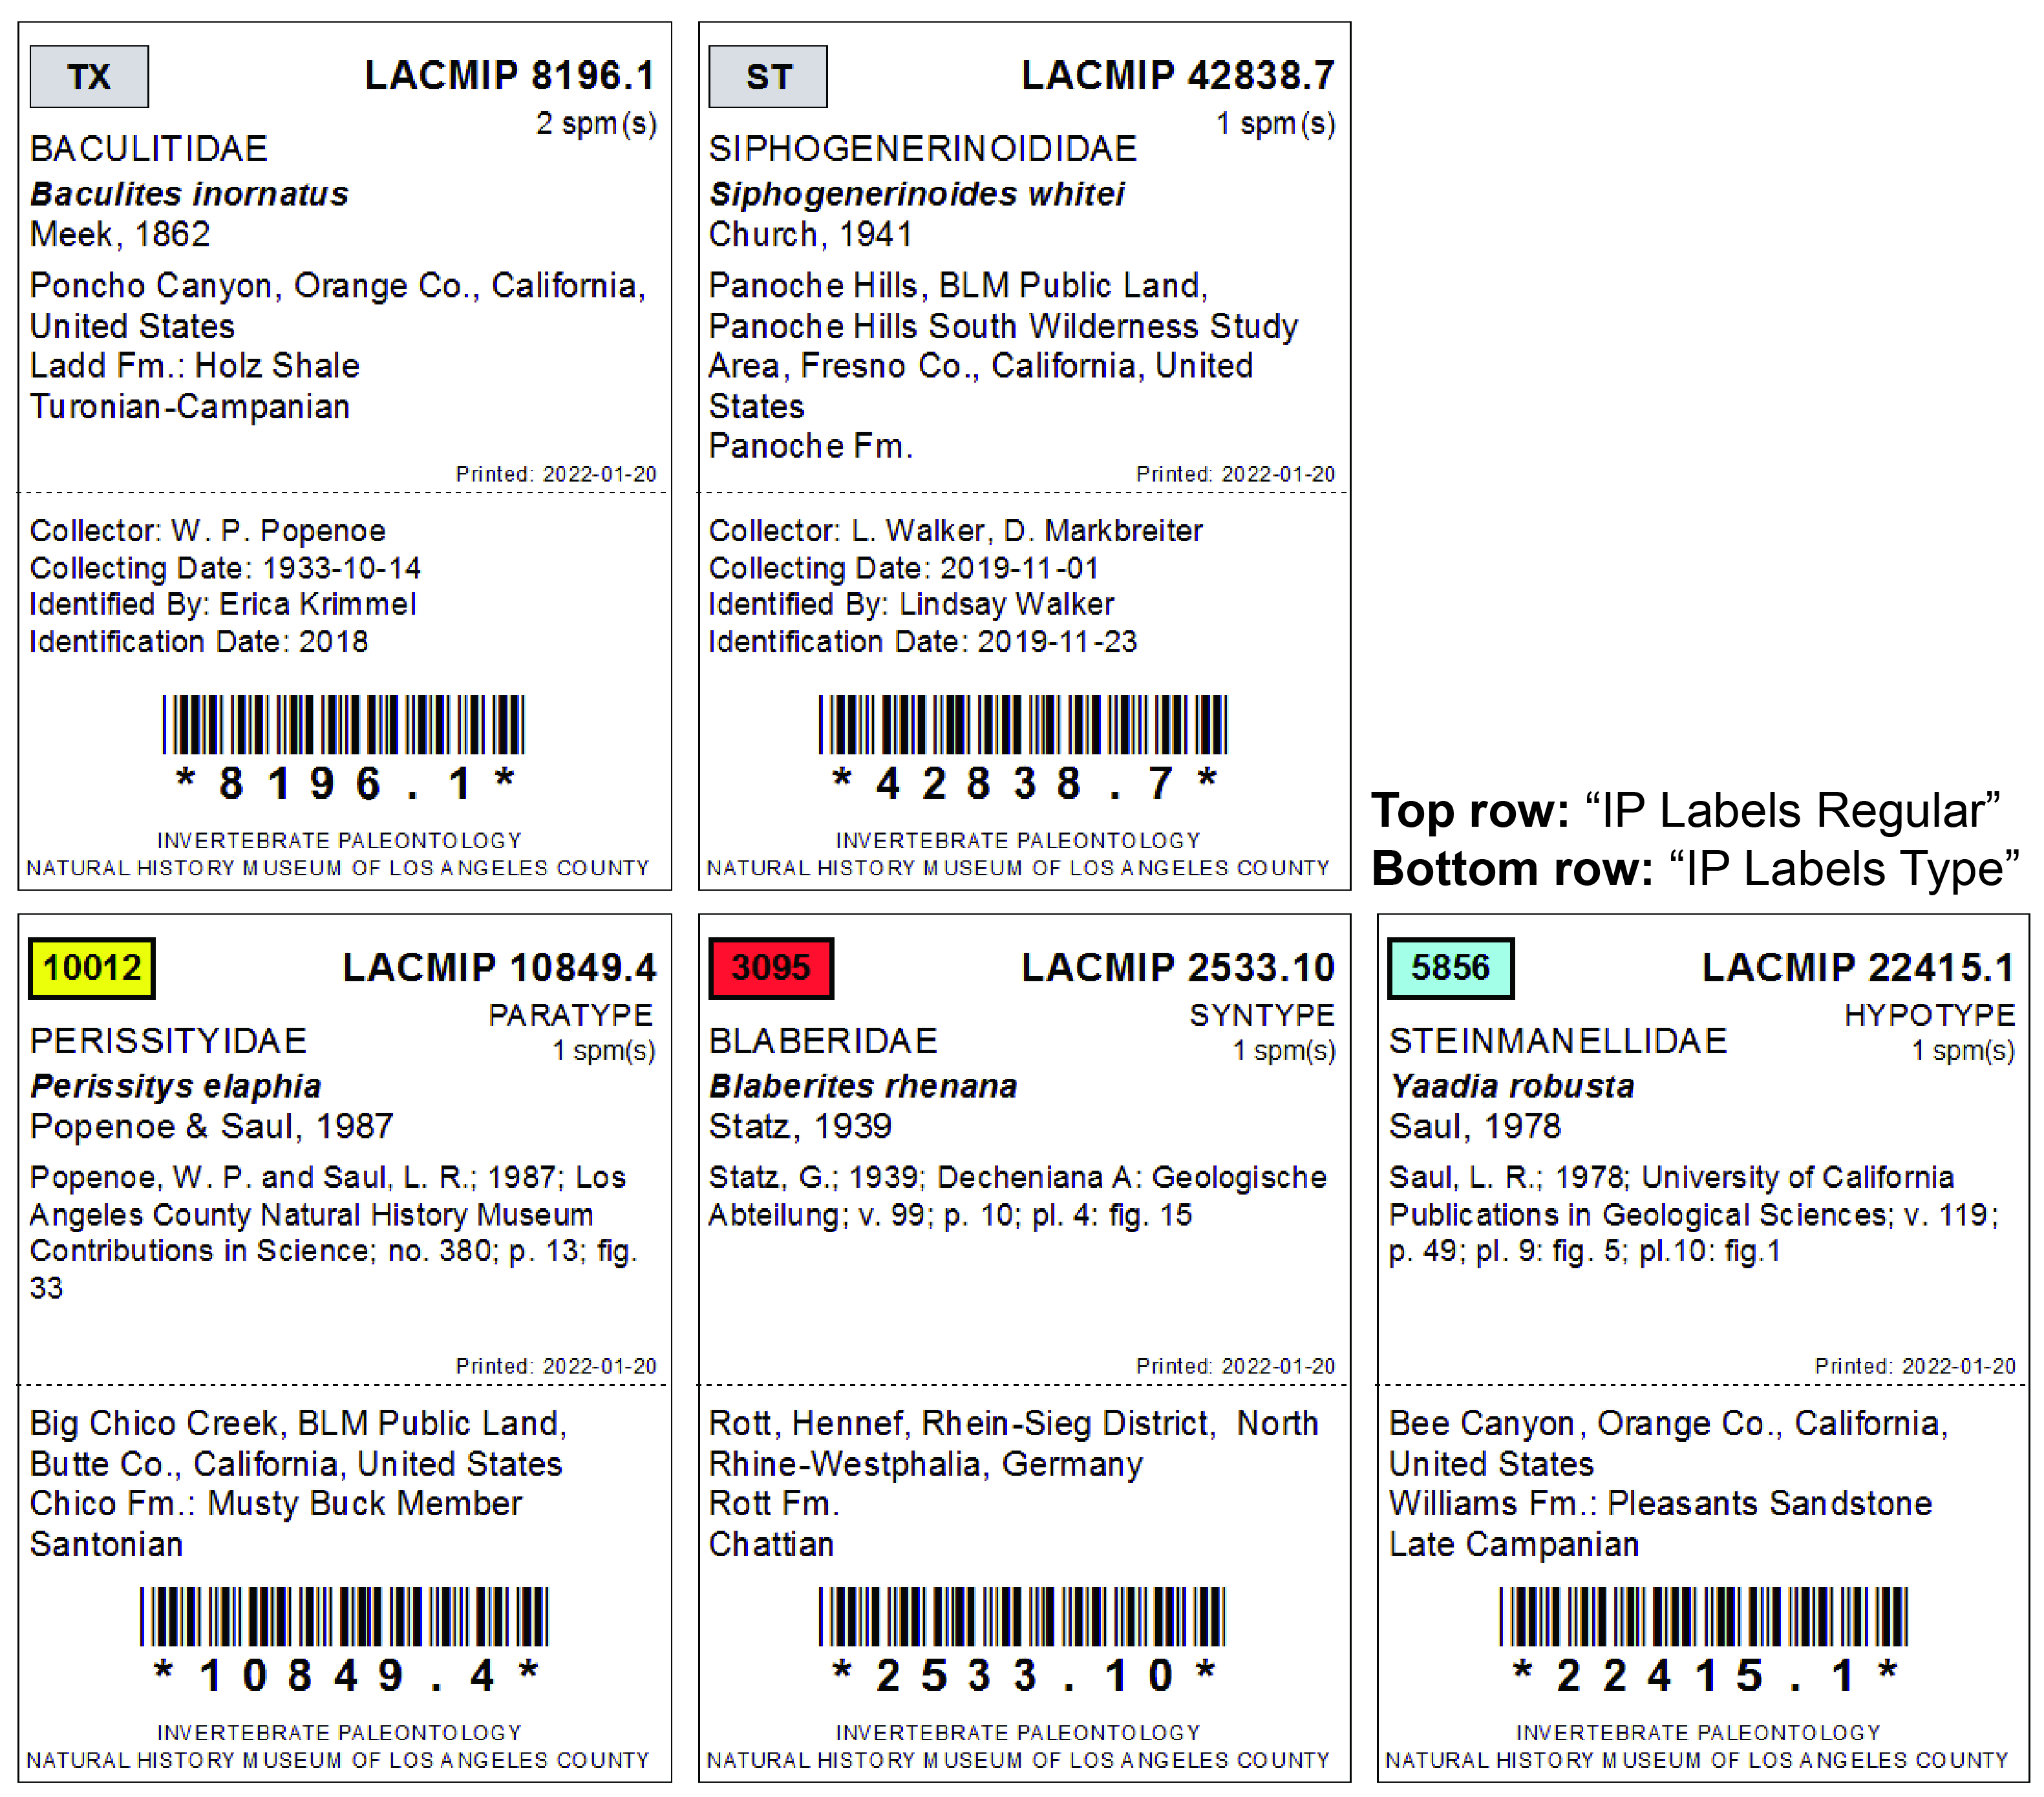
LACMIP currently has two different label templates. These have been created by the Museum’s database manager in Crystal Reports; please contact him if you need modifications to either the layout of or the data being pulled into these reports.
IP Labels Regular is for the majority of the specimen labels you will print. You should make sure that the specimens in your search results belong to either the “ED”, “ST”, or “TX” collection when using this label report.
IP Labels Type is for printing type specimen labels, which have a significantly different layout than regular specimen labels. You should make sure that you only have specimens that belong to the “TYPE” collection in your search results when you are using this label report.

Sites module
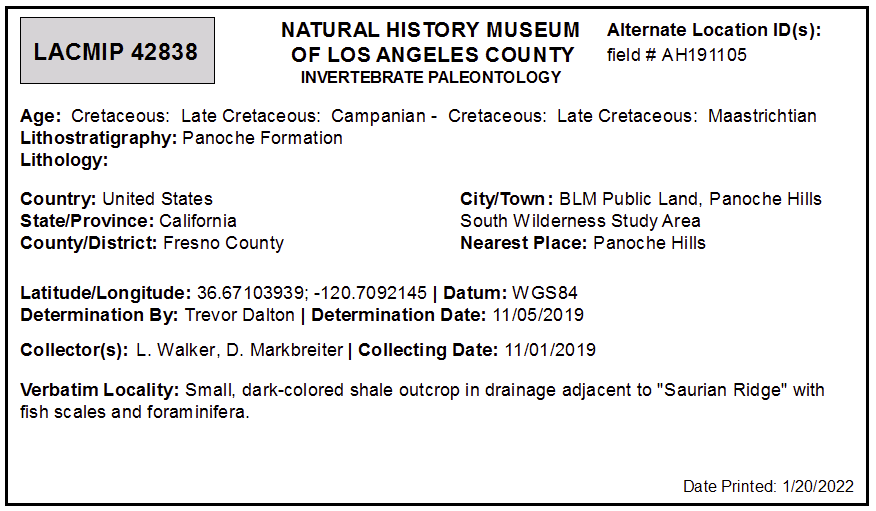
IP Locality Cards are for printing and storage with specimens in the stratigraphic collections.
