Inventorying (SpecimenPro)
This inventory workflow was developed to digitally inventory collections with a 256 GB iPad Mini 6 using the app “SpecimenPro” developed by Mineral Sciences Curator Aaron Celestian. Discover the readme file to see what the app does and how it works.
All fields are optional, but it’s best to provide as much information as possible for each specimen at the time of initial entry. Be consistent in how you enter data. For example, if you use the abbreviation “AZ” for Arizona, continue using that format throughout.
If you have any questions, contact your supervisor.
SpecimenPro Workflow
| Step | On the iPad… |
|---|---|
| 1 | Unlock the iPad with the code “123456” |
| 2 |  Open the SpecimenPro app on the home screen. Open the SpecimenPro app on the home screen. |
| 3 | 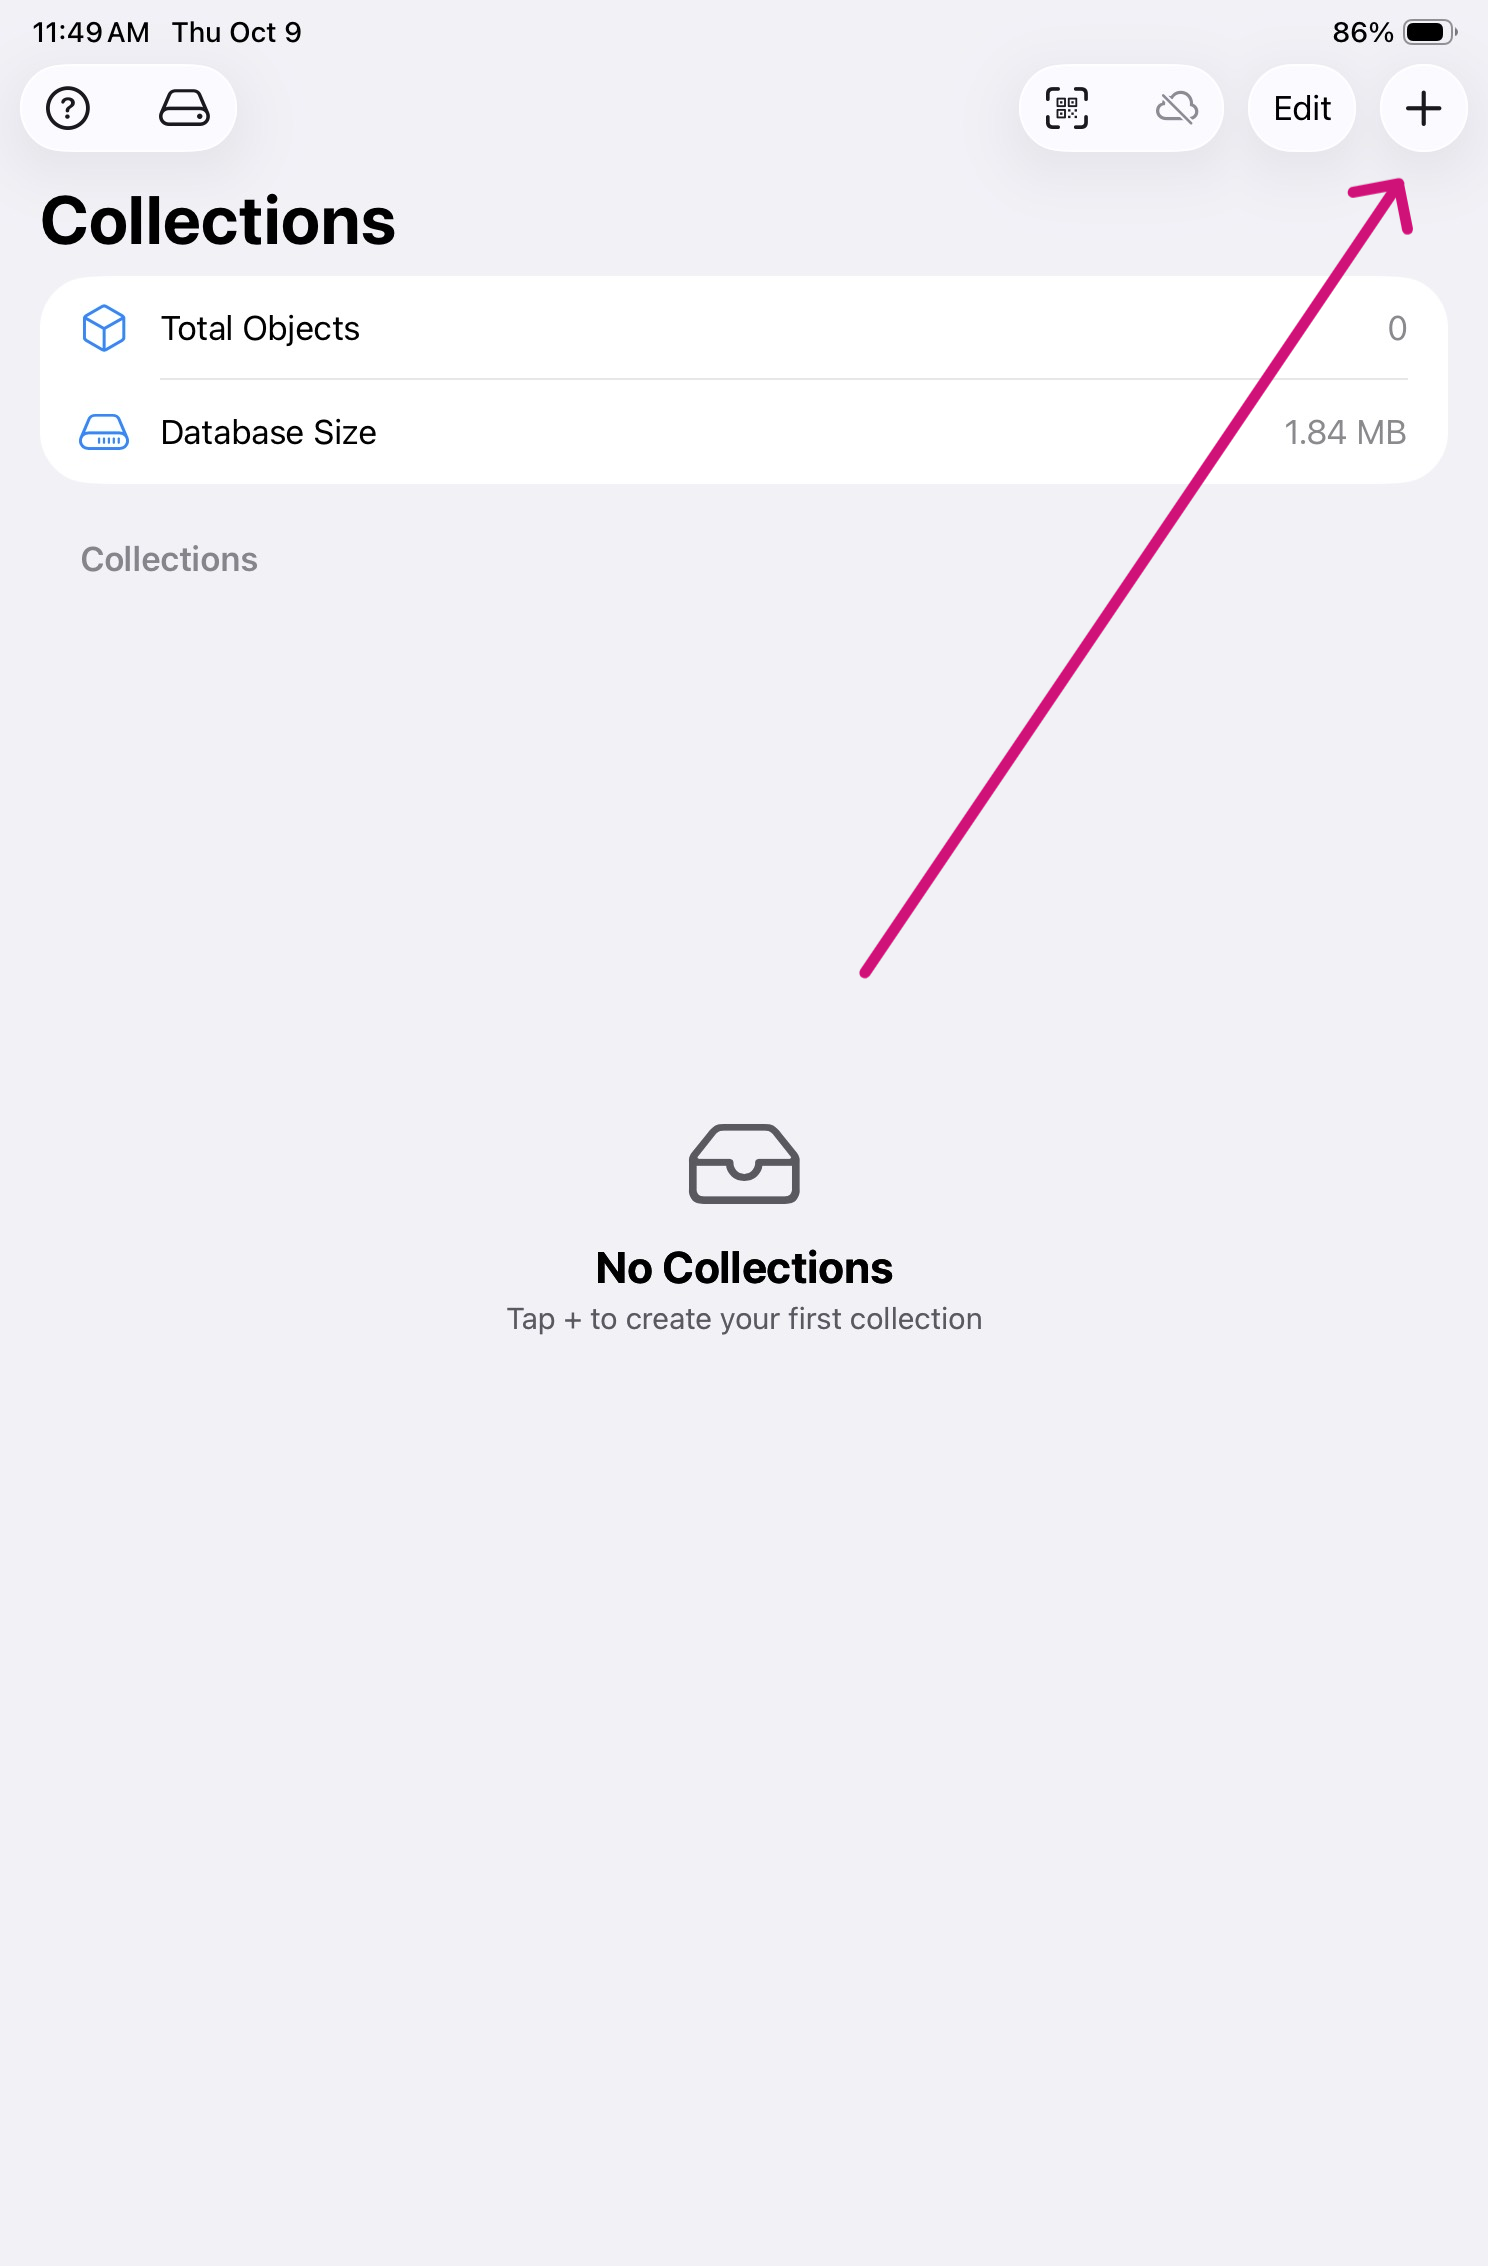 In the top right hand corner of the app, click the plus symbol. In the top right hand corner of the app, click the plus symbol. |
| 4 | 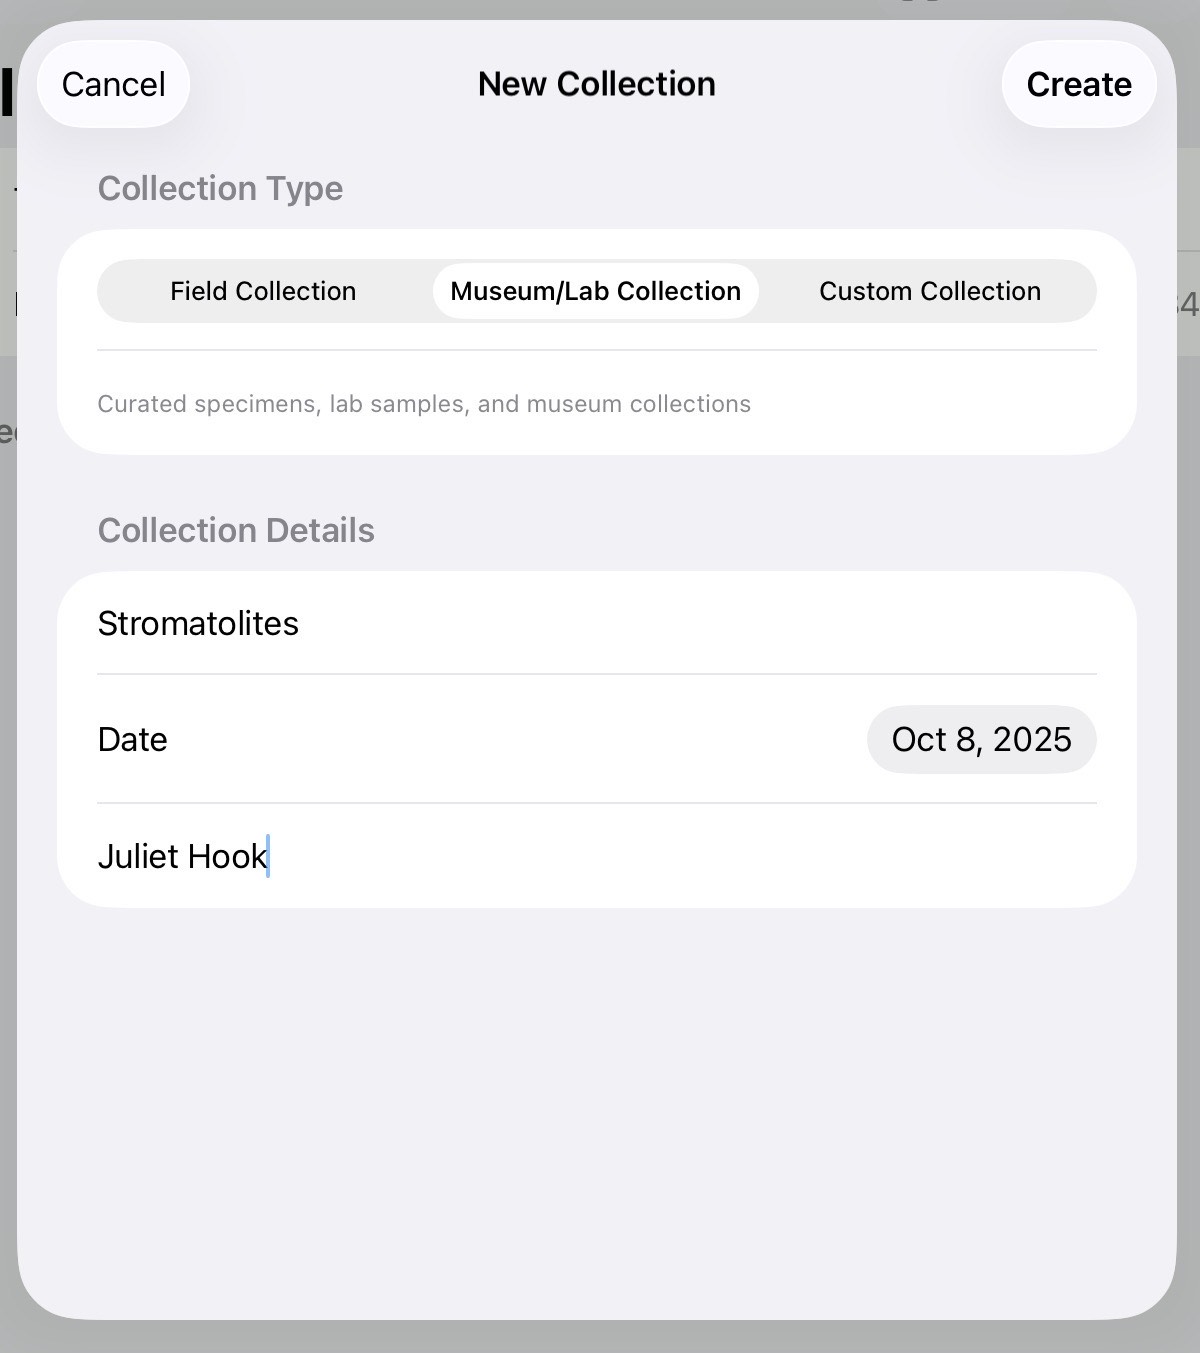 Make sure the window pop-up has the Museum/Lab Collection banner highlighted and fill in the collection details including, name of the collection, date, and the name of the collector. Make sure the window pop-up has the Museum/Lab Collection banner highlighted and fill in the collection details including, name of the collection, date, and the name of the collector. |
⚠️ A collection should be created only on Day 1 of the project. All subsequent specimens belonging to the same collection must be added to the existing collection database.
| 5 | 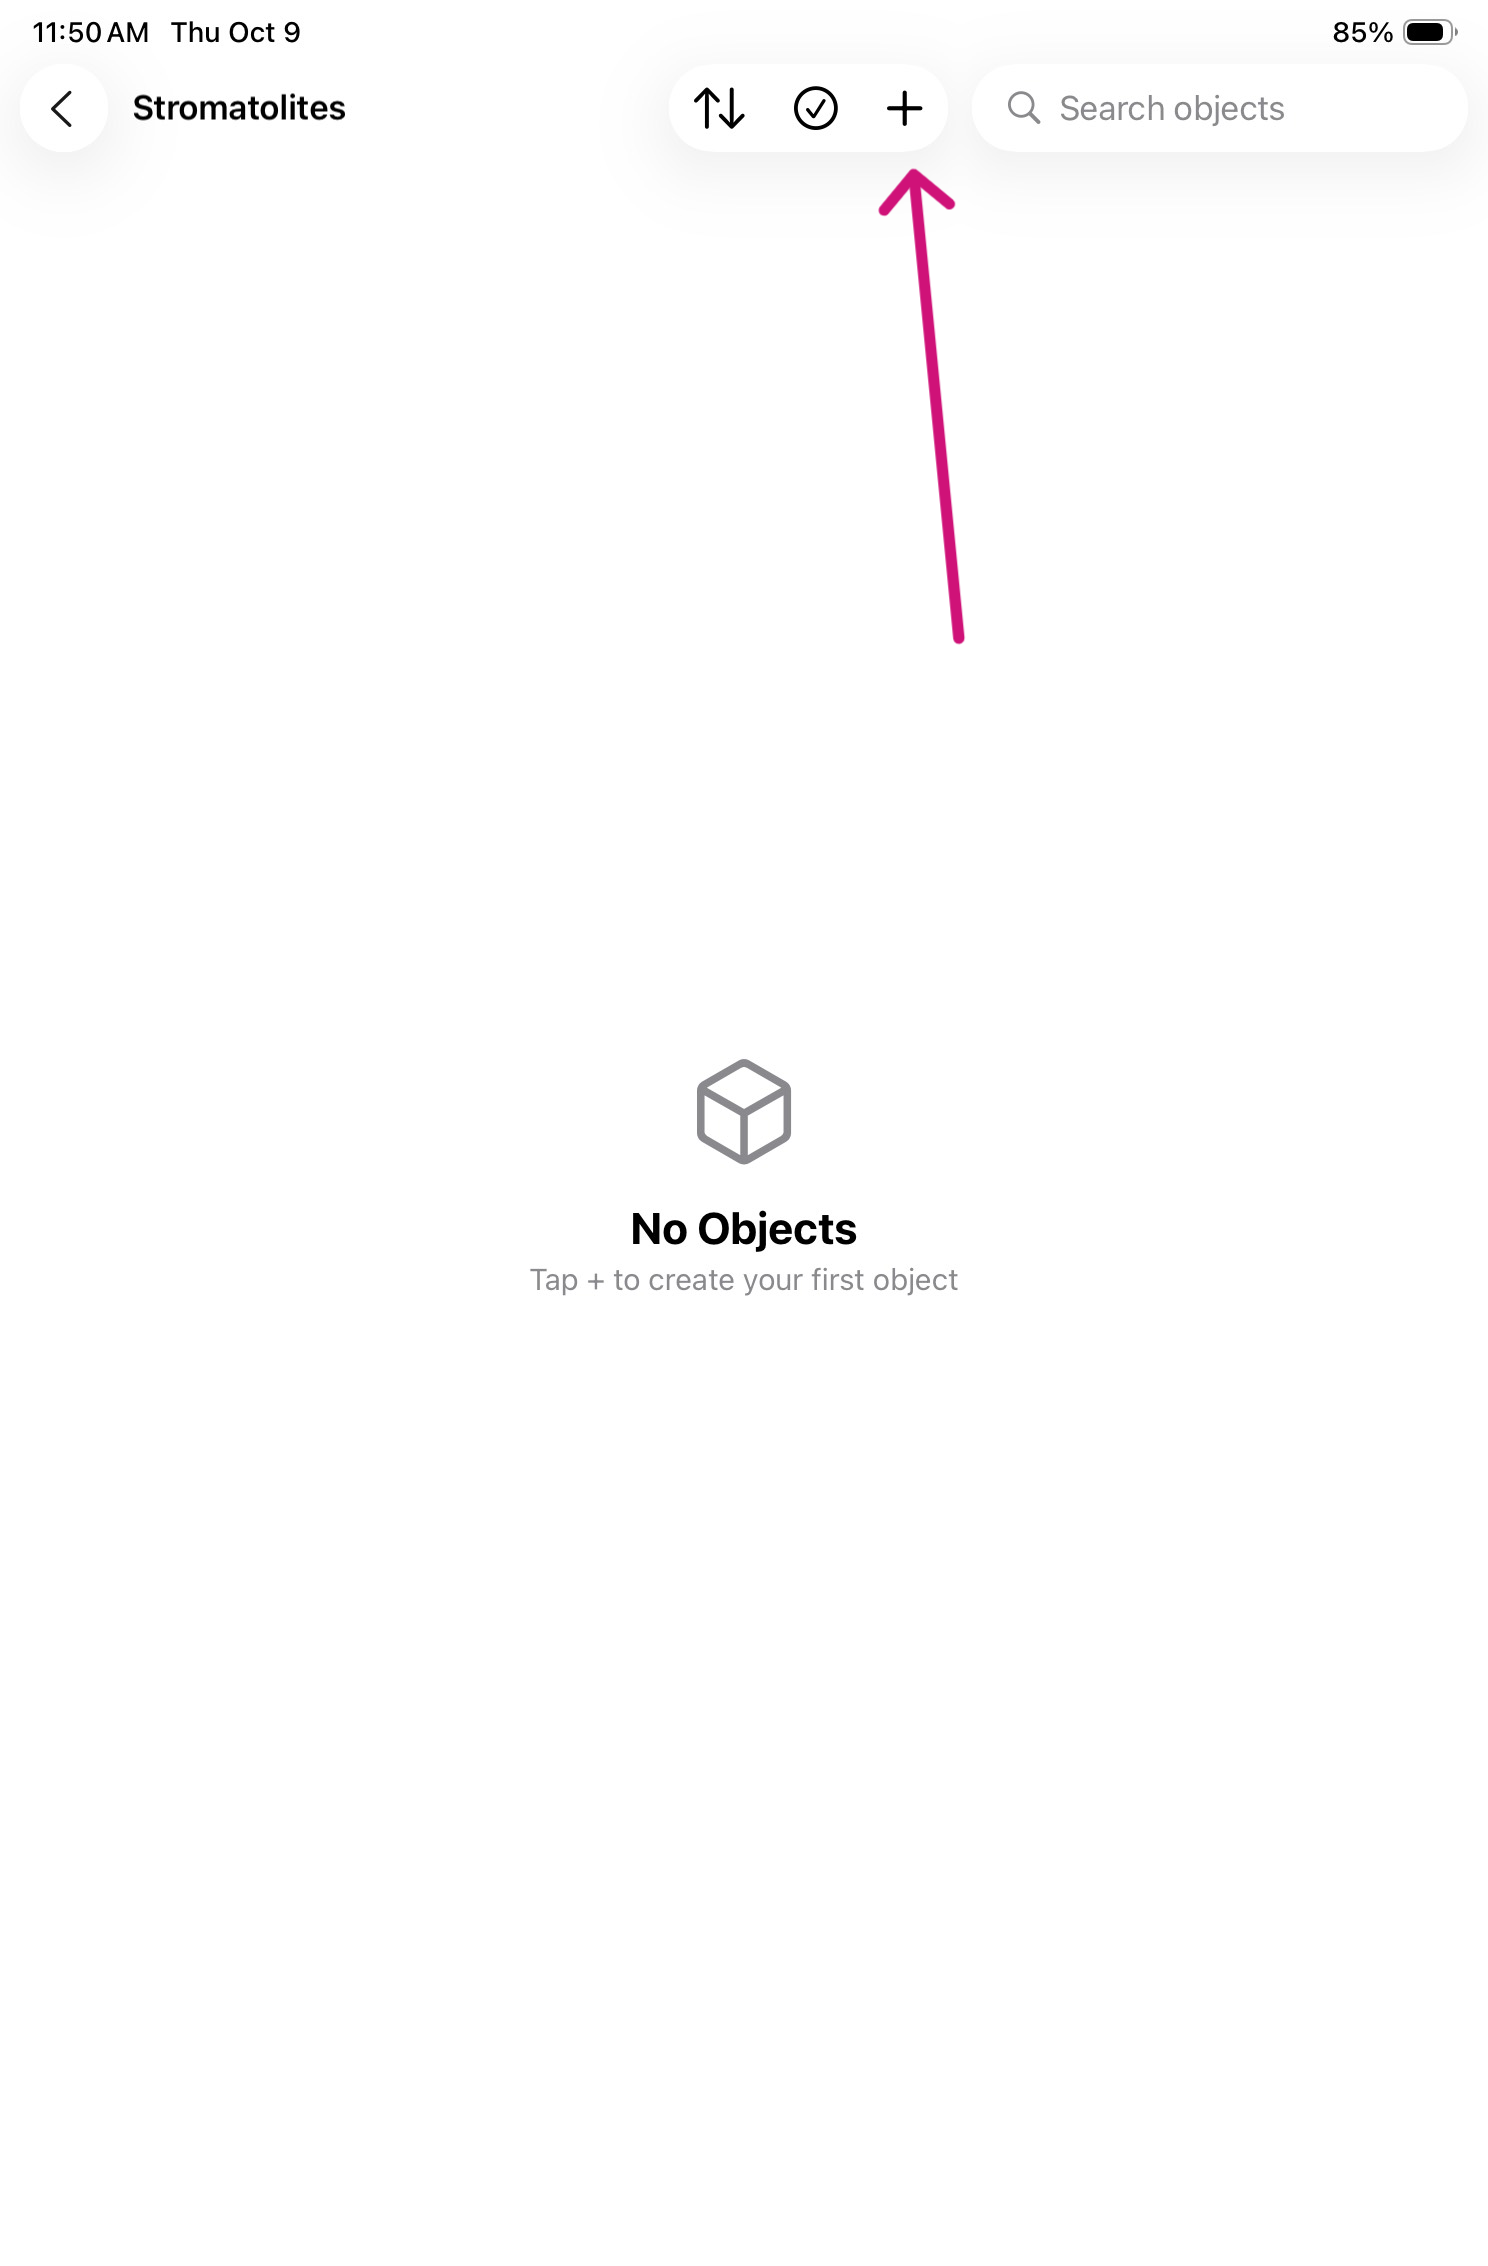 In the Collections portal, click the plus symbol to add a new specimen to the collection. In the Collections portal, click the plus symbol to add a new specimen to the collection. |
| Step | Under Basic Information… |
|---|---|
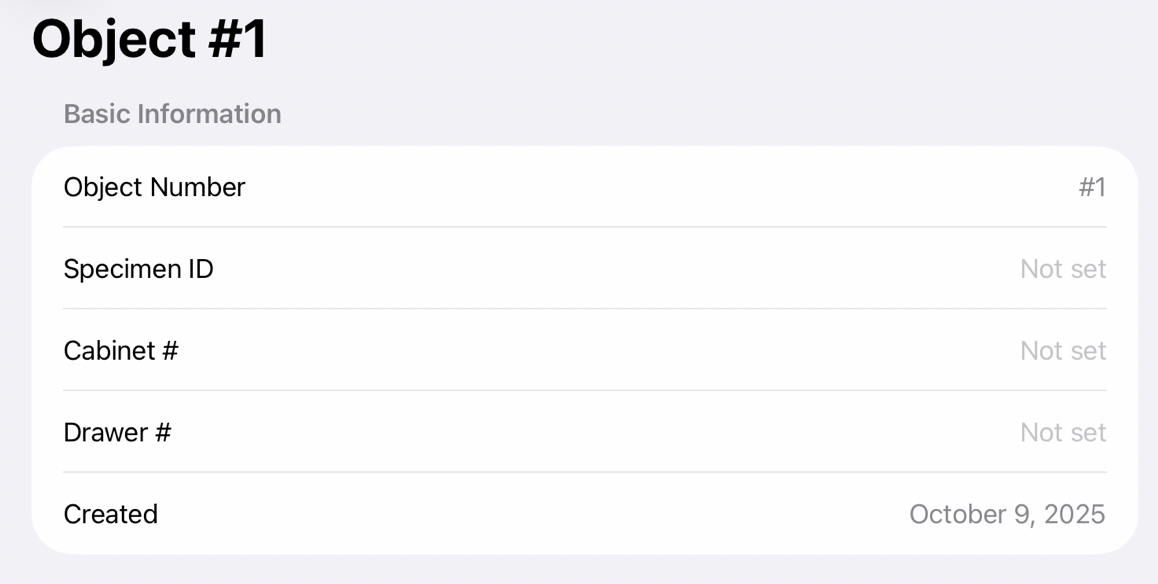
| 6 | The object number is generated by the app. To add the Specimen ID, locate the number assigned to the specimen, typically written directly on it. For example, a series like “5 of 3/8/85”. |
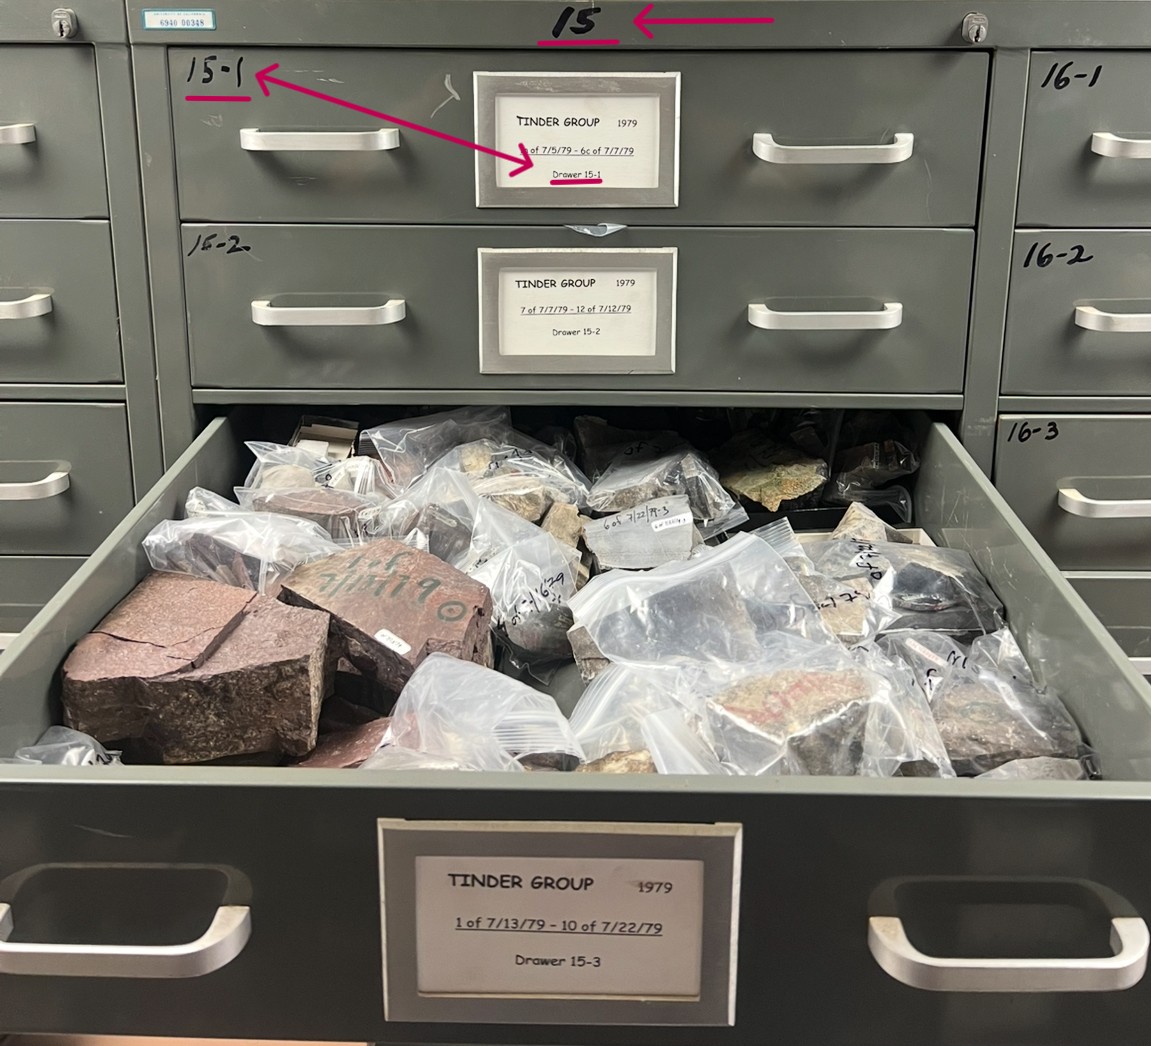
| 7 | Record the cabinet and drawer numbers where the specimen is physically stored. For example, Cabinet 15 and Drawer 15-1. |
| Step | Under Tags… |
|---|---|
| 8 | Tags are optional. If your supervisor indicates that the specimen is of “exhibit quality,” type “display” and click the plus sign to add the tag. |
| Step | Under Photos… |
|---|---|
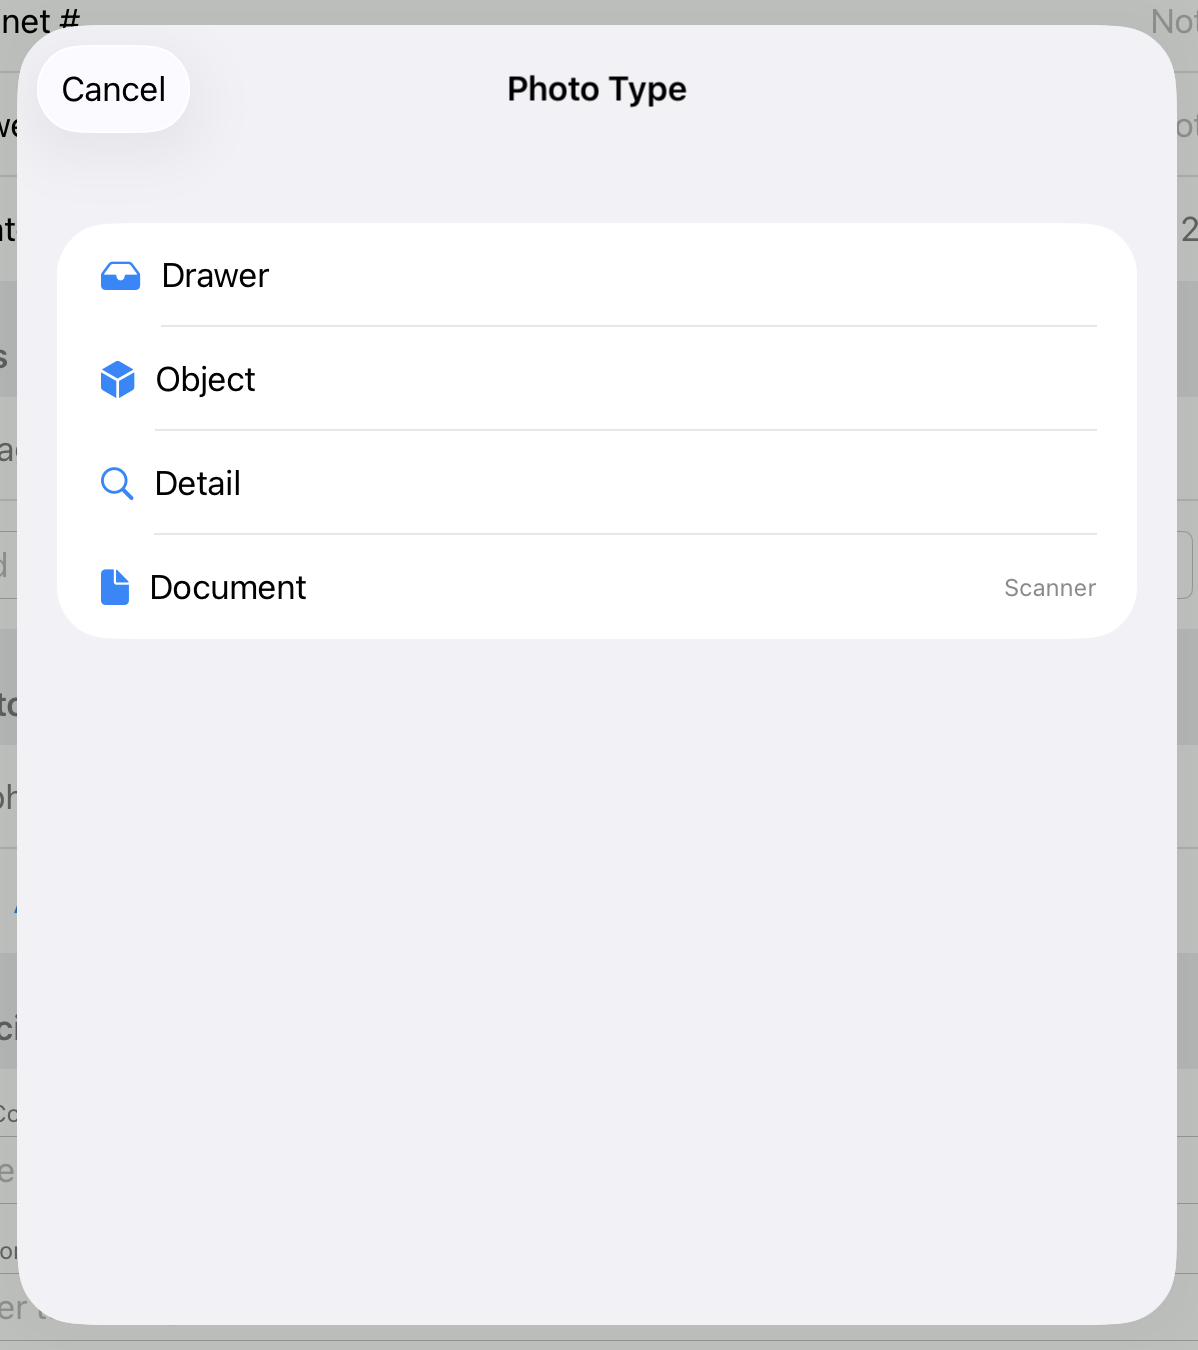
| 9 | Tap “Add Photo” then “Take Photo”. This is the opportunity to take a top-down photo of the entire drawer, a photo of the specimen with its tag (object), and an up close image of the specimen “detail”. If there is an associated entry in a field notebook and/or a specimen label, use the document option to scan the text. |
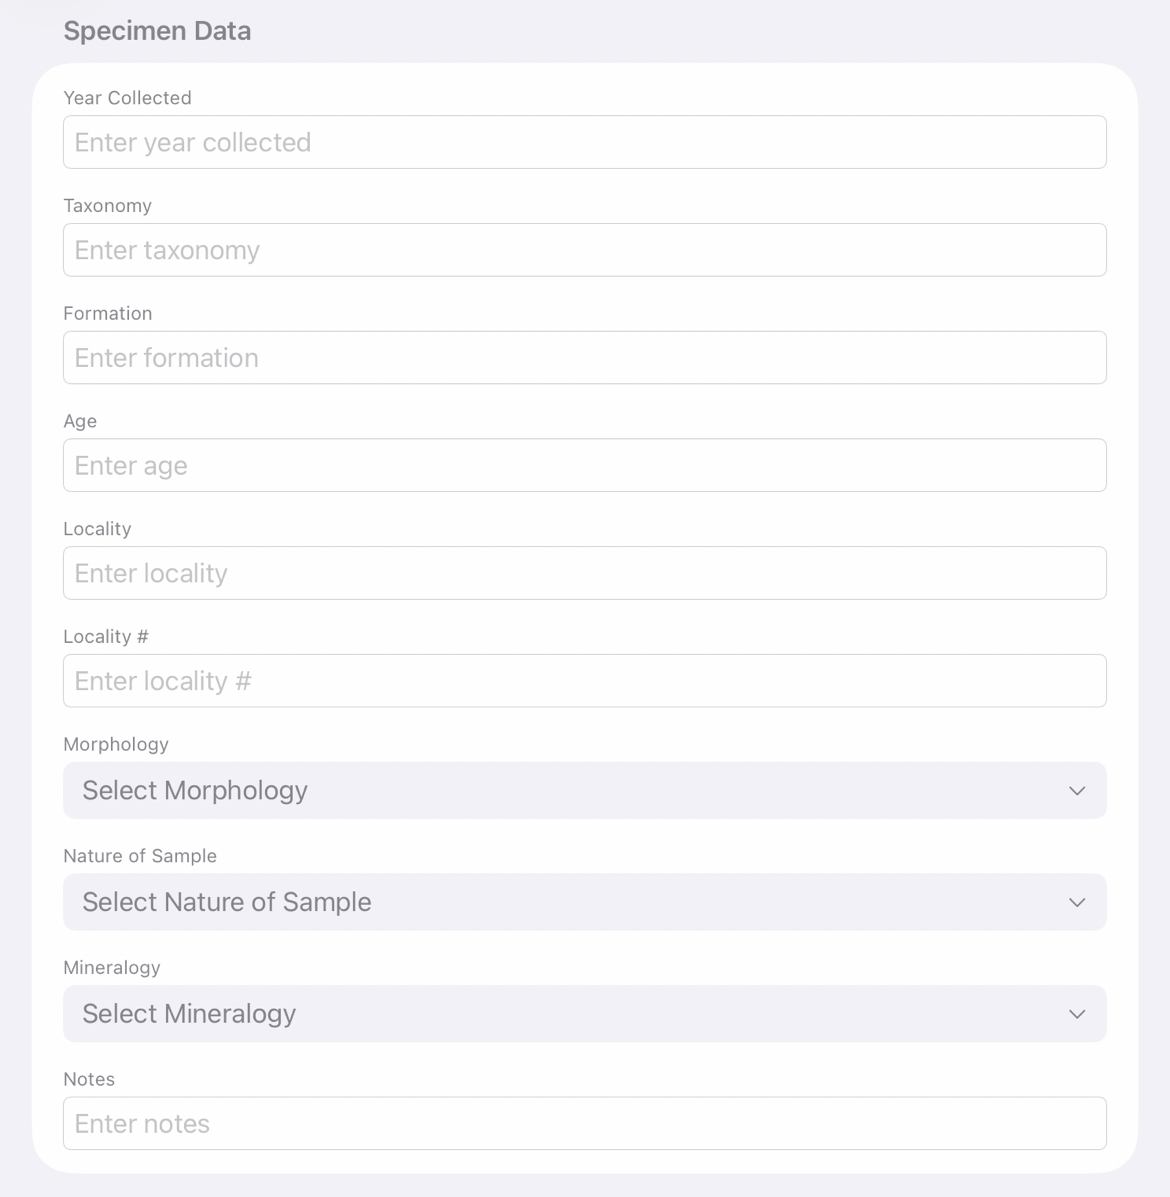
| Step | Under Specimen Data… |
|---|---|
| 10 | Add the year collected. Typically, that is reflected in the specimen id written on the specimen. |
| 11 | Add the taxonomy (Latin name: Cryptozoön proliferum) of the specimen. |
| 12 | Add the geological formation. |
| 13 | Add the age. |
| 14 | Add locality information like if the specimen was collected in Arizona. |
| 15 | Add the locality #. |
| 16 | Using the drop-down menu, select the morphology that best describes the specimen. If you cannot find the appropriate morphology, use the “Add New..” to create a new option for the morphology drop down menu. |
| 17 | Using the drop-down menu, select the nature of sample that best describes the specimen (ie slab, hand sample, thin section). If you cannot find the appropriate morphology, use the “Add New..” to create a new option for the nature of sample drop down menu. |
| 18 | Using the drop-down menu, select the mineralogy that best describes the specimen. |
| 19 | Notes is a free text field. Add any pertinent information that does not fit in the other fields. |
| Step | Under Voice Notes… |
|---|---|
| 20 | 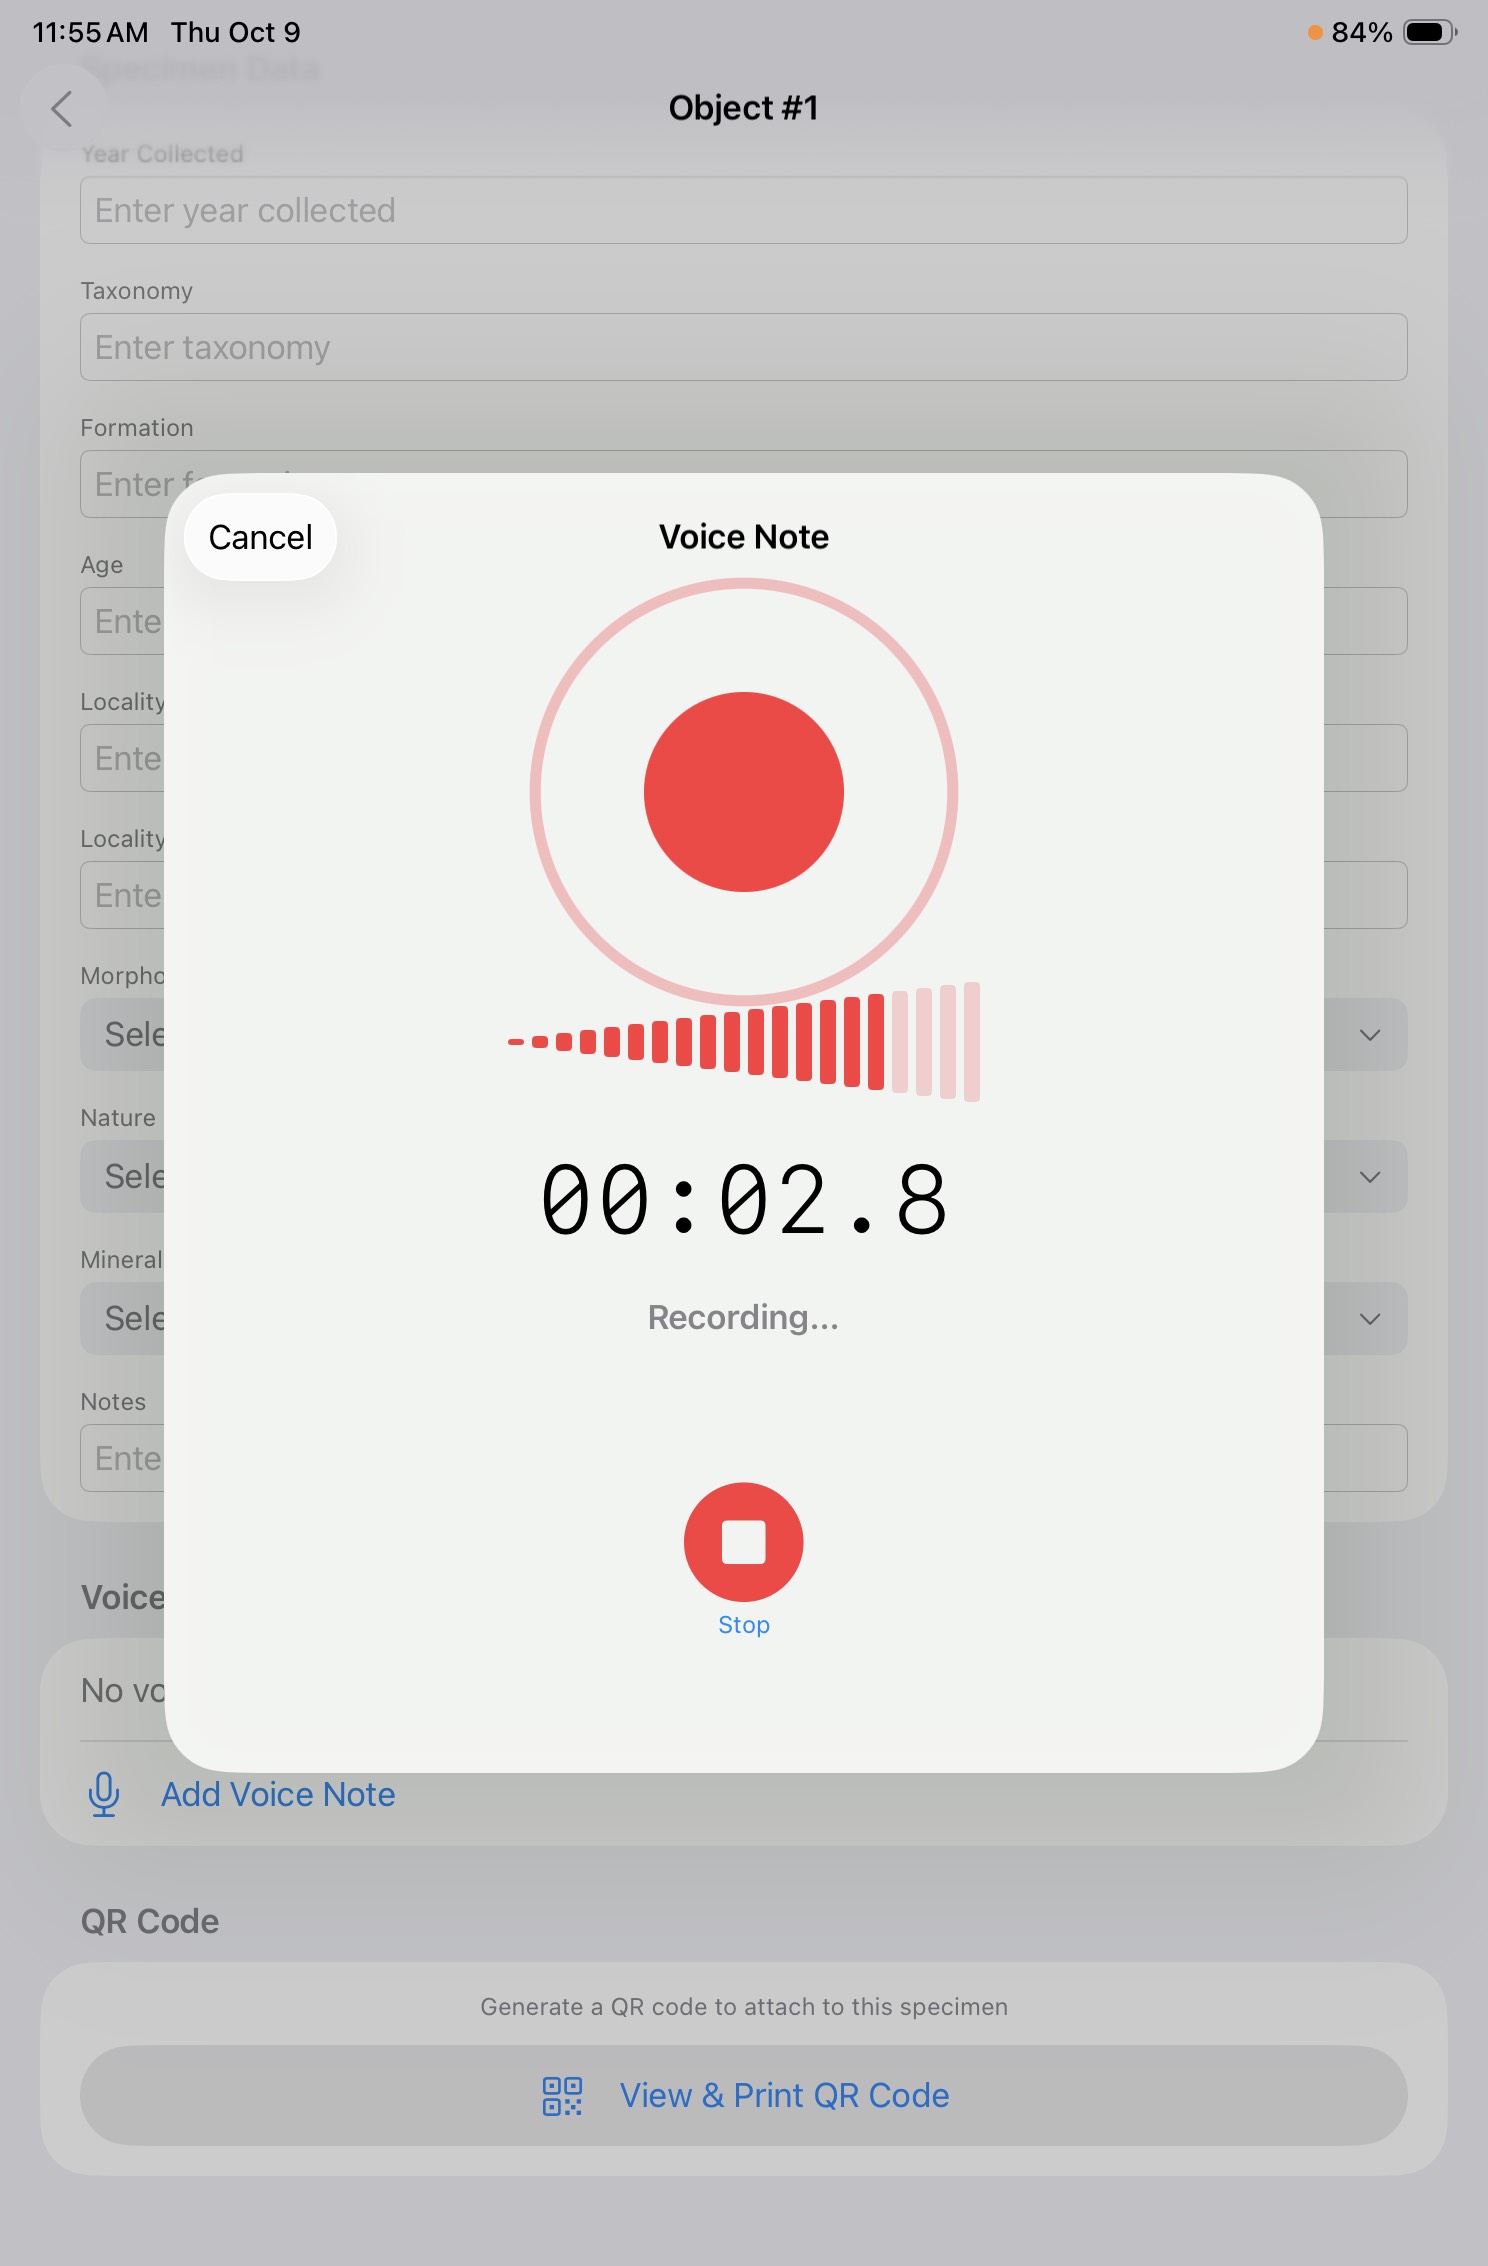 Record any relevant voice notes from the collector. Record any relevant voice notes from the collector. |
Printing QR Codes
Each specimen entry receives a system generated QR code. Individual QR codes can be viewed and printed within the specimen record however the default size of the QR code will take up the a full printer page.
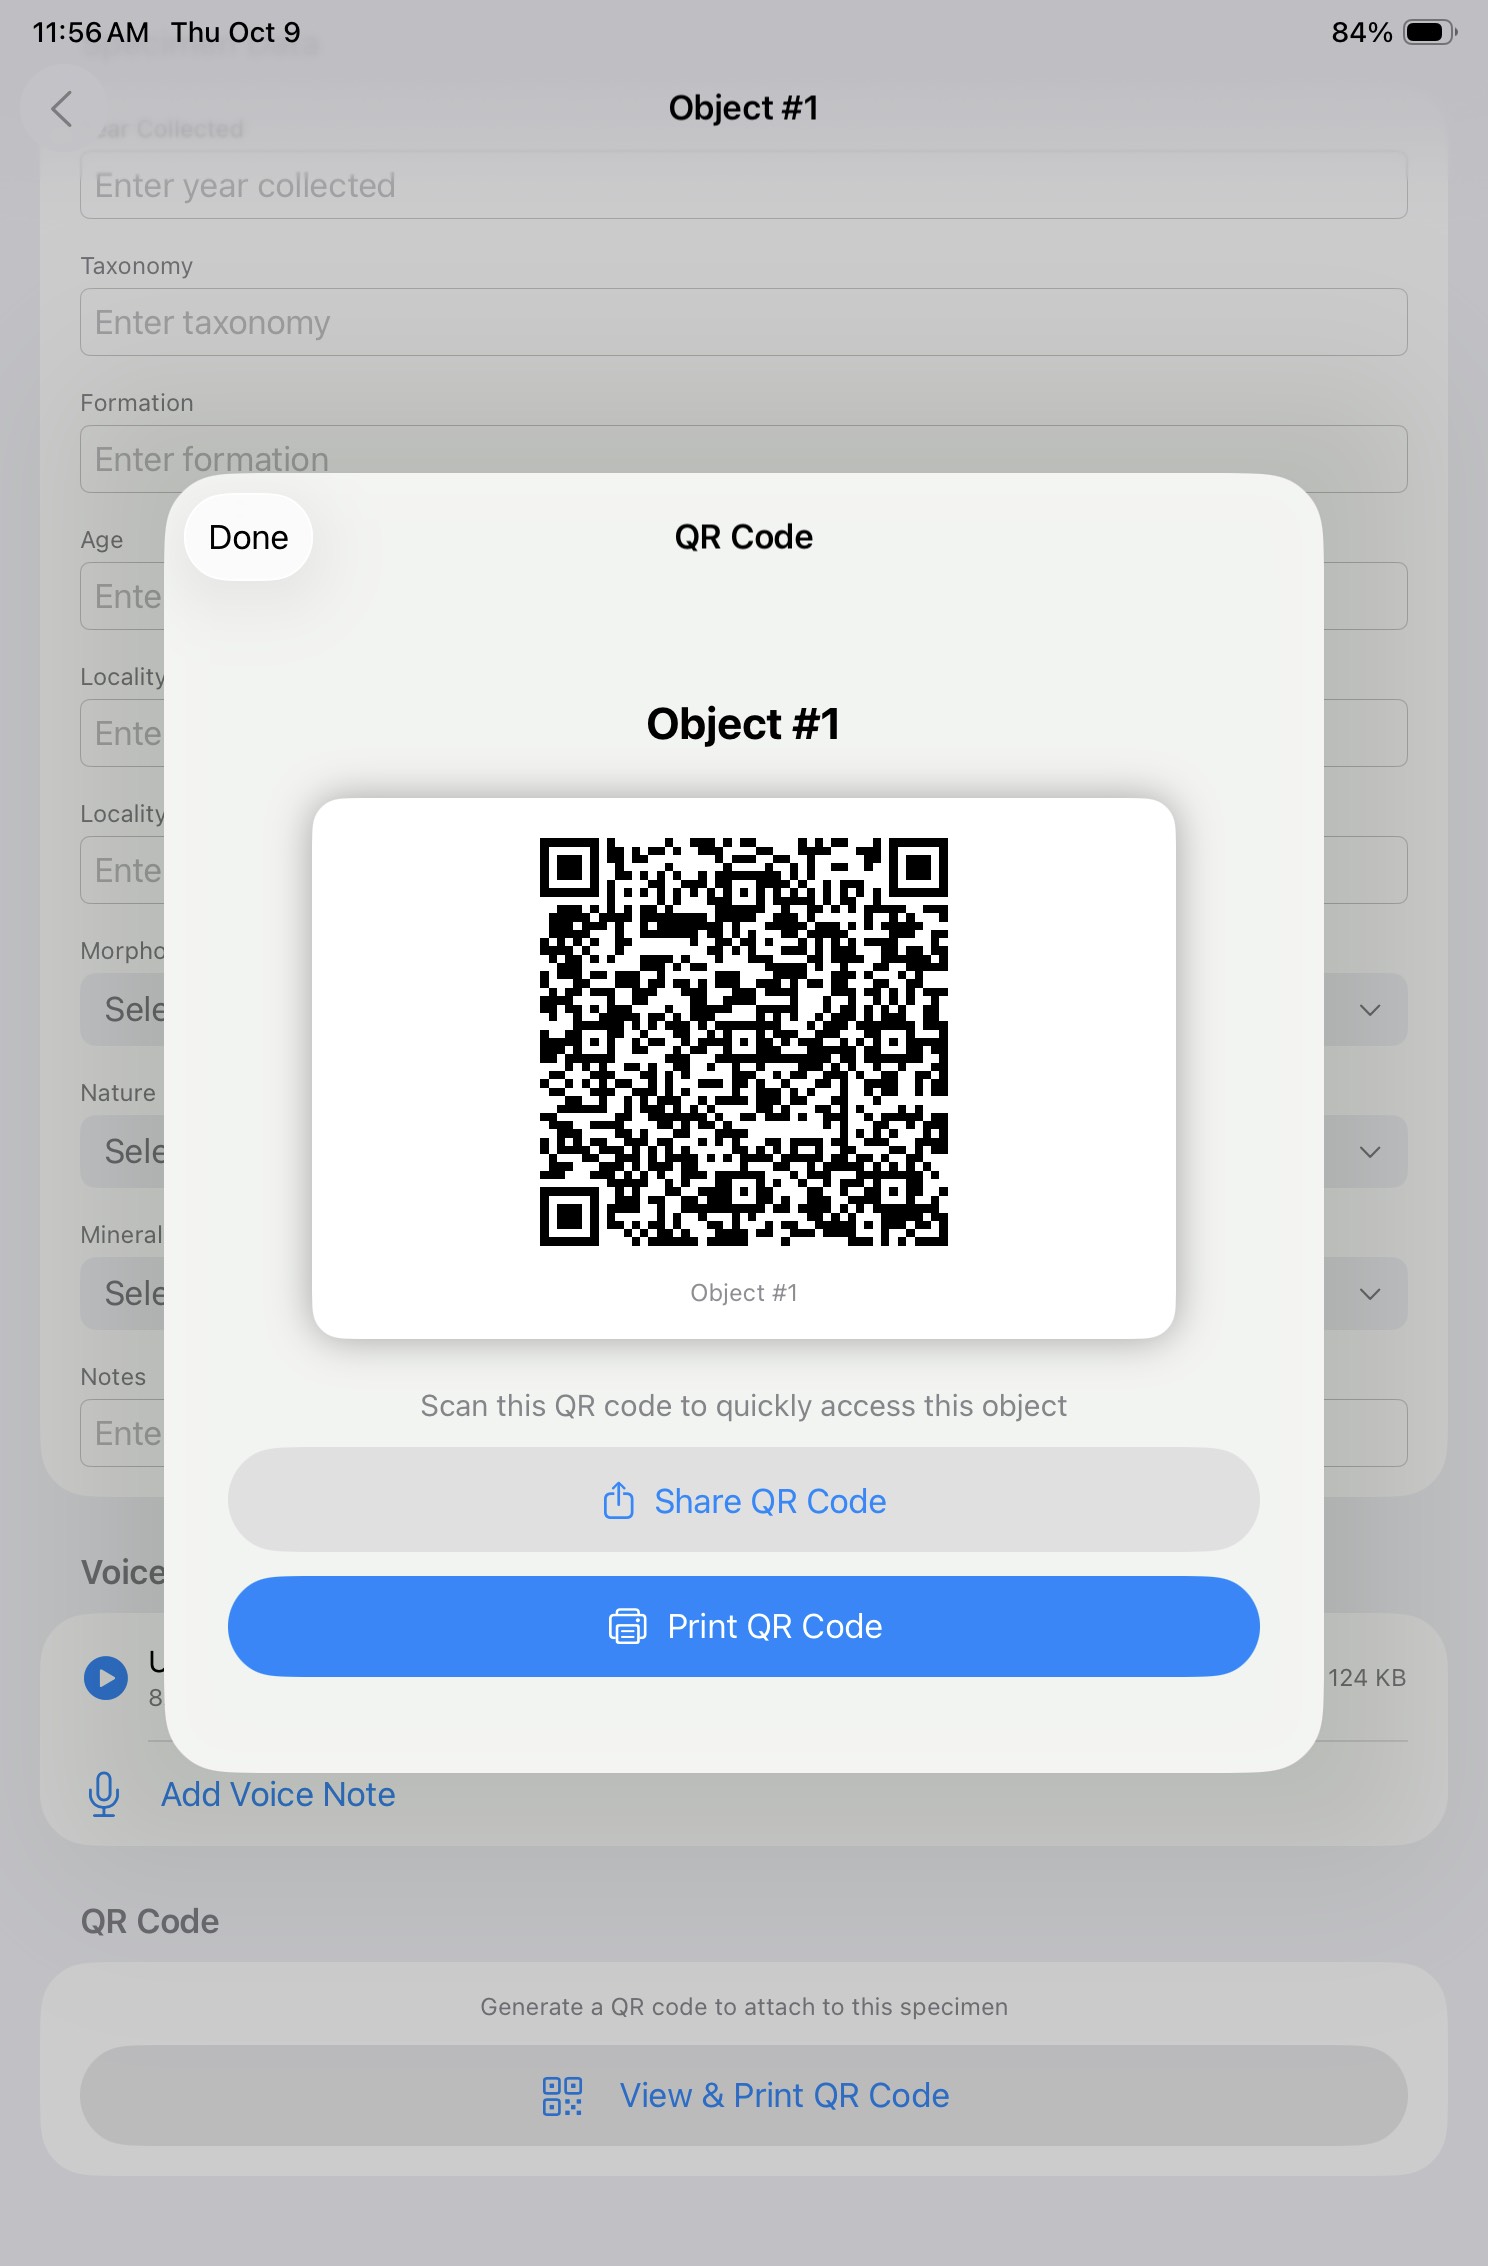
To customize the size and to print QR codes for multiple specimens, follow the below steps.
| Step | In Collection Portal |
|---|---|
| 1 | 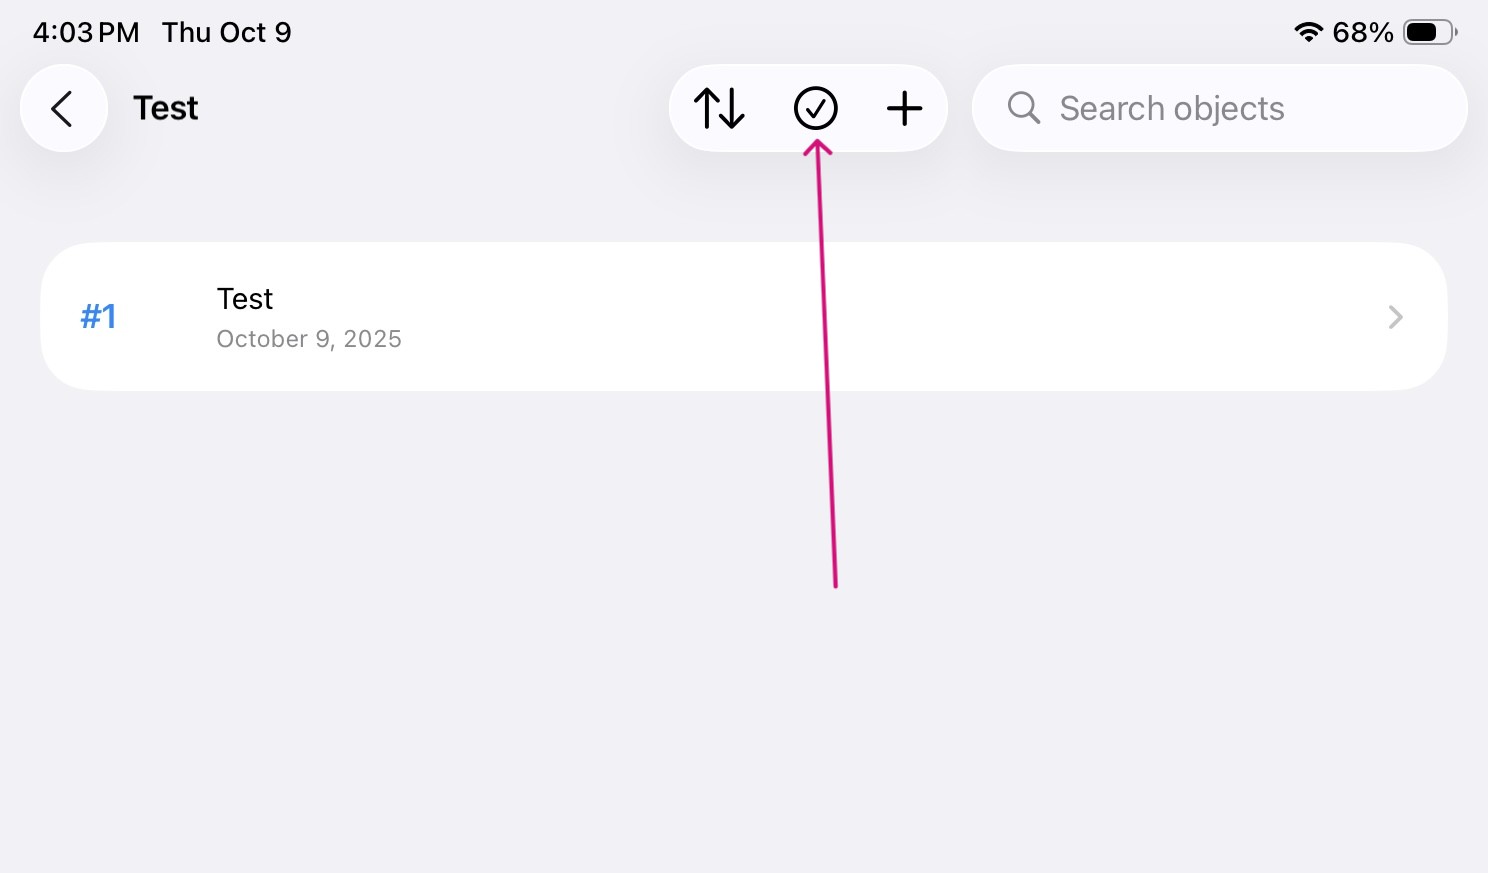  In the landing page of the collection, click the circled check mark and then select each entry to print out their QR codes. Then, click the circled three dots in the top right-hand corner and select “Print QR Codes.” In the landing page of the collection, click the circled check mark and then select each entry to print out their QR codes. Then, click the circled three dots in the top right-hand corner and select “Print QR Codes.” |
| 2 | 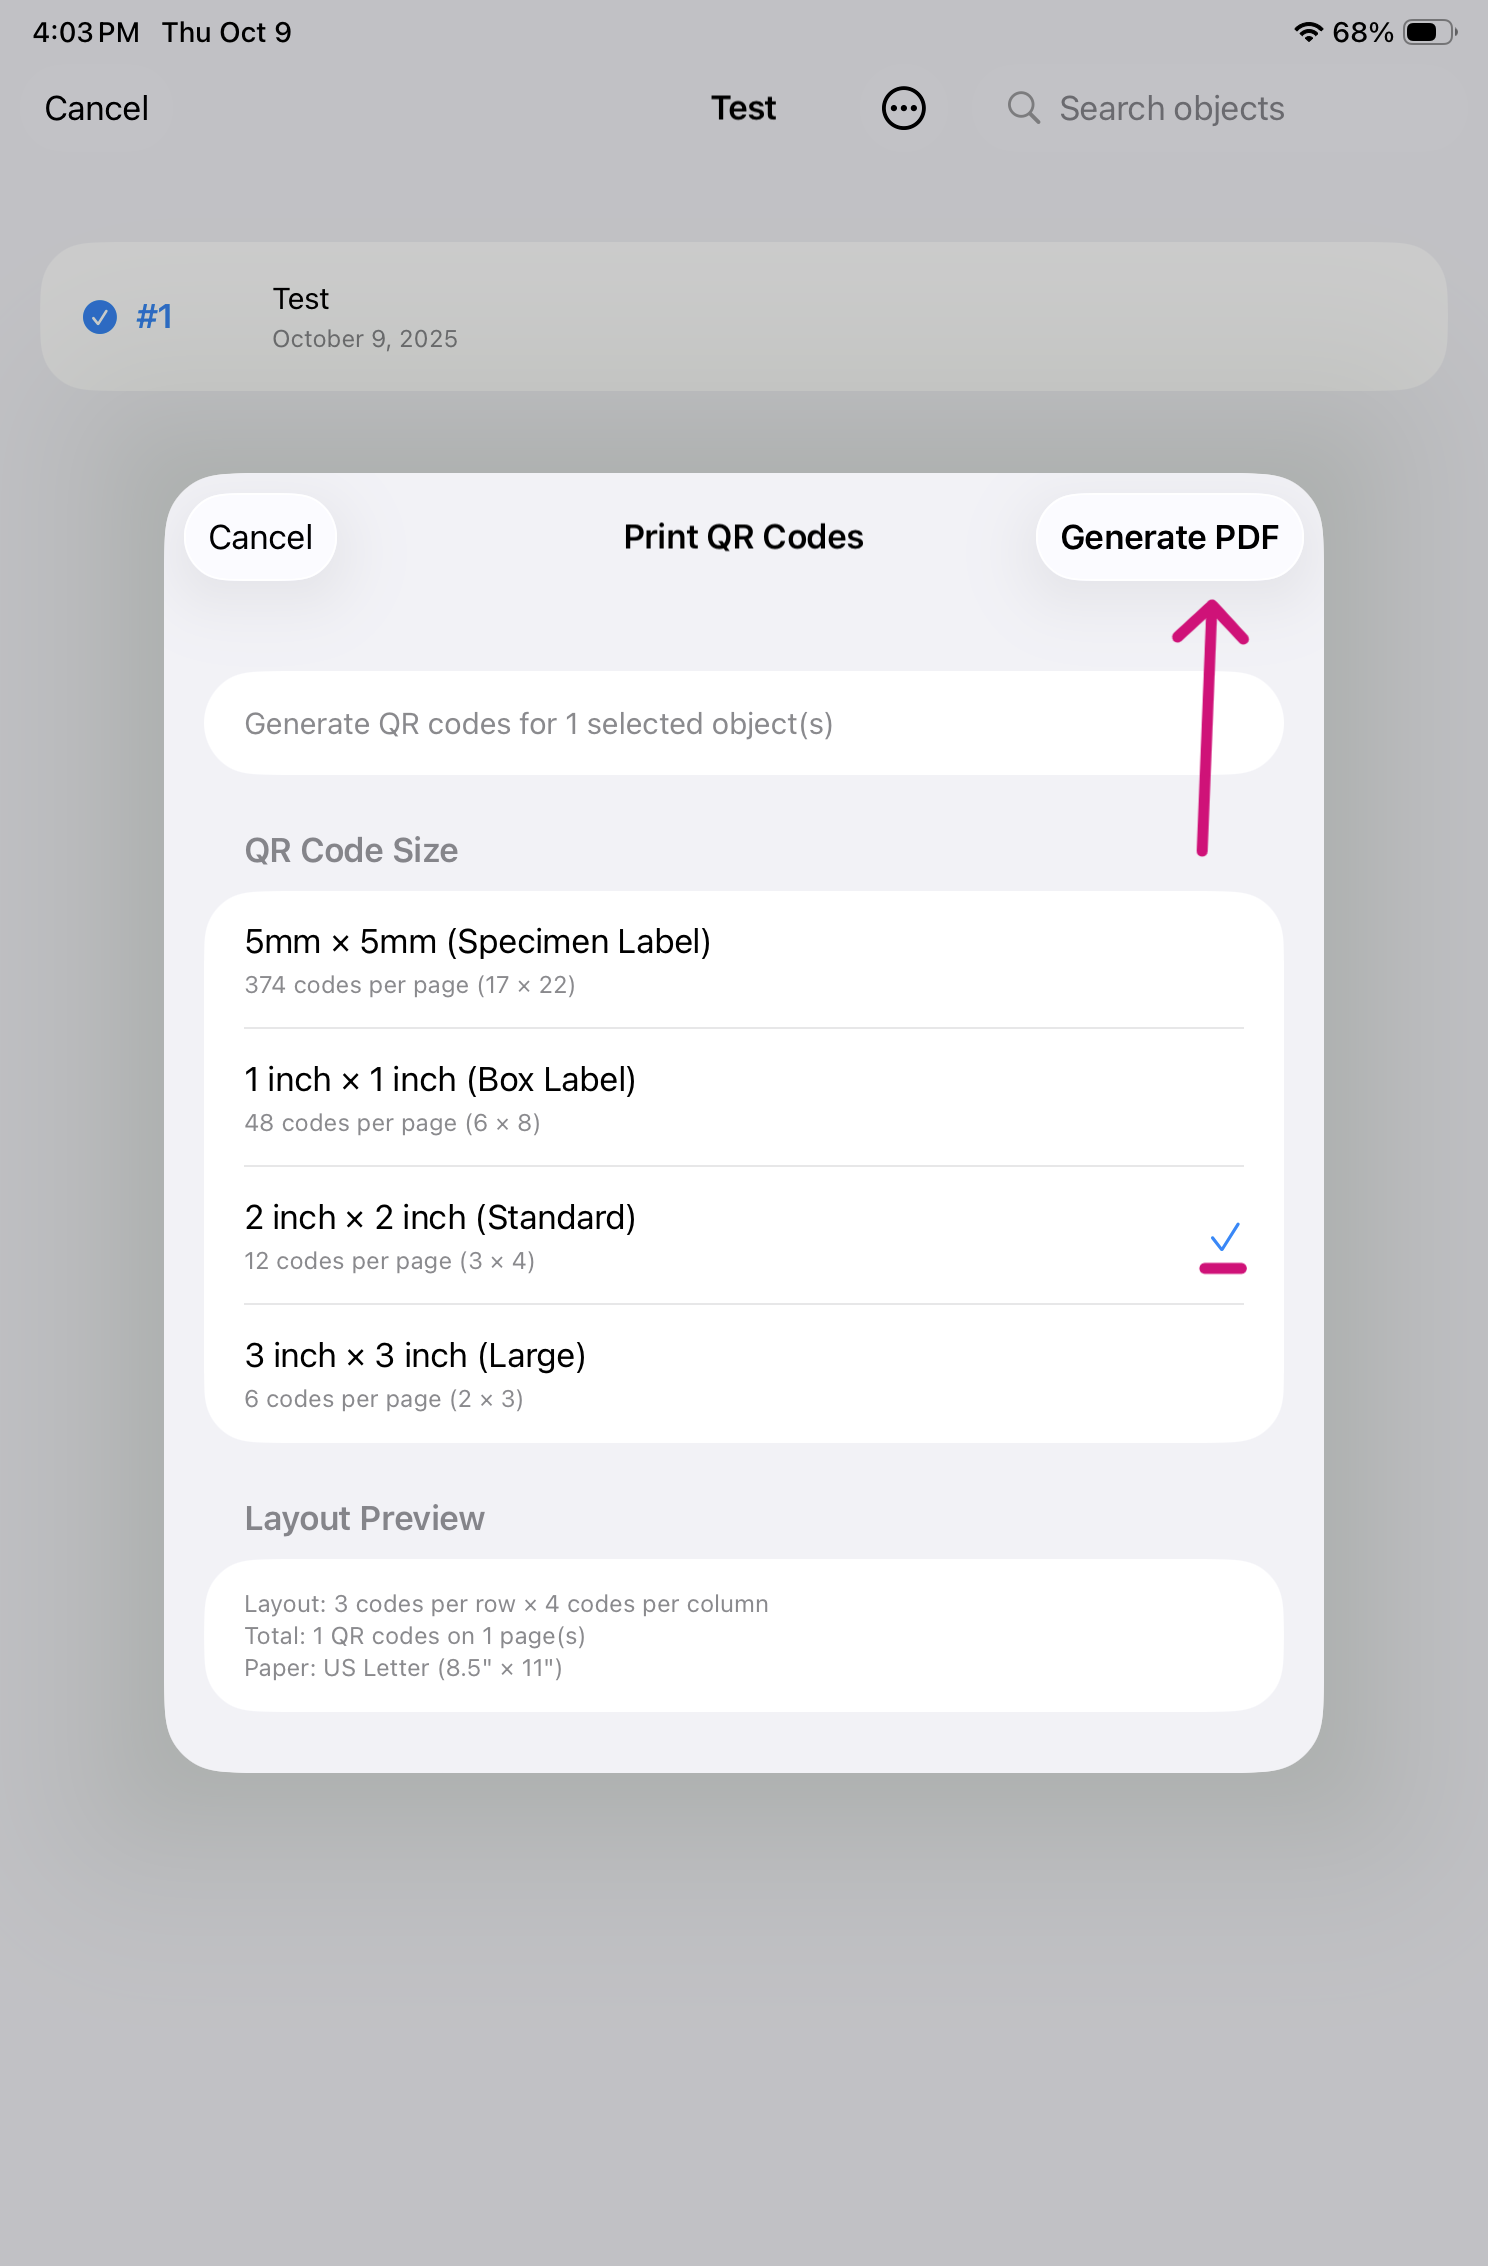 There are four QR size options to choose from: 5mm x 5mm (Specimen Label); 1 inch x 1 inch (Box Label); 2 inch x 2 inch (Standard) and 3 inch x 3 inch (Large). Select a size then click “Generate PDF” in the right-hand corner of the pop-up. There are four QR size options to choose from: 5mm x 5mm (Specimen Label); 1 inch x 1 inch (Box Label); 2 inch x 2 inch (Standard) and 3 inch x 3 inch (Large). Select a size then click “Generate PDF” in the right-hand corner of the pop-up. |
| 3 | 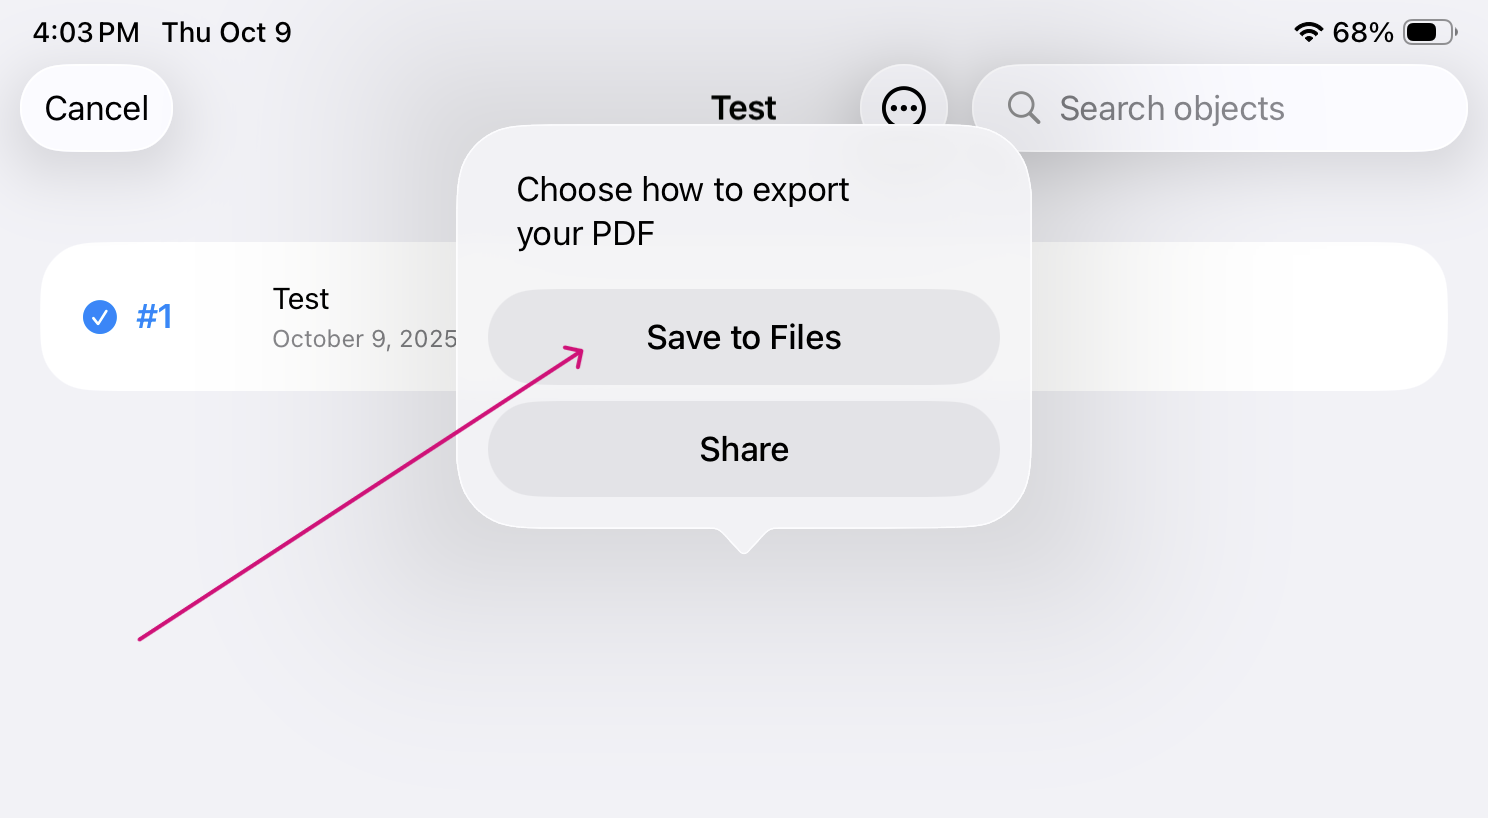 Save the PDF to Files. Save the PDF to Files. |
| 4 | Open the Files app on the home page to send the generated PDF with the QR codes to a printer. |
Exporting the Database
At the end of each week, make sure to export the database to the device so that a copy is saved in the Files app.
| Step | In SpecimenPro |
|---|---|
| 1 | 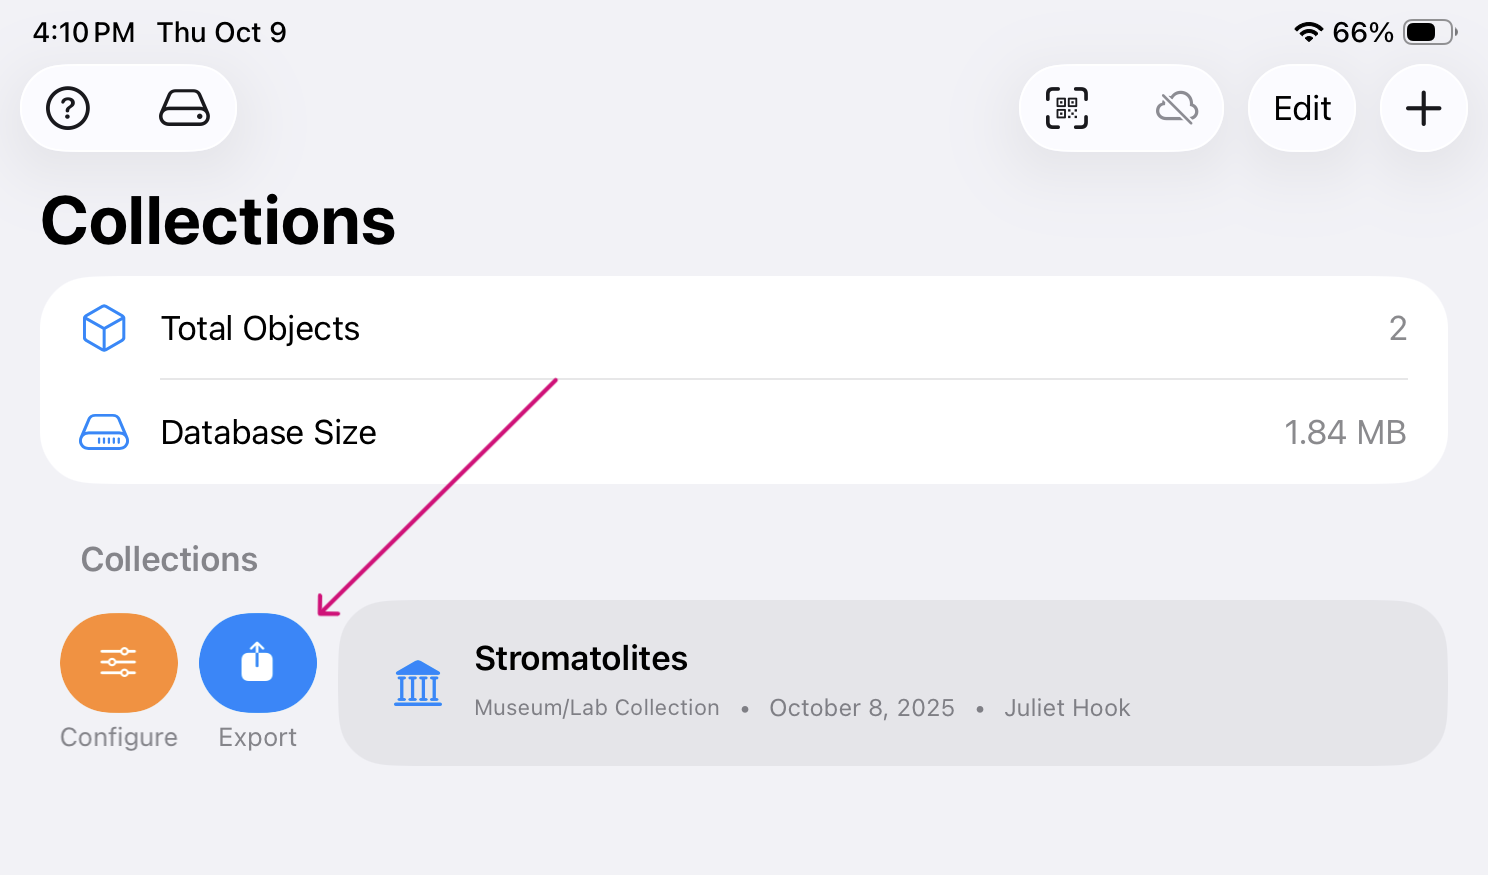 In the home page for the app, swipe the Collection to the right to find the blue export button. In the home page for the app, swipe the Collection to the right to find the blue export button. |
| 2 | 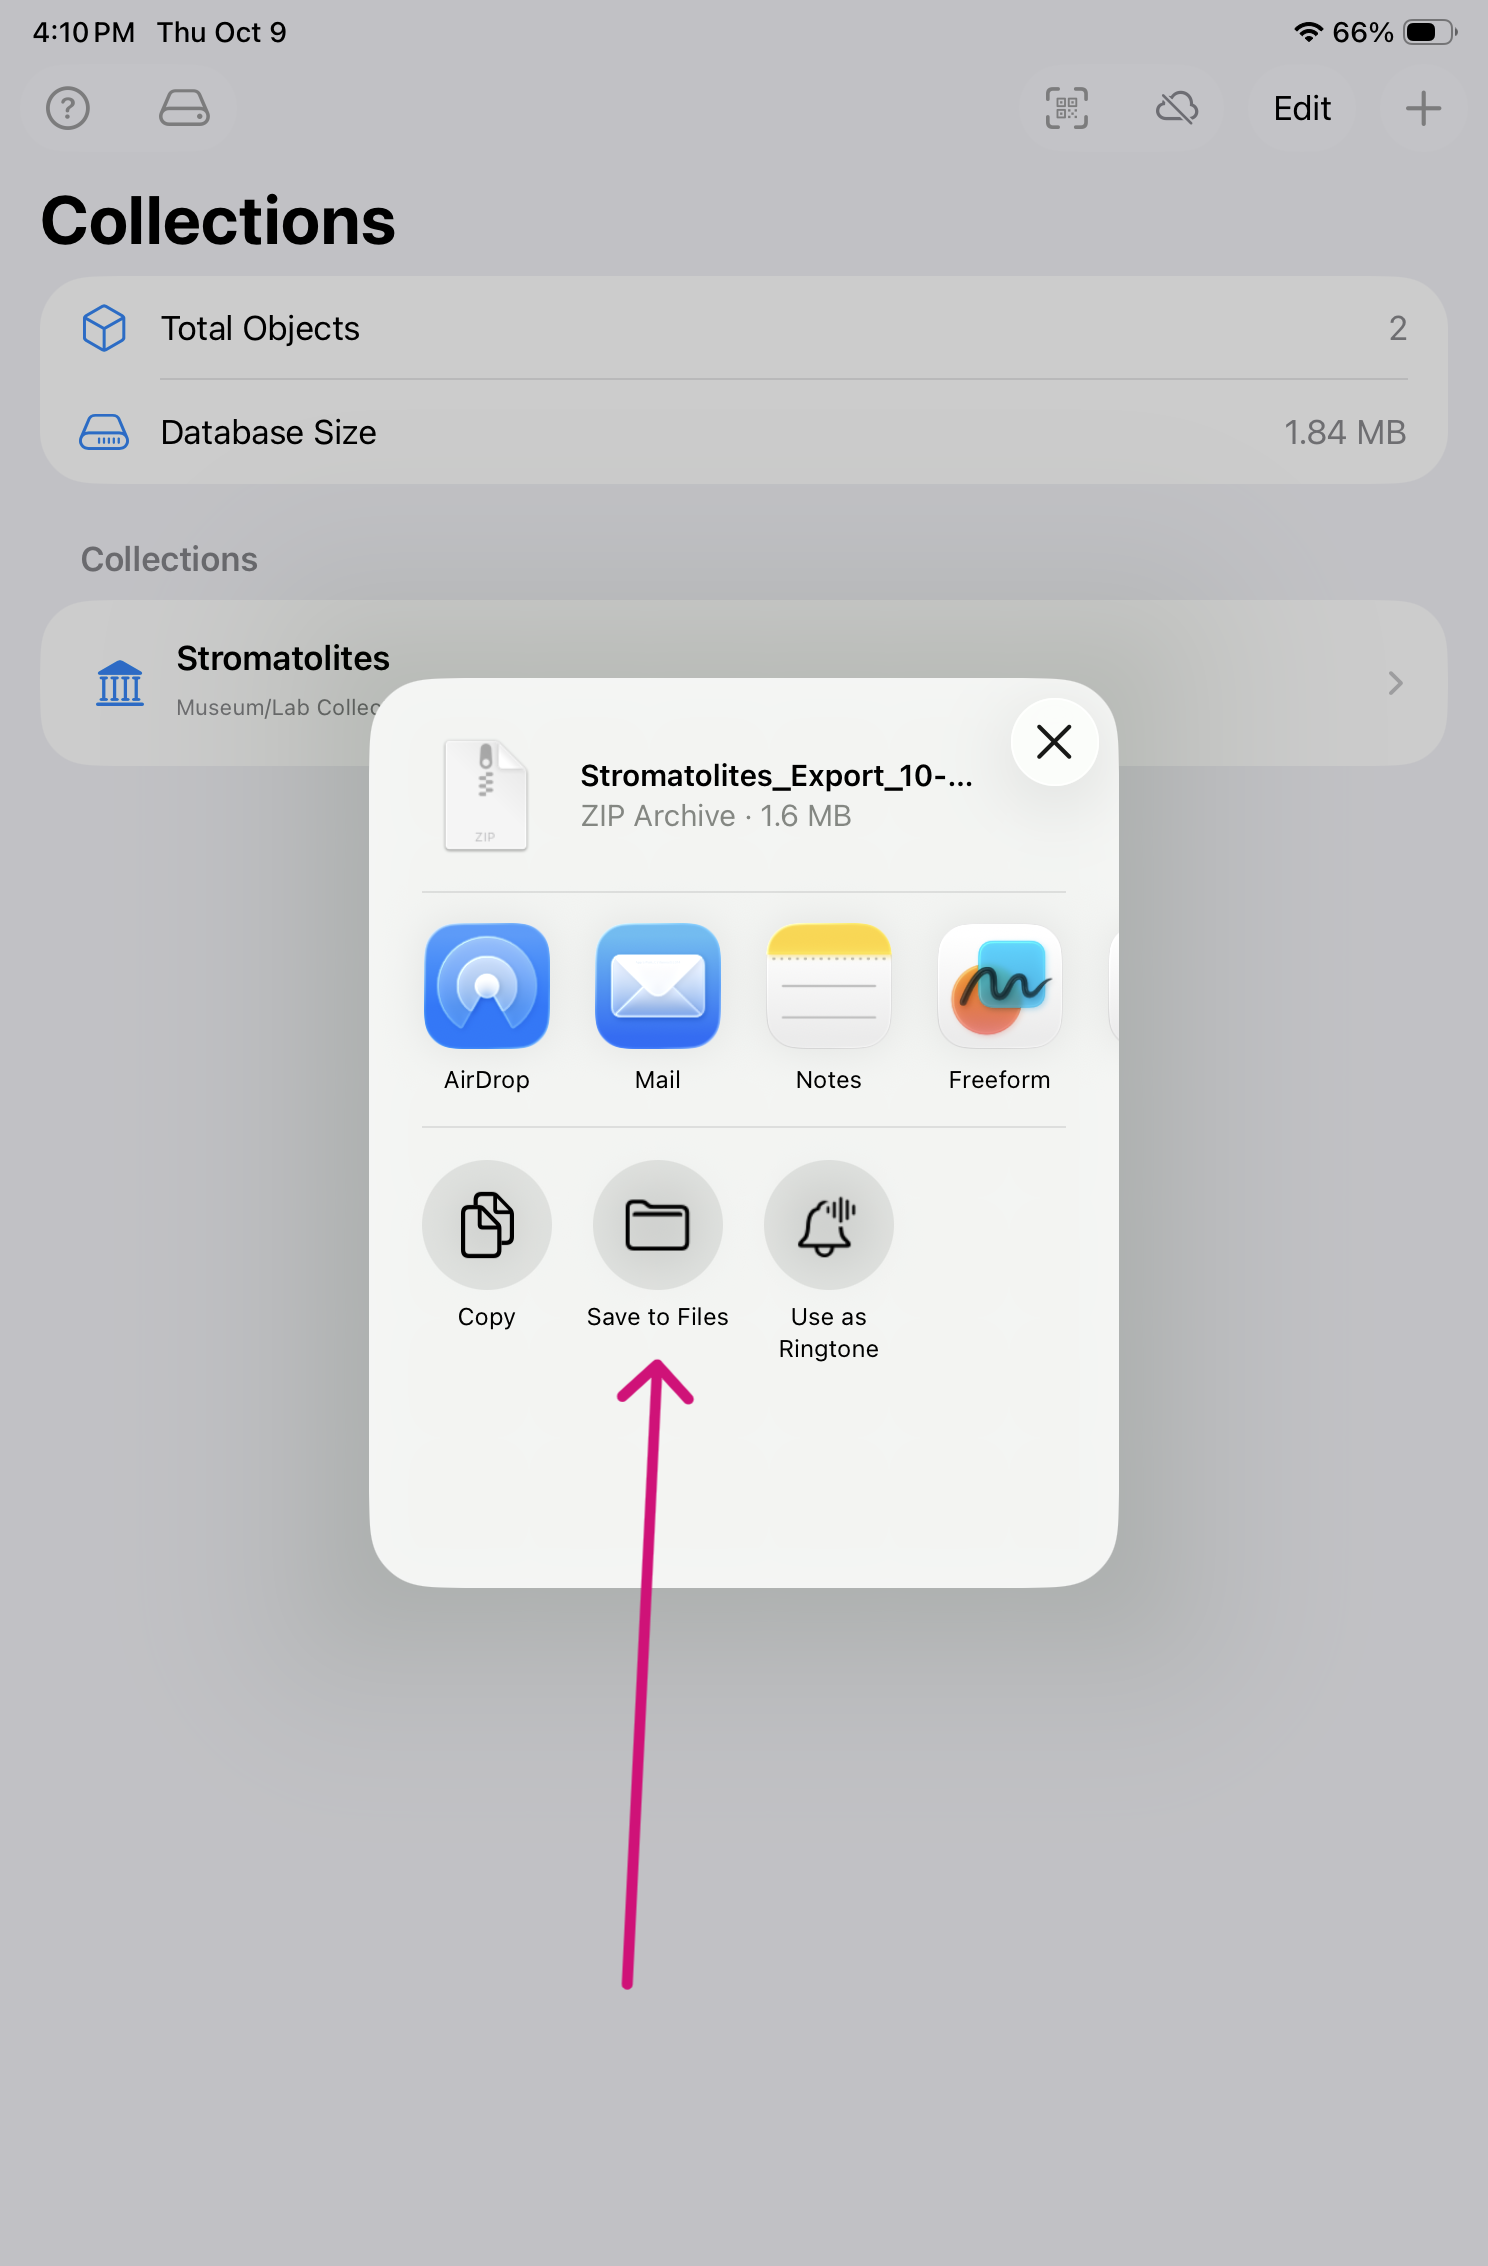 Save to Files. Save to Files. |
Charge the iPad at the end of each session.